Introduction
In recent years, the demand for healthy snacks has soared as more people become aware of the importance of nutrition and its impact on overall health. Whether you’re a busy professional, a parent juggling work and family, or simply someone looking for a guilt-free treat, having nutritious snacks on hand is essential. Enter Crunchy Peanut Butter Bliss Balls—a delightful and nutritious option that not only satisfies your sweet tooth but also packs a punch of flavor and health benefits.
These bliss balls are a perfect combination of taste and nutrition. They are easy to make, require minimal ingredients, and can be enjoyed anytime—whether as an after-school snack, an on-the-go breakfast, or a post-workout treat. With a crunchy texture from Rice Krispies and the rich, creamy goodness of peanut butter, these bites are sure to become a staple in your snack repertoire.
In this article, we will explore the key ingredients that make up these delicious treats and provide you with a step-by-step guide on how to prepare them. Let’s dive into the world of Crunchy Peanut Butter Bliss Balls and discover just how simple and rewarding they are to make!
Understanding the Ingredients
To create the perfect Crunchy Peanut Butter Bliss Balls, it is essential to understand the role and benefits of each ingredient. This not only enhances the flavor but also ensures that you are making a healthy choice. Here’s a breakdown of the key ingredients you’ll need:
Rice Krispies Cereal
The foundation of our bliss balls is Rice Krispies cereal. This ingredient adds a satisfying crunch that contrasts beautifully with the creamy peanut butter. Additionally, Rice Krispies are gluten-free, making them a suitable choice for those with gluten sensitivities. They are light and airy, allowing the bliss balls to retain their shape while providing a delightful texture that elevates the snacking experience.
Peanut Butter
Peanut butter is the star of this recipe, bringing a rich, nutty flavor that is hard to resist. Packed with protein and healthy fats, it provides sustained energy, making these bliss balls a perfect snack for busy days. Opt for natural peanut butter without added sugars or hydrogenated oils to maximize health benefits. The creaminess of the peanut butter also helps bind the ingredients together, ensuring that your bliss balls hold their shape.
Honey or Maple Syrup
To sweeten our bliss balls naturally, we use honey or maple syrup. Both are excellent alternatives to refined sugars and come with their own health benefits. Honey is known for its antioxidant properties and can help soothe a sore throat, while maple syrup contains essential minerals like zinc and manganese. Feel free to choose the one that suits your taste preference or dietary needs.
Powdered Sugar
While honey or maple syrup provides natural sweetness, a touch of powdered sugar can enhance the texture and sweetness of our bliss balls. It helps achieve that melt-in-your-mouth quality that makes these treats so enjoyable. Use it sparingly, as the main goal is to keep the bliss balls healthy.
Vanilla Extract
A splash of vanilla extract goes a long way in elevating the flavor profile of our bliss balls. It adds a warm and inviting aroma, complementing the nuttiness of the peanut butter beautifully. Plus, vanilla is known for its mood-enhancing properties, making it a perfect addition to any snack.
Mini Chocolate Chips
For those who want to indulge a little, mini chocolate chips are an optional ingredient that can be added to the mixture. They bring a delightful sweetness and richness to the bliss balls, making them even more tempting. Choose dark chocolate chips for a healthier option, as they contain antioxidants and less sugar than milk chocolate.
Salt
A pinch of salt is essential in baking and snack recipes, as it helps to balance sweetness and enhance the overall flavor. It brings out the natural flavors of the other ingredients, making each bite of your bliss balls even more delicious.
Optional Coating with Extra Rice Krispies
To make these bliss balls even crunchier, you can roll them in extra Rice Krispies before serving. This not only adds an extra layer of texture but also makes for a visually appealing treat that’s perfect for sharing.
Step-by-Step Instructions
Now that we have a clear understanding of our ingredients, let’s move on to the preparation process. Creating your Crunchy Peanut Butter Bliss Balls is straightforward, and with these detailed instructions, you’ll be a pro in no time!
Step 1: Gather Your Ingredients
Before you begin, ensure that you have all your ingredients ready. Here’s a quick list to help you prepare:
– 1 cup Rice Krispies cereal
– 1 cup natural peanut butter
– 1/4 cup honey or maple syrup
– 1/4 cup powdered sugar
– 1 teaspoon vanilla extract
– 1/2 cup mini chocolate chips (optional)
– A pinch of salt
Step 2: Mix Wet Ingredients
In a large mixing bowl, start by combining the peanut butter, honey or maple syrup, and vanilla extract. Use a spatula or a wooden spoon to mix these ingredients until they are smooth and well incorporated. It’s crucial to ensure that there are no lumps in the peanut butter, as this will help in achieving a uniform texture throughout the bliss balls. If your peanut butter is particularly thick, consider microwaving it for a few seconds to make it easier to mix.
Step 3: Incorporate Dry Ingredients
Once your wet ingredients are well mixed, it’s time to add the dry ingredients. Gradually sprinkle in the Rice Krispies cereal and powdered sugar, mixing gently to avoid crushing the cereal. The key here is to achieve an even distribution of the Rice Krispies throughout the mixture. This will ensure that every bite is packed with that satisfying crunch.
Step 4: Add Chocolate Chips
If you’re using mini chocolate chips, now is the time to fold them into the mixture. Gently incorporate the chips, being careful not to break the Rice Krispies. You want them to stay intact to maintain that delightful crunch in the finished product. A light hand is essential; use a spatula to carefully mix until the chocolate chips are evenly distributed.
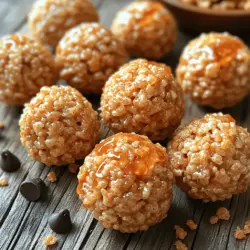
Step 5: Shape the Bliss Balls
Once all the ingredients are well combined, it’s time to shape the mixture into bliss balls. Using your hands, take small amounts of the mixture and roll them into balls about one inch in diameter. If you like, you can roll them in extra Rice Krispies at this stage for an added crunch. Make sure to press them firmly to ensure they hold their shape.
These bliss balls can be stored in an airtight container in the refrigerator for up to a week, making them a convenient and healthy snack option that’s always ready to enjoy.
With just a few simple steps and ingredients, you’ve crafted a nutritious treat that’s perfect for any occasion. The Crunchy Peanut Butter Bliss Balls not only satisfy cravings but also provide a healthy boost, all while being incredibly easy to make. Stay tuned as we explore more about the benefits of these bliss balls and tips for customization in the next part of this article!
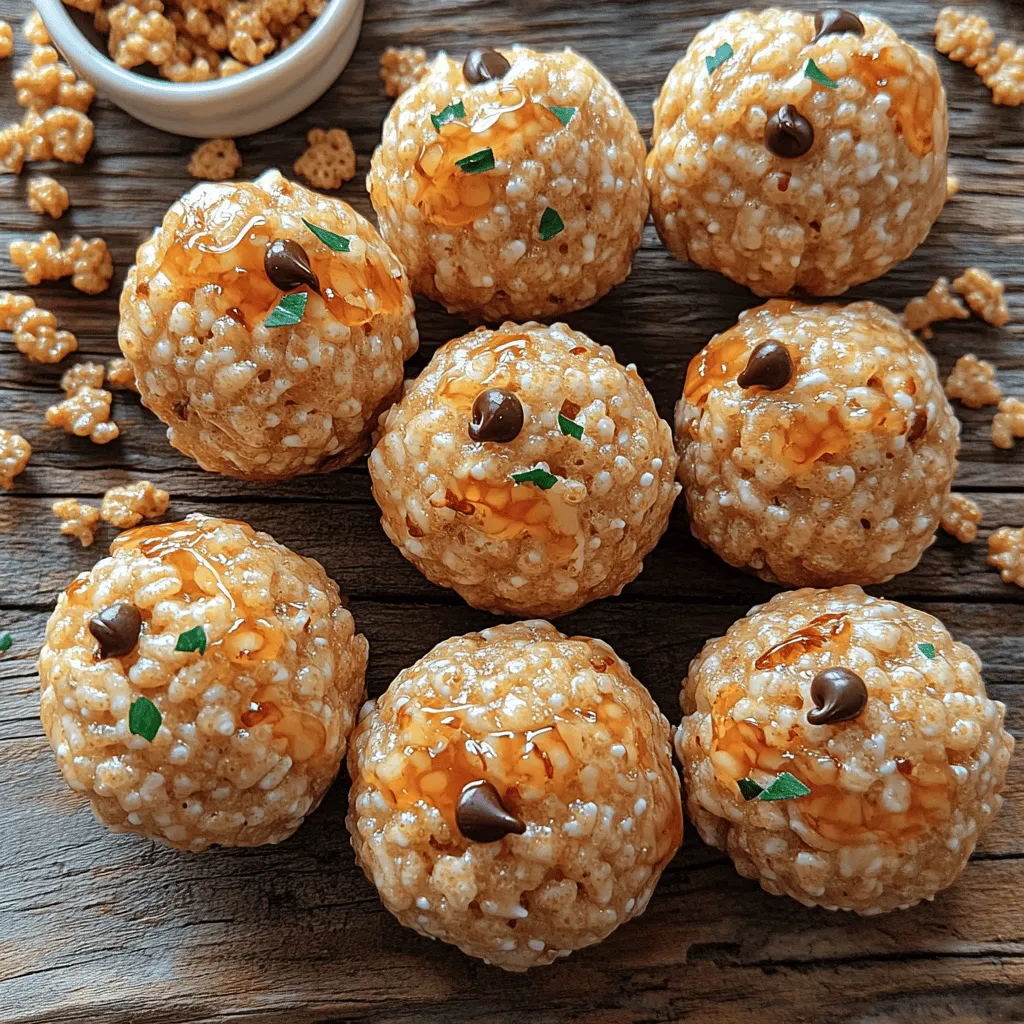
Rolling into Balls: Size Consistency and Shaping Techniques
Once your mixture is perfectly blended, it’s time to shape your Crunchy Peanut Butter Bliss Balls. Consistency in size is crucial for even texture and uniformity in each bite. A great reference size is about 1 inch in diameter, which allows for a perfect mouthful without being overwhelming.
To roll the mixture, take a tablespoon or use a small cookie scoop to ensure each ball is approximately the same size. This not only enhances presentation but also ensures that each ball has the same flavor profile. After scooping, roll the mixture between your palms to create a smooth, round shape. If the mixture feels too sticky, dampen your hands slightly with water or oil to prevent it from adhering too much to your skin.
If you prefer a more rustic look, you can roll the bliss balls into irregular shapes, giving them a homemade charm. This can also be a fun activity to involve kids or family members, making it a delightful experience while prepping a nutritious snack.
Optional Coating: Benefits of Extra Crunch and Visual Appeal
To elevate your Crunchy Peanut Butter Bliss Balls, consider adding a coating that not only enhances texture but also adds visual appeal. Coating options can range from crushed nuts, seeds, or even desiccated coconut to cocoa powder.
Each coating brings its unique flavor and texture. Crushed peanuts or almonds can amplify the nutty flavor while adding an extra crunch, making each bite more delightful. If you’re aiming for a sweeter touch, rolling the bliss balls in cocoa powder or powdered sugar can provide a delicious contrast to the rich peanut butter base.
To apply the coating, simply roll the formed balls in your chosen ingredient until evenly covered. This additional step is not only visually appealing but can also contribute to the overall flavor profile of the bliss balls, making them even more irresistible.
Chilling Process: Importance of Firming Up the Balls for Texture
After shaping and coating the bliss balls, it’s imperative to chill them in the refrigerator for at least 30 minutes. This process allows the ingredients to meld together and firm up, ensuring that the bliss balls maintain their shape when handled.
Chilling also enhances the flavors, as the ingredients have time to settle and integrate. The cool temperature makes the bliss balls more enjoyable to eat, providing a refreshing snack option, especially in warmer months. If you prefer a firmer texture, you can chill them for up to an hour.
Once chilled, you can enjoy them immediately or proceed to store them for later use. The chilling process is a simple yet crucial step in achieving the perfect Crunchy Peanut Butter Bliss Balls.
Nutritional Information
Understanding the nutritional profile of your Crunchy Peanut Butter Bliss Balls is essential, especially if you’re incorporating them into a balanced diet. Here’s a breakdown of what you can expect per serving (approximately two bliss balls):
– Calories: 180-200 calories
– Protein: 6-8 grams
– Fats: 10-12 grams (primarily healthy fats from peanut butter)
– Carbohydrates: 16-18 grams
These bliss balls are packed with protein and healthy fats, making them a great energy-boosting snack. They are particularly appealing to anyone following a vegan or gluten-free diet, as they contain no animal products or gluten ingredients. Just ensure that any added sweeteners or mix-ins you choose are also compliant with your dietary needs.
Serving Suggestions
Crunchy Peanut Butter Bliss Balls offer versatility in how you can enjoy them. Here are several creative ideas to incorporate them into your day:
– On-the-Go Snack: These bliss balls are perfect for a quick snack while driving or during a busy workday. They fit easily into lunch boxes and can provide a much-needed energy boost without the sugar crash.
– Post-Workout Fuel: Packed with protein and healthy fats, they make an excellent post-workout recovery snack. Pair them with a piece of fruit, like a banana or apple, for a balanced snack that replenishes your energy.
– Healthy Dessert: Enjoy them as a guilt-free dessert option. They satisfy sweet cravings while providing nutritional value, making them a smart choice for after dinner.
– Pairing Ideas: Serve with yogurt for a creamy contrast, or add them to smoothies for a nutty flavor and added protein. They also pair well with fresh fruits, making a delightful and nutritious platter.
– Presentation Tips: If you’re serving them at gatherings or parties, consider using decorative serving dishes. Arrange them on a platter with fresh fruit or alongside a dip, like yogurt or chocolate sauce, for a stunning display.
Storage Recommendations
To keep your Crunchy Peanut Butter Bliss Balls fresh and delicious, proper storage is key. Here are some best practices:
– Refrigeration: Store the bliss balls in an airtight container in the refrigerator. They can last up to a week when stored properly. Make sure to separate layers with parchment paper to prevent sticking.
– Freezing: For longer-term storage, bliss balls can be frozen. Simply place them in a single layer on a baking sheet until firm, then transfer them to a freezer-safe container or bag. They can be kept frozen for up to three months.
– Thawing: When you’re ready to enjoy them, simply remove the desired number of bliss balls from the freezer and let them thaw in the refrigerator for a few hours or at room temperature for about 20-30 minutes.
Conclusion
In summary, Crunchy Peanut Butter Bliss Balls are not only a delicious and nutritious snack, but they also serve as a canvas for your creativity in the kitchen. Their versatility allows for various modifications and pairings, making them suitable for any time of the day—whether as a quick snack, post-workout fuel, or a healthy dessert option.
By incorporating these bliss balls into your daily routine, you can enjoy a healthy and satisfying treat that supports your nutritional goals. Whether you stick to the classic recipe or customize it to your liking, these bliss balls are sure to become a staple in your healthy eating repertoire. So gather your ingredients, get rolling, and indulge in these delightful bites of energy!