Introduction
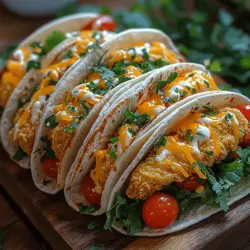
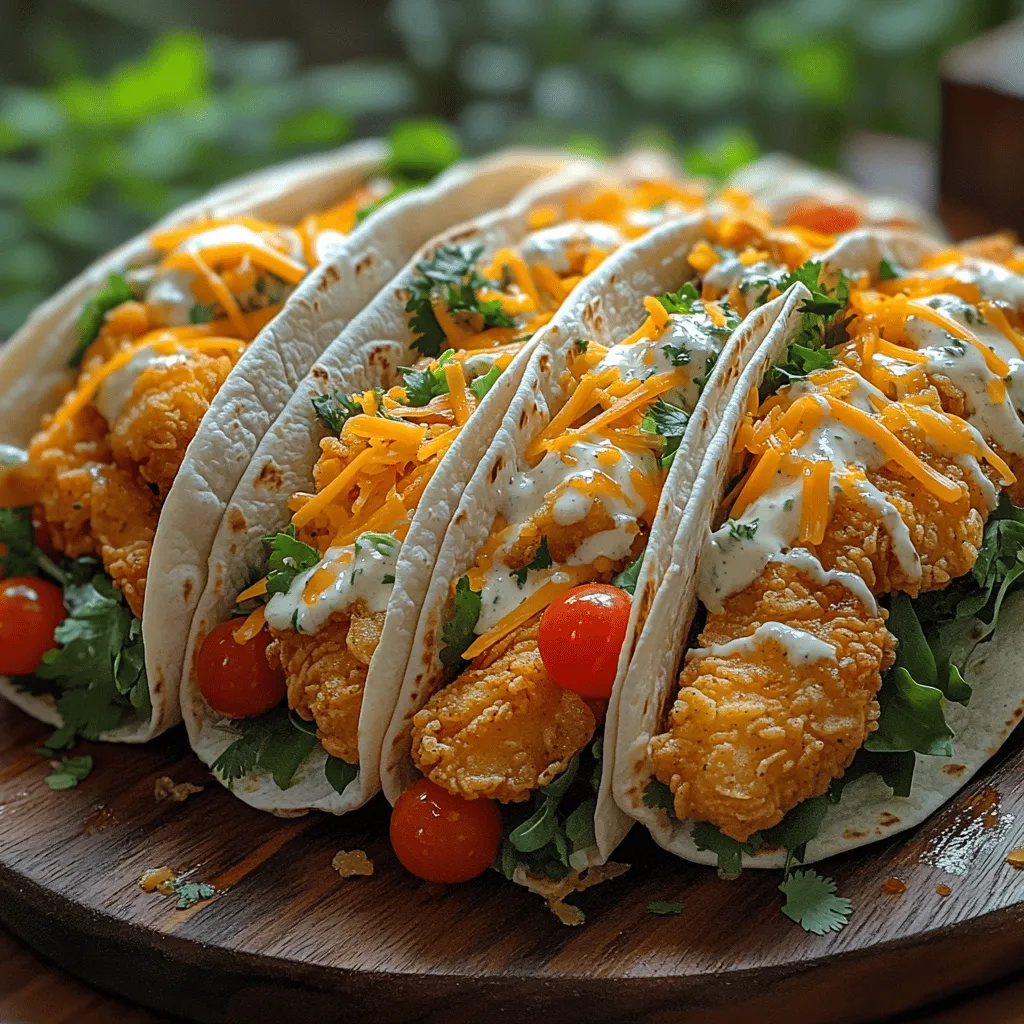
Crispy Chicken Ranch Wraps have emerged as a beloved staple for those who appreciate quick, flavorful meals that cater to a variety of settings. Whether you’re feeding a hungry family after a busy day, planning a delightful picnic, or prepping meals for the week ahead, these wraps are the perfect solution. Their appeal lies not only in their ease of preparation but also in the delightful medley of flavors that come together in each bite. The crispiness of the chicken, paired with the creamy ranch dressing and fresh greens, creates a satisfying dish that is both comforting and refreshing.
The versatility of Crispy Chicken Ranch Wraps allows for endless customization. Feel free to experiment with different toppings or sauces—this recipe serves as a great base for a variety of taste preferences. You can enjoy these wraps hot off the stove, or they can be made in advance and enjoyed cold, making them an excellent option for meal prep or lunchboxes. Let’s dive into the ingredients that make this dish shine!
Understanding the Key Ingredients
To craft the perfect Crispy Chicken Ranch Wraps, it’s essential to understand the role of each ingredient that contributes to the overall flavor and texture. Here’s a detailed look at what makes this dish so irresistible:
Boneless, Skinless Chicken Breasts
The star of this dish, boneless, skinless chicken breasts, serves as the primary source of protein. This lean meat option not only provides nourishment but also acts as a blank canvas, easily absorbing flavors from marinades and spices. When cooked correctly, chicken breasts can be juicy and tender, providing a satisfying bite in each wrap.
Buttermilk
Buttermilk is a key component in this recipe, primarily used for marinating the chicken. Its acidity helps to tenderize the meat, while also infusing it with flavor. The creamy texture of buttermilk allows the spices to adhere better, ensuring that every piece of chicken is evenly seasoned. A good marination time (ideally a few hours or overnight) will enhance the flavor profile significantly.
Panko Breadcrumbs
For the perfect crispy coating, panko breadcrumbs are the ideal choice. Unlike traditional breadcrumbs, panko is coarser and larger, which contributes to a crunchier texture when fried. This contrast not only elevates the eating experience but also helps create a visually appealing golden crust on the chicken. The airy structure of panko allows for better crispness, making it a favorite among chefs and home cooks alike.
Spices
The blend of spices used in this recipe is what truly elevates the chicken to a whole new level. Common spices include paprika, garlic powder, onion powder, oregano, and a touch of cayenne for heat. Paprika adds a subtle smokiness and vibrant color, while garlic and onion powders provide aromatic depth. Oregano contributes an earthy flavor, and cayenne adds a hint of spice, rounding out the flavor profile. This combination ensures that every bite is packed with flavor.
Tortillas
The choice of tortilla is vital in creating a satisfying wrap. Flour tortillas are the most common choice due to their pliability and mild flavor, making them easy to roll without tearing. However, you can also use whole wheat tortillas for a healthier alternative or corn tortillas for a gluten-free option. Each type brings its unique texture and flavor, so choose one that suits your dietary preferences.
Mixed Greens and Toppings
To complete the Crispy Chicken Ranch Wraps, mixed greens and various toppings add both nutrition and freshness. Leafy greens like spinach, arugula, or romaine provide essential vitamins and minerals while balancing the richness of the fried chicken. Additional toppings such as diced tomatoes, sliced cucumbers, or shredded cheese can further enhance the taste and texture of the wrap, allowing you to tailor each serving to personal preference.
Preparation Steps for Perfectly Crispy Chicken
Now that we understand the key ingredients, let’s delve into the preparation steps that will ensure your Crispy Chicken Ranch Wraps turn out perfectly every time.
Marinating the Chicken
The first step in creating tender, flavorful chicken is marinating it in buttermilk. To do this, start by cutting the boneless, skinless chicken breasts into strips or bite-sized pieces, depending on your preference. Place the chicken in a bowl and pour in enough buttermilk to cover it completely. For added flavor, consider mixing in some of the spices at this stage. Cover the bowl and refrigerate for at least 1 hour, though marinating overnight will yield even better results.
The importance of timing in marination cannot be overstated. Allowing the chicken to soak in the buttermilk not only enhances its flavor but also ensures that it remains moist during the cooking process. As the chicken absorbs the buttermilk, it becomes tender and juicy, making for a mouthwatering bite once cooked.
Setting Up a Breading Station
An organized workspace is crucial for efficient cooking, especially when breading chicken. Set up a breading station by gathering three shallow dishes: one for the seasoned flour, one for the beaten eggs, and one for the panko breadcrumbs. In the first dish, combine all-purpose flour with a pinch of salt and pepper, along with any additional spices you wish to include. In the second dish, beat a couple of eggs until well mixed. Finally, pour the panko breadcrumbs into the third dish.
This assembly line approach allows for easy coating of the chicken pieces. Start by removing the chicken from the buttermilk, letting any excess liquid drip off. Dredge each piece in the seasoned flour, shaking off any excess. Next, dip it into the beaten egg, ensuring it is fully coated. Finally, roll the chicken in the panko breadcrumbs, pressing lightly to adhere the crumbs. This multi-step breading process ensures a perfect, crunchy coating on the chicken.
Breading Techniques
To ensure that your chicken is perfectly coated, there are a few best practices to keep in mind during the breading process. First, make sure your hands are dry when handling the chicken to prevent the breading from clumping. It’s also important to coat each piece evenly; if the panko breadcrumbs are unevenly distributed, some areas may turn out soggy while others are overly crispy.
For an even layer of breadcrumbs, consider using one hand for the wet ingredients (buttermilk and egg) and the other for the dry (flour and panko). This technique helps prevent a messy situation and keeps your hands cleaner. After breading, place the chicken on a wire rack or a plate while you finish the remaining pieces. This allows the breading to set before cooking, which is essential for achieving that desired crispiness.
Cooking the Chicken to Perfection
Once your chicken is breaded and ready to go, it’s time to cook it to perfection. The method you choose for frying can significantly impact the final outcome, so let’s explore the frying techniques that will give you that coveted crispy texture.
Frying Methodology
There are several methods to cook your breaded chicken, including deep frying, shallow frying, or baking. Deep frying will yield the crispiest results but requires more oil and careful monitoring of the temperature. Shallow frying is a good compromise, utilizing less oil while still achieving a satisfying crunch. Baking is the healthiest option but may not provide the same level of crispiness.
Regardless of the method you choose, temperature control is key. If frying, heat oil in a large skillet over medium-high heat until it reaches around 350°F (175°C). A good way to test if the oil is hot enough is to drop in a small piece of bread; if it sizzles and bubbles vigorously, you’re ready to cook.
When frying, avoid overcrowding the pan, as this can lower the oil temperature and lead to soggy chicken. Cook the chicken in batches, ensuring each piece has enough space to brown evenly. After about 4-5 minutes per side, or until the chicken reaches an internal temperature of 165°F (75°C) and is golden brown, remove it from the oil and place it on a paper towel-lined plate to drain excess oil.
In the next part of this article, we will explore how to assemble the wraps, the best toppings to use, and tips on storing leftovers. Stay tuned for more delicious insights on creating the ultimate Crispy Chicken Ranch Wraps!
Safety Tips for Frying Chicken
Frying chicken can be a delightful experience, but it’s essential to prioritize safety to avoid accidents in the kitchen. Here are some vital safety tips to keep in mind while frying your chicken for the Crispy Chicken Ranch Wraps:
1. Use a Deep Fry Thermometer: Maintaining the right oil temperature is crucial. Use a thermometer to monitor the oil, ensuring it stays at around 350°F to 375°F (175°C to 190°C) for optimal frying. This prevents oil from overheating and reduces the risk of flare-ups.
2. Avoid Overcrowding the Pan: Frying too many chicken pieces at once can lower the oil temperature, leading to greasy chicken. Fry in smaller batches to maintain the ideal frying temperature and achieve that crispy texture.
3. Dry the Chicken Thoroughly: Pat the chicken pieces dry with paper towels before coating them in flour or breadcrumbs. Excess moisture can cause the oil to splatter, posing a safety hazard.
4. Use Appropriate Cooking Oil: Choose oils with high smoke points, such as vegetable oil, canola oil, or peanut oil. Avoid using oils that are prone to smoking or burning.
5. Keep a Lid Nearby: In case of an oil fire, having a lid handy can help smother the flames. Never use water to extinguish an oil fire, as it can cause the fire to spread.
6. Wear Protective Gear: Consider wearing an apron and long sleeves to protect against splatters. Use tongs or a slotted spoon to handle the chicken safely.
Ensuring Doneness: How to Check for the Perfect Internal Temperature
To ensure your fried chicken is perfectly cooked, it’s crucial to check its internal temperature. The USDA recommends that chicken should reach an internal temperature of 165°F (74°C) to be safe for consumption. Here’s how to check for doneness:
1. Use a Meat Thermometer: Insert a meat thermometer into the thickest part of the chicken, avoiding bones. This gives you the most accurate reading of the meat’s doneness.
2. Check Multiple Pieces: If frying several pieces, check the temperature of a few to ensure they are all cooked through.
3. Look for Visual Cues: In addition to using a thermometer, look for the juices to run clear, and the meat should no longer be pink. This visual check is a good complement to temperature checks.
Crafting the Wraps
With your chicken perfectly fried and ready to go, it’s time to assemble your Crispy Chicken Ranch Wraps. Here’s a step-by-step guide to ensure maximum flavor and texture in each bite.
Assembly Process: Step-by-Step Guide
1. Prepare Your Ingredients: Gather all your ingredients, including the fried chicken, ranch dressing, lettuce, tomatoes, cheese, and tortillas.
2. Lay Out the Tortilla: Place a large tortilla flat on a clean surface. If you prefer a warm wrap, lightly heat the tortilla in a dry skillet for a few seconds on each side to make it more pliable.
3. Spread the Ranch Dressing: Spoon a generous amount of ranch dressing onto the center of the tortilla, spreading it evenly. This dressing will act as the flavor base for your wrap.
4. Layer the Ingredients:
– Start with a layer of shredded lettuce, which adds crunch and freshness.
– Next, add slices of tomato for sweetness and juiciness.
– Place the crispy chicken tenders on top of the vegetables. You can break them into smaller pieces if desired.
– Sprinkle shredded cheese over the chicken for a creamy, melty texture.
5. Fold and Roll:
– Bring the sides of the tortilla inward over the filling.
– Starting from the bottom, roll the tortilla tightly around the filling, tucking it in as you go.
– Secure the wrap with a toothpick if necessary or wrap it in parchment paper for easy handling.
Visual Tips on How to Layer Ingredients
To create a visually appealing and balanced wrap, consider these layering tips:
– Use different colors for your vegetables to make the wrap visually enticing. This means pairing green lettuce with red tomatoes and yellow cheese.
– Ensure that the chicken is evenly distributed so every bite contains a good mix of chicken and veggies.
– Avoid overstuffing the wrap, which can make it difficult to roll and eat. Keep it manageable to enjoy every bite without the filling spilling out.
Optional Grilling: Benefits of Grilling the Wraps for Added Flavor and Crunch
For an extra layer of flavor and a satisfying crunch, consider grilling your assembled wraps. Here’s how:
– Preheat your grill or grill pan over medium heat.
– Lightly brush the outside of the wrap with olive oil or cooking spray.
– Place the wraps seam-side down on the grill and cook for about 2-3 minutes per side, or until golden brown and crispy.
– Grilling not only adds a delightful charred flavor but also helps melt the cheese inside, enhancing the overall taste experience.
Serving Suggestions and Pairings
When it comes to serving your Crispy Chicken Ranch Wraps, presentation and complementary dishes can elevate the meal. Here are some suggestions:
Presentation Tips for Serving
– Plate with Style: Cut the wraps in half diagonally and arrange them on a platter. This not only showcases their colorful interiors but also makes them easy to grab.
– Add Garnishes: Top with fresh herbs like chopped cilantro or parsley for a pop of color and freshness. A sprinkle of paprika or chili flakes can add a visual and flavorful kick.
Ideas on Garnishing with Herbs and Serving with Extra Dressing
– Serve the wraps with small bowls of extra ranch dressing or a spicy dipping sauce on the side. This allows guests to customize their wraps to their liking.
– Fresh herbs, such as dill or basil, can enhance the flavor profile of the dish. Consider placing a few sprigs on top of the wraps or alongside them for an elegant touch.
Recommended Side Dishes That Complement the Wraps
To complete your meal, consider serving these side dishes:
– Crispy Potato Wedges: The crunchy texture pairs well with the wraps.
– Coleslaw: A refreshing side that balances the richness of the chicken and dressing.
– Fruit Salad: A light and sweet contrast to the savory flavors of the wraps.
Suggestions for Beverages and Salads That Pair Well
– Beverages: Serve with iced tea, lemonade, or a light beer for a refreshing complement. For a non-alcoholic option, sparkling water with lime is delightful.
– Salads: A simple green salad with vinaigrette can provide a fresh counterpoint. Alternatively, a pasta salad with herbs and a light dressing can add a hearty side.
Nutritional Insights
Understanding the nutritional content of your Crispy Chicken Ranch Wraps can help you make informed choices. Here’s a breakdown of what to expect per serving:
Breakdown of Nutritional Content Per Serving
– Calories: Approximately 400-500 calories, depending on ingredients and portion size.
– Protein: Around 25 grams, primarily from the chicken and cheese.
– Fats: Approximately 20 grams, including healthy fats from the ranch dressing and cooking oil.
– Carbohydrates: Roughly 40 grams, mainly from the tortilla and any added vegetables.
Discussion on How to Make the Wraps Healthier
To create a lighter version of your wraps, consider these adjustments:
– Whole Wheat Tortillas: Swap regular tortillas for whole wheat versions, adding fiber and nutrients.
– Reduced-Fat Ranch Dressing: Use a low-calorie ranch dressing to cut down on calories and fat.
– Baked Chicken: Instead of frying, bake the chicken tenders with a light coating for a healthier alternative.
Culinary Variations and Adaptations
One of the best aspects of Crispy Chicken Ranch Wraps is their versatility. Here are some variations and adaptations to cater to different dietary preferences:
Suggestions for Customizing the Recipe
– Vegetarian Alternatives: For a vegetarian version, substitute fried chicken with crispy tofu or tempeh, seasoned with similar spices for flavor.
– Gluten-Free Options: Use gluten-free wraps and alternative breadcrumbs for coating the chicken, ensuring everyone can enjoy the dish.
– Flavor Variations: Experiment with different dressings, such as buffalo sauce for a spicy kick or honey mustard for sweetness. Adding herbs or spices, like Cajun seasoning or smoked paprika, can also enhance the flavor profile.
Conclusion
Crispy Chicken Ranch Wraps are a delicious and versatile dish perfect for various occasions, from casual family dinners to festive gatherings. Their delightful combination of textures and flavors makes them appealing to both kids and adults alike.
Making these wraps at home not only allows you to customize them to your taste but also brings the joy of cooking into your kitchen. Whether you enjoy them grilled, freshly fried, or with a variety of fillings, these wraps are sure to become a favorite. Embrace the cooking process, experiment with variations, and most importantly, enjoy every bite of your homemade Crispy Chicken Ranch Wraps!