Mini Lemon Meringue Pies: A Delightful Dessert Experience
Mini lemon meringue pies are more than just a dessert; they are a celebration of flavor and texture that tantalizes the taste buds. These charming little treats combine the zesty brightness of lemon with the airy sweetness of meringue, all nestled within a buttery, flaky crust. The balance of tart and sweet makes them a standout choice for any occasion, from casual family gatherings to elegant dinner parties. Their diminutive size is perfect for sharing, allowing guests to enjoy a bite-sized indulgence without feeling overwhelmed.
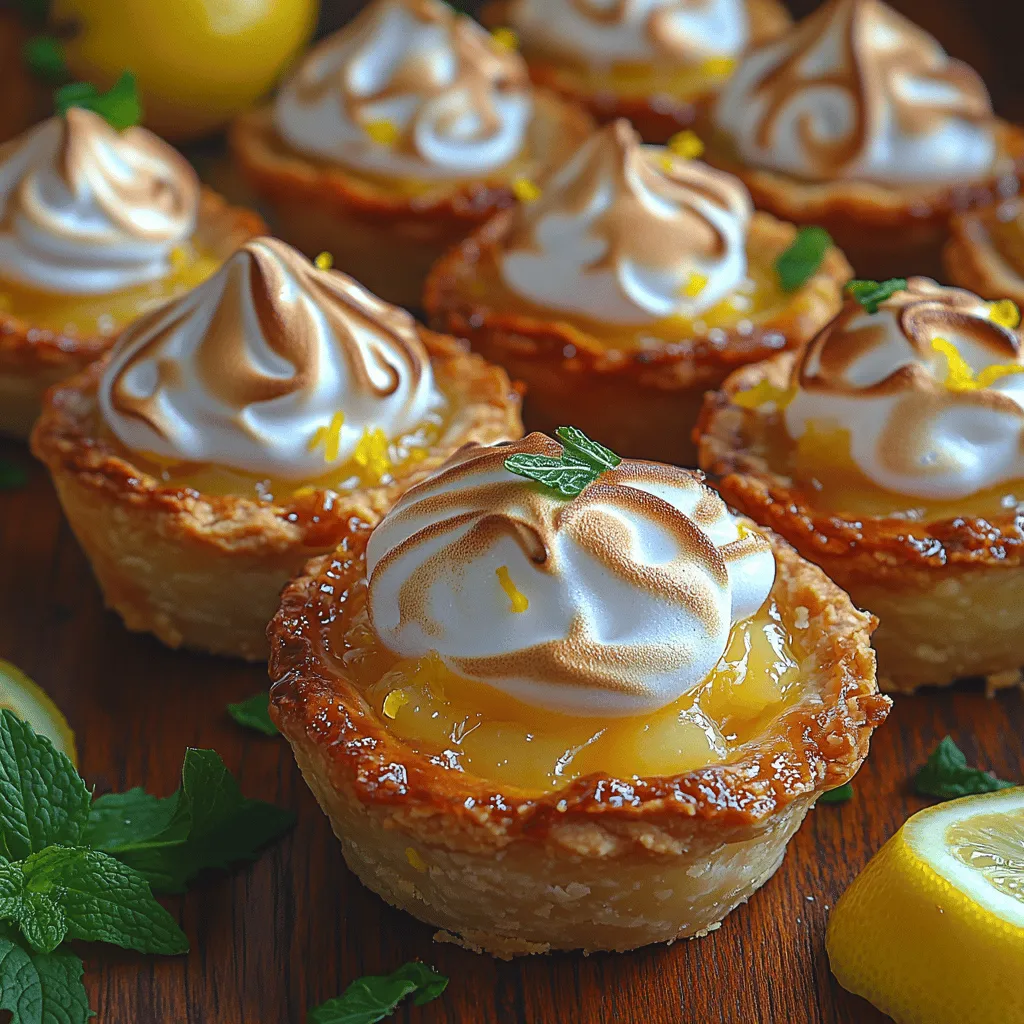
The allure of mini lemon meringue pies lies not only in their delightful taste but also in their visual appeal. Each pie is a work of art, showcasing a golden, toasted meringue that crowns a vibrant lemon filling. The contrast of colors and textures makes them an eye-catching addition to any dessert table. Furthermore, their bite-sized convenience allows for easy serving and enjoyment, making them a favorite among both hosts and guests.
The Allure of Mini Lemon Meringue Pies
The history of lemon meringue pie dates back to the 19th century, with its origins often attributed to various European influences. It is believed that the classic combination of lemon custard and fluffy meringue emerged in England, and as culinary styles evolved, the pie made its way to American kitchens, where it became a beloved staple. Over time, the traditional recipe has seen many adaptations, leading to the creation of mini versions that are perfect for portion control and presentation.
Mini lemon meringue pies are not only aesthetically pleasing but also practical. They provide the same burst of flavor as their larger counterparts but in a more manageable size. This makes them an ideal choice for parties and events where guests appreciate a variety of desserts without the commitment of a full slice of pie. Their individual servings allow for easy tasting and sharing, encouraging guests to sample multiple treats.
Ingredients Breakdown
To create the perfect mini lemon meringue pies, you’ll need to gather a few essential ingredients. Each component plays a critical role in achieving the ideal flavor and texture:
For the Crust:
– All-purpose flour
– Unsalted butter (cold)
– Granulated sugar
– Salt
– Ice water
For the Lemon Filling:
– Granulated sugar
– Cornstarch
– Water
– Freshly squeezed lemon juice (preferably from organic lemons)
– Egg yolks
– Unsalted butter
For the Meringue:
– Egg whites
– Granulated sugar
– Cream of tartar (optional, for stability)
– Vanilla extract (optional, for flavor)
When preparing these mini pies, the quality of your ingredients can significantly impact the final result. Using freshly squeezed lemon juice rather than bottled juice is crucial, as it provides a fresher, more vibrant flavor. Additionally, high-quality butter and eggs will ensure a rich and creamy filling and a flaky crust.
For those with dietary restrictions or preferences, there are several variations and substitutions available. A gluten-free crust can be made using almond flour or a gluten-free all-purpose blend, while a vegan meringue can be achieved using aquafaba (the liquid from canned chickpeas) instead of egg whites.
Crafting the Perfect Crust
Creating a flaky crust is the foundation of any great pie, and the process for mini lemon meringue pies is no exception. Follow these step-by-step instructions to achieve a crust that is both tender and crisp:
1. Prepare Your Workspace: Begin by gathering all your ingredients and tools, including a mixing bowl, pastry cutter, rolling pin, and mini pie pans.
2. Mix the Dry Ingredients: In a large bowl, combine the all-purpose flour, granulated sugar, and salt. Whisking these ingredients together helps to evenly distribute the sugar and salt throughout the flour.
3. Cut in the Butter: Using a pastry cutter or your fingertips, cut the cold unsalted butter into the dry mixture until it resembles coarse crumbs. It’s important to keep the butter cold, as this contributes to the flakiness of the crust.
4. Add Ice Water: Gradually add ice water, one tablespoon at a time, mixing gently until the dough begins to come together. Be careful not to overwork the dough, as this can lead to a tough crust.
5. Chill the Dough: Once your dough is formed, wrap it in plastic wrap and refrigerate for at least 30 minutes. Chilling the dough allows the gluten to relax, resulting in a more tender crust.
6. Roll and Shape the Dough: After chilling, remove the dough from the fridge and roll it out on a lightly floured surface to a thickness of about 1/8 inch. Use a round cutter to cut out circles of dough that will fit your mini pie pans.
7. Fit the Dough into the Pans: Gently press the dough circles into the mini pie pans, ensuring there are no air pockets. Trim any excess dough hanging over the edges.
8. Pre-Bake the Crusts: To prevent a soggy bottom, pre-bake the crusts before adding the filling. Prick the bottoms with a fork to allow steam to escape, and bake in a preheated oven until lightly golden.
Creating the Zesty Lemon Filling
The lemon filling is the star of the show in mini lemon meringue pies, and understanding the role of each ingredient is essential for achieving a perfectly balanced flavor. Here’s how to create the zesty lemon filling:
1. Combine Sugar and Cornstarch: In a medium saucepan, whisk together granulated sugar and cornstarch. This mixture will create a thick, glossy filling once cooked.
2. Add the Liquid: Gradually whisk in water and freshly squeezed lemon juice. The acidity of the lemon juice is what gives the filling its signature tartness.
3. Heat the Mixture: Place the saucepan over medium heat and cook while stirring constantly. This step is crucial, as it helps dissolve the sugar and cornstarch. As the mixture heats, it will begin to thicken.
4. Temper the Egg Yolks: In a separate bowl, whisk the egg yolks until smooth. When the lemon mixture reaches a simmer, gradually add a small amount of the hot mixture to the egg yolks, whisking continuously. This process, known as tempering, prevents the yolks from curdling when added to the hot mixture.
5. Combine and Cook: Once tempered, pour the egg yolk mixture back into the saucepan with the remaining lemon mixture. Continue to cook for a few more minutes until it thickens even further. Remove from heat and stir in unsalted butter until melted and smooth.
By mastering these initial steps, you’ll be well on your way to creating mini lemon meringue pies that are sure to impress your family and friends. The balance of flavors and textures makes these treats a delightful addition to any dessert spread, embodying the essence of a classic recipe with a modern twist. Stay tuned for the next part, where we’ll delve into crafting the fluffy meringue topping that completes these charming pies.
Tips for Achieving the Perfect Consistency and Flavor Balance
Creating the perfect mini lemon meringue pies requires attention to detail, especially regarding the consistency of both the lemon filling and the meringue. Here are some essential tips to ensure your pies are bursting with flavor and have the ideal texture.
Mastering the Meringue
To achieve that coveted fluffy and stable meringue, start by ensuring your egg whites are at room temperature. This simple step significantly enhances the volume of the meringue. Cold egg whites take longer to whip and may not reach the desired peaks. Allow them to sit at room temperature for about 30 minutes before you begin.
Step-by-Step Instructions for Whipping Meringue to the Right Peaks
1. Prepare Your Tools: Use a clean mixing bowl and whisk attachments. Any grease or residue can prevent the egg whites from whipping up properly.
2. Begin Whipping: Start at a low speed to break up the egg whites, then gradually increase to medium-high. This helps incorporate air without over-whipping.
3. Add Sugar Gradually: Once the egg whites begin to foam, slowly add granulated sugar, about a tablespoon at a time. This slow addition helps create a stable meringue.
4. Check for Peaks: Continue whipping until you reach stiff peaks, which means the meringue holds its shape and doesn’t droop. To check, lift the whisk out of the meringue; if the peaks stand straight up, you’re ready.
5. Incorporate Cornstarch: For added stability, gently fold in cornstarch and a dash of vinegar or cream of tartar, which helps prevent the meringue from weeping.
Common Meringue Mistakes and How to Avoid Them
– Weeping Meringue: This occurs when moisture seeps out of the meringue. To prevent this, ensure the filling is cooled before adding the meringue, and store the pies in a cool, dry place.
– Grainy Texture: If the sugar isn’t dissolved completely, the meringue can be grainy. Make sure to whip until the sugar is fully integrated and the mixture is glossy.
– Flat Meringue: If your meringue doesn’t hold its shape, it could be due to over-whipping. Stop whipping once you reach stiff peaks.
Assembling the Mini Pies
Now that your lemon filling and meringue are ready, it’s time to assemble the mini pies.
Detailed Instructions for Filling the Crusts and Topping with Meringue
1. Fill the Crusts: Spoon a generous amount of the lemon filling into each pre-baked mini pie crust, filling them to the brim. Use a spatula to smooth the filling evenly.
2. Top with Meringue: Immediately dollop the whipped meringue on top of the lemon filling, spreading it out to cover the filling completely. Make sure the meringue touches the edges of the crust to prevent shrinking.
3. Create Texture: Use a spatula or the back of a spoon to create peaks and swirls in the meringue. This not only adds visual appeal but also gives more surface area for toasting.
Techniques for Piping Meringue for an Attractive Finish
For a professional-looking finish, consider piping the meringue instead of spreading it. Use a piping bag fitted with a star tip to create elegant swirls and peaks. This adds a decorative touch and enhances the visual appeal of your mini pies.
Safety Tips When Using a Kitchen Torch or Broiler for Toasting Meringue
– When using a kitchen torch, hold it about 6 inches from the meringue and move it in a circular motion to achieve an even toast.
– If using a broiler, place the pies on a baking sheet and watch them closely, as they can go from perfectly toasted to burnt in seconds. Keep the oven door cracked open to monitor the browning.
Serving Suggestions and Pairings
Once your mini lemon meringue pies are beautifully assembled, consider these serving suggestions to elevate your dessert experience.
Ideas for Garnishing Mini Lemon Meringue Pies
– Fresh Berries: Add a few blueberries or raspberries on top of the meringue for a pop of color and a burst of flavor.
– Mint Leaves: A sprig of fresh mint not only enhances the presentation but also adds a refreshing aroma.
– Zest: Grate some lemon zest over the top for an extra zing of citrus flavor and visual appeal.
Suggested Beverages That Pair Well with Lemon Meringue Pies
– Herbal Teas: A calming chamomile or a refreshing peppermint tea pairs wonderfully with the tartness of lemon.
– Sparkling Water: The effervescence of sparkling water cleanses the palate and complements the sweetness of the meringue.
– Lemonade: For lemon lovers, a glass of freshly squeezed lemonade can enhance the citrus experience.
Presentation Tips for Serving at Gatherings or Special Occasions
– Plating: Serve the mini pies on a decorative platter, arranging them with garnishes for a delightful display.
– Individual Servings: Place each pie in a small paper or cupcake liner to create an appealing individual serving that’s easy to grab.
– Seasonal Decor: Consider adding seasonal elements, such as edible flowers in spring or colorful fruits in summer, to match the theme of your gathering.
Storage and Shelf Life
To maintain the quality of your mini lemon meringue pies, follow these best practices for storage.
Best Practices for Storing Mini Lemon Meringue Pies
– Refrigerate: Store the assembled pies in the refrigerator if they won’t be served immediately. The meringue will stay fluffy for a few hours, but it’s best served fresh.
– Cover Loosely: To prevent the meringue from sticking to plastic wrap, cover the pies loosely with a lid or parchment paper.
Discussion on How Meringue Behaves Over Time and Tips for Serving Leftovers
Meringue can start to lose its texture over time, becoming soft or weeping. If you have leftovers, it’s best to consume them within 24 hours for the best experience. If the meringue has softened, consider re-toasting it briefly under the broiler to refresh its texture before serving.
Conclusion
Creating mini lemon meringue pies from scratch is a labor of love that brings joy and satisfaction to any dessert table. The combination of a buttery crust, tangy lemon filling, and fluffy meringue creates a delightful balance of flavors and textures that is hard to resist.
Whether you’re celebrating a special occasion or simply indulging in a classic dessert, this recipe captures the essence of nostalgia wrapped in a modern, bite-sized treat. So roll up your sleeves, gather your ingredients, and embark on this delightful baking adventure. You’ll not only enjoy the sweet reward of your efforts but also the joy of sharing these charming mini pies with friends and family. Happy baking!