
Introduction
As the temperatures drop and the chill of winter settles in, there is nothing more comforting than a rich, warm drink to soothe the soul. Enter the hot chocolate bomb—a delightful trend that has taken the culinary world by storm. These indulgent treats have become a favorite among both children and adults, transforming a simple cup of hot cocoa into an interactive and enjoyable experience. With their visually appealing design and the promise of a deliciously rich drink, hot chocolate bombs are perfect for the colder months.
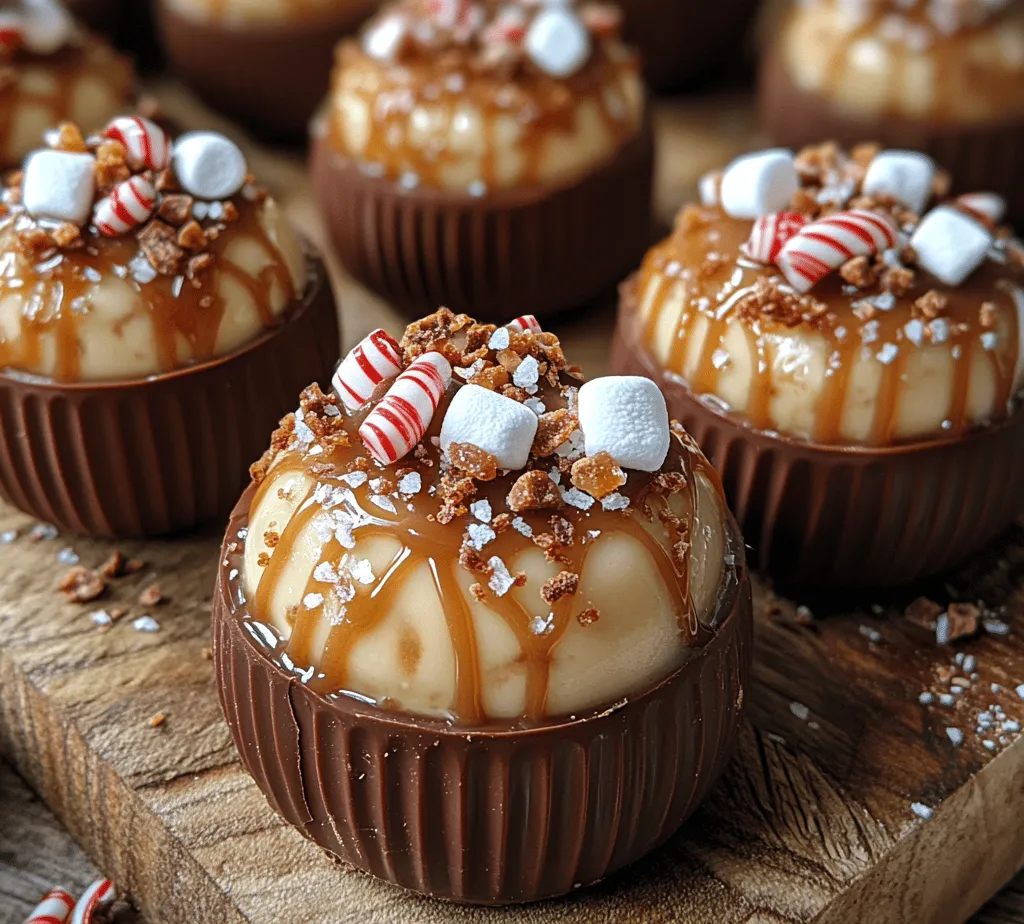
Among the various flavors available, salted caramel hot chocolate bombs stand out as a truly decadent option. Combining the richness of chocolate with the sweetness of caramel and a hint of salt, these bombs provide a delightful balance that tantalizes the taste buds. The contrast between the silky chocolate, the luscious caramel, and the subtle saltiness creates an indulgent treat that is hard to resist. Whether you’re curling up by the fire, enjoying a cozy evening with friends, or gifting a sweet surprise, salted caramel hot chocolate bombs are sure to please.
Understanding Hot Chocolate Bombs
So, what exactly are hot chocolate bombs? Essentially, they are hollow spheres made of chocolate that are filled with hot cocoa mix and various toppings, such as marshmallows, caramel, or even flavored syrups. When you drop a hot chocolate bomb into a cup of hot milk, the outer shell melts away, releasing the contents inside and creating a rich, creamy drink. The experience of watching the bomb dissolve and the drink transform into a comforting cup of cocoa is part of the magic that has made these treats so popular.
The history of hot chocolate dates back centuries, originating from the ancient Mayans who brewed a chocolate drink using water, cocoa beans, and spices. Over time, this beverage evolved into the sweetened and creamy hot chocolate we know today, with variations emerging across different cultures. The introduction of hot chocolate bombs represents a modern twist on this classic drink, allowing for creativity and personalization in every cup.
While you can certainly find store-bought hot chocolate bombs, there is something special about making them at home. Homemade bombs offer the freedom to customize flavors, control ingredients, and even experiment with different fillings. Plus, they make for a beautiful and heartfelt gift, perfect for sharing during the holiday season or any time of year.
Ingredients Breakdown
Before diving into the preparation of your salted caramel hot chocolate bombs, it’s essential to understand the role of each ingredient you’ll be working with. Here’s a detailed breakdown of what you’ll need:
Milk Chocolate Chips
Milk chocolate chips are the primary ingredient for the outer shell of the hot chocolate bomb. They provide the necessary sweetness and creamy flavor that complements the drink. Look for high-quality milk chocolate for the best results, as this will significantly impact the overall taste of your bombs.
Semi-Sweet Chocolate Chips
To balance the sweetness of the milk chocolate, semi-sweet chocolate chips are added. This combination creates a more complex flavor profile, ensuring that the bombs aren’t overly sugary. The slight bitterness of the semi-sweet chocolate enhances the richness of the hot cocoa experience.
Hot Cocoa Mix
The foundation of every hot chocolate bomb is a good quality hot cocoa mix. This mix typically contains cocoa powder, sugar, and sometimes powdered milk. When the bomb melts, it will dissolve in the hot milk, infusing the drink with rich chocolate flavor. You can choose store-bought mixes or make your own for a more personalized touch.
Caramel Sauce
To achieve that delightful salted caramel flavor, you’ll need caramel sauce. This ingredient adds a layer of sweetness and richness to the hot chocolate bomb. You can use store-bought caramel sauce or make your own at home for a more authentic flavor.
Mini Marshmallows
No hot chocolate is complete without marshmallows! Mini marshmallows are the perfect addition to your hot chocolate bombs, providing a nostalgic and comforting touch. As the bomb melts in the hot milk, the marshmallows will soften and float to the top, adding a delightful texture to your drink.
Sea Salt
The secret ingredient that elevates your salted caramel hot chocolate bombs is sea salt. A sprinkle of sea salt enhances the sweet flavors of the chocolate and caramel, creating that signature salted caramel effect. It’s important to use high-quality sea salt for the best flavor.
Optional Garnishes
For those looking to personalize their hot chocolate bombs, there are plenty of options for garnishes. Consider adding crushed candy canes for a festive touch, a drizzle of chocolate or caramel on top, or even a sprinkle of cocoa powder or cinnamon for added flavor. The possibilities are endless, allowing you to get creative with your presentation.
Step-by-Step Instructions
Now that you’re familiar with the ingredients, it’s time to dive into the preparation of your salted caramel hot chocolate bombs. Follow these detailed steps to create your own delicious treats:
1. Melt the Chocolate: Begin by melting your milk chocolate chips and semi-sweet chocolate chips together. You can use a microwave in short bursts, stirring in between, or a double boiler for more controlled heating. Ensure that the chocolate is completely smooth and free of lumps.
2. Mold the Chocolate: Once melted, allow the chocolate to cool slightly. Then, use a spoon or a pastry brush to coat the inside of silicone molds with a layer of the melted chocolate. Make sure to cover the entire surface evenly, creating a shell that is thick enough to hold the filling. Place the molds in the refrigerator for about 10-15 minutes to set.
3. Create the Second Layer: After the first layer has set, remove the molds from the refrigerator and apply a second layer of melted chocolate to reinforce the shells. This step is crucial for ensuring that the bombs hold together when you fill them. Again, return the molds to the refrigerator for another 10-15 minutes to firm up.
4. Prepare the Filling: While the chocolate shells are setting, gather your hot cocoa mix, caramel sauce, and mini marshmallows. You can measure out the hot cocoa mix according to your preference, but a standard serving is typically around 2 tablespoons per bomb.
5. Assemble the Bombs: Once the chocolate shells are firm, carefully remove them from the molds. You should have two halves for each bomb. On one half, add a layer of hot cocoa mix, followed by a drizzle of caramel sauce, a handful of mini marshmallows, and a sprinkle of sea salt.
6. Seal the Bombs: To complete the bombs, take the other half of the chocolate shell and gently press it onto the filled half. You can use a little melted chocolate around the edges to help seal the two halves together. Make sure there are no gaps where the filling can escape.
7. Final Touches: For an appealing presentation, you can drizzle melted chocolate or caramel over the completed bombs and sprinkle them with additional sea salt or decorative sprinkles. Allow the bombs to set completely at room temperature or in the refrigerator.
With these steps, you’ll have beautifully crafted salted caramel hot chocolate bombs ready to be enjoyed or gifted. Keep an eye out for the next part of this article, where we’ll explore more tips for achieving the best results, as well as answering some common questions about this delightful treat.
Melting the Chocolate: Techniques for Achieving a Smooth Consistency
To create the perfect salted caramel hot chocolate bombs, the first step is melting the chocolate. Achieving a smooth, velvety texture is essential for both the flavor and the structural integrity of your chocolate shells. Here are a few techniques to ensure your chocolate melts flawlessly:
1. Double Boiler Method: This is one of the most effective ways to melt chocolate without burning it. Fill a saucepan with about an inch of water and bring it to a simmer. Place a heatproof bowl on top of the saucepan, ensuring it doesn’t touch the water. Add your chocolate to the bowl, stirring frequently until it’s completely melted and smooth.
2. Microwave Method: If you prefer a quicker method, the microwave can be your best friend. Place chopped chocolate in a microwave-safe bowl and heat in 20-30 second intervals, stirring in between. Be vigilant; chocolate can burn quickly. Continue until the chocolate is just melted, then stir until smooth.
3. Tempering Chocolate: For a professional finish, consider tempering your chocolate. This process ensures your chocolate will have a nice sheen and a satisfying snap when bitten into. To temper, melt two-thirds of your chocolate and then gradually add the remaining third, stirring until it cools to about 88°F to 90°F before use.
Preparing the Molds: Tips for Creating Perfect Chocolate Shells
Using the right molds is crucial for crafting beautiful hot chocolate bombs. Silicone molds are ideal as they are flexible and make it easy to pop out the chocolate shells. Here are some tips for preparing your molds:
– Clean and Dry: Make sure your molds are clean and completely dry. Any moisture can cause the chocolate to seize or not set properly.
– Coat Generously: Once your chocolate is melted, use a spoon or pastry brush to coat the inside of each mold. Ensure an even layer, making sure to cover all surfaces to prevent any holes in your bombs.
– Chill and Layer: After the first layer of chocolate has been applied, chill the molds in the refrigerator for about 10-15 minutes to set. For a sturdier shell, repeat the process and apply a second layer of melted chocolate. This will also help prevent breakage when you remove the bombs from the molds.
Making the Filling: Importance of Mixing and Layering Flavors Effectively
The filling is where the magic happens, combining all the flavors you love in a hot chocolate bomb. To create a rich, flavorful filling, follow these steps:
1. Layering Flavors: Start with a base of high-quality cocoa powder or hot cocoa mix. Add a generous drizzle of salted caramel sauce to enhance the sweetness. You can also mix in mini marshmallows or crushed cookies for added texture and flavor.
2. Balancing Sweetness and Saltiness: The key to a great salted caramel bomb is balancing the sweet and salty elements. Ensure the salted caramel sauce is not overly sweet; a touch of sea salt can enhance the flavor profile without overwhelming it.
3. Mixing Consistency: If you’re using dry ingredients (like cocoa powder or powdered sugar), mix them thoroughly with the caramel to ensure an even distribution of flavors throughout the bomb.
Filling and Sealing the Bombs: Best Practices to Ensure They Hold Together
Now that you have your chocolate shells and delicious filling, it’s time to assemble your bombs. Here’s how to do it effectively:
1. Fill with Care: Take one half of your chocolate shell and fill it with your prepared mixture, leaving a little space at the top to ensure you can seal it properly. It’s important not to overfill, as this can cause the bomb to break when it’s sealed.
2. Heat to Seal: To attach the other half of the shell, gently heat the edge of the filled half by placing it briefly on a warm plate. This will slightly melt the chocolate, creating a sticky surface for the two halves to adhere to.
3. Seal and Smooth: Press the two halves together firmly and smooth out any excess chocolate that may ooze out. This will help create a seamless and attractive finish to your hot chocolate bombs.
Decorating for Presentation: Creative Ideas for Finishing Touches
The final touch is the decoration, which not only enhances the visual appeal but also adds an extra layer of flavor. Here are some creative ideas for decorating your hot chocolate bombs:
– Drizzle and Dip: Melt some additional chocolate (white, milk, or dark) and drizzle it over the top of each bomb for a beautiful finish. You can also dip the tops in melted chocolate and then sprinkle with sea salt or crushed candy canes.
– Sprinkles and Nuts: Add a festive touch by sprinkling edible glitter, colorful sprinkles, or crushed nuts on top of the melted chocolate before it sets.
– Personal Touches: Consider adding a small tag or note when gifting these bombs, indicating the flavor or any special ingredients used, making them even more personal.
Tips for Success
Creating salted caramel hot chocolate bombs can be a delightful experience, but there are a few common pitfalls to avoid:
– Avoid Overheating Chocolate: This can cause the chocolate to seize. Always melt it slowly and gently.
– Don’t Rush the Setting Process: Allow the chocolate to set completely before removing it from molds. Patience here will pay off with beautifully formed shells.
– Use Quality Ingredients: The flavor of your bombs will be directly related to the quality of the chocolate and fillings you use. Opt for high-quality chocolate and pure caramel for the best results.
Recommended Tools and Equipment for Best Results
To create your hot chocolate bombs, it’s helpful to have the following tools:
– Silicone molds (sphere-shaped work best)
– Heatproof mixing bowls
– A microwave or double boiler
– A spatula and whisk for mixing
– Piping bags or squeeze bottles for decorating
Variations to Try: Different Flavor Combinations or Dietary Substitutions
While the salted caramel flavor is a crowd-pleaser, there are numerous variations you can experiment with:
– Peppermint Hot Cocoa Bombs: Use crushed peppermint candies in your filling and peppermint extract in the chocolate for a refreshing twist.
– Spicy Mexican Hot Chocolate: Add a pinch of cayenne pepper and cinnamon for a warm, spicy kick.
– Dairy-Free Options: Substitute regular chocolate with dairy-free chocolate chips and use almond or oat milk for a vegan-friendly treat.
Serving Suggestions
Once your salted caramel hot chocolate bombs are ready, serving them is as fun as making them:
1. Pouring Hot Milk or Water: To experience the magic, place a hot chocolate bomb in a mug and pour hot milk or water over it. Watch as it melts and reveals the delicious filling inside.
2. Pairing Ideas: Enhance your hot chocolate experience by serving it with cookies, biscotti, or even a dollop of whipped cream or marshmallows on top.
Storage and Shelf Life
Storing your hot chocolate bombs properly will ensure they retain their quality:
– Best Practices for Storing: Keep your bombs in an airtight container at room temperature, away from direct sunlight and heat sources.
– Shelf Life: Homemade hot chocolate bombs can typically be stored for up to two weeks. However, they are best enjoyed fresh for optimal flavor.
– Gifting Suggestions: These bombs make excellent gifts! Consider wrapping them in clear cellophane tied with a ribbon, or placing them in a decorative box for a charming present.
Conclusion
Making salted caramel hot chocolate bombs is not only a fun activity but also a rewarding one. These delightful treats are perfect for cozy nights in or as a special gift for loved ones. The joy of watching the bomb melt and transform into a rich, creamy hot chocolate is a treat in itself.
The creativity involved in crafting these bombs allows for endless customization, encouraging you to experiment with flavors and decorations. So gather your ingredients, follow these steps, and enjoy the process of making these indulgent salted caramel hot chocolate bombs at home. Whether for yourself or as a gift, these delicious creations are sure to delight anyone who tastes them.
