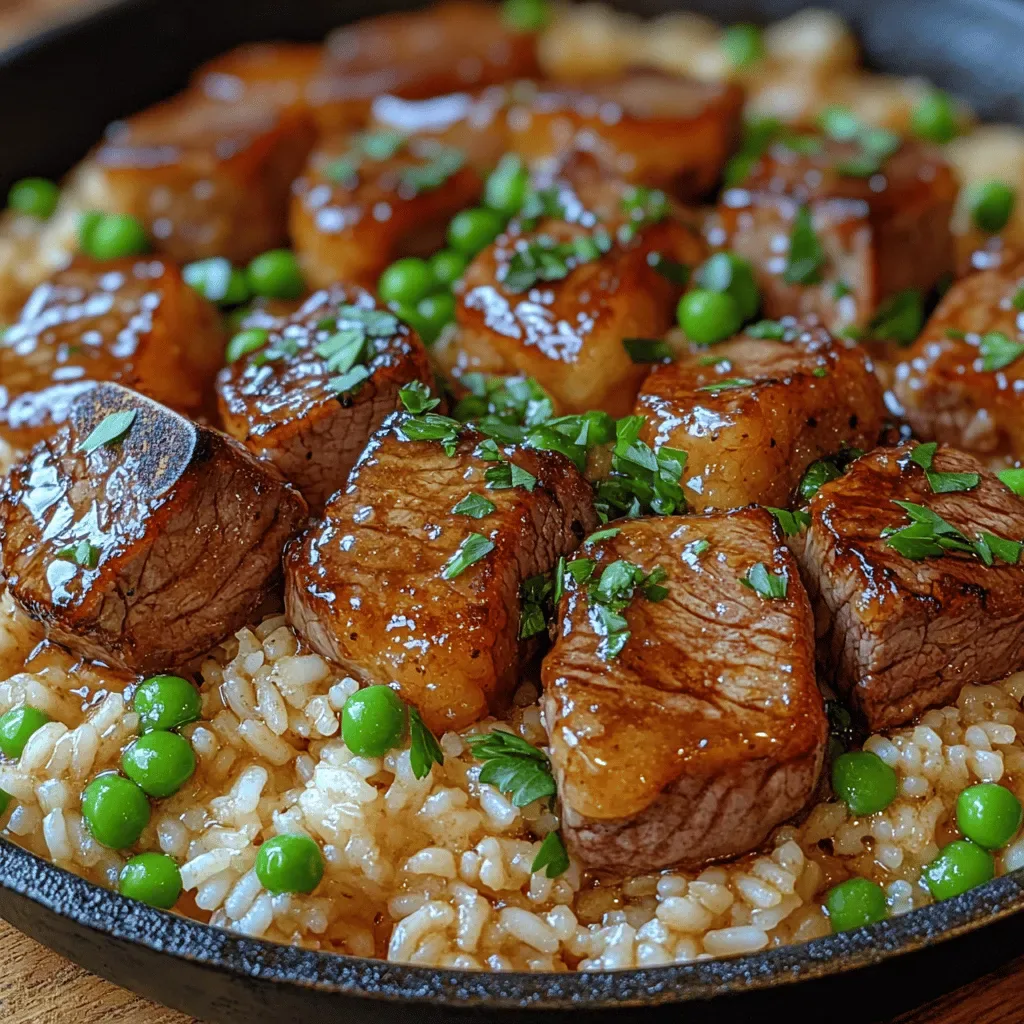
The first time I tried barbecued black‑eyed peas, I was sitting on a porch swing in late summer, the cicadas buzzing like a low‑key soundtrack to the clatter of my grandma’s old cast‑iron pot. The moment I lifted the lid, a cloud of fragrant steam hit me—sweet, smoky, and a whisper of earth that reminded me of fresh garden soil after a rainstorm. I could hear the sizzle of the sauce as it kissed each pea, and the scent of caramelized onions curled around the air, making my stomach do a little happy dance. That memory has stuck with me, and every time I recreate the dish, I feel like I’m inviting that same warm, lazy afternoon into my kitchen.
What makes this recipe stand out is its simplicity paired with a depth of flavor that rivals many restaurant‑style sides. Black‑eyed peas are already a humble, hearty legume, but when you coat them in a glossy barbecue glaze, they become a star that can hold its own next to grilled ribs or a fresh summer salad. The olive oil keeps everything moist, while the garlic powder and onion add layers of savory aroma that build up with each stir. And let’s not forget the subtle crunch from the diced onion that pops against the soft peas—textural contrast that keeps every bite interesting.
But here’s the thing: most people think you need a ton of exotic spices or a complicated technique to get that restaurant‑quality glaze. I’m about to prove otherwise. In fact, there’s a secret trick in step four that will make the sauce cling like a second skin, and you’ll wonder why you ever settled for anything less. Trust me, once you taste that caramelized edge, you’ll be reaching for the serving bowl again and again.
Now, imagine serving this at your next family gathering, potluck, or even a quick weeknight dinner. The bright specks of black‑eyed peas will add a pop of color, while the smoky barbecue notes will make everyone think you spent hours in the kitchen (when really it’s under 45 minutes). Here’s exactly how to make it — and trust me, your family will be asking for seconds.
🌟 Why This Recipe Works
- Flavor Depth: The combination of barbecue sauce and garlic powder creates a sweet‑smoky profile that penetrates each pea, delivering a burst of flavor in every bite. The sauce caramelizes slightly, adding a subtle char that mimics outdoor grilling.
- Texture Harmony: Tender black‑eyed peas meet a gentle crunch from the onion, while the olive oil ensures the glaze stays glossy and prevents any dryness. This contrast keeps the palate engaged from the first spoonful to the last.
- Ease of Preparation: All ingredients are pantry‑friendly and require only one pan, meaning cleanup is a breeze. Even beginners can follow the steps without feeling overwhelmed.
- Time Efficiency: With a total cook time of just 45 minutes, this side fits perfectly into busy weeknights or a relaxed weekend brunch. You’ll have a stunning dish ready before the main course even finishes.
- Versatility: The base recipe can be tweaked for heat, sweetness, or herbaceous notes, making it adaptable for any cuisine theme you’re exploring. It pairs well with grilled meats, tofu, or even as a hearty topping for baked potatoes.
- Nutrition Boost: Black‑eyed peas are a powerhouse of protein, fiber, and essential minerals, while olive oil adds heart‑healthy monounsaturated fats. You’re getting a side that’s both indulgent and nourishing.
- Ingredient Quality: By using fresh onion and a quality barbecue sauce, you elevate the dish without needing exotic spices. The simplicity lets each component shine.
- Crowd‑Pleaser Factor: The familiar barbecue flavor appeals to both kids and adults, making it a safe bet for any gathering. You’ll see smiles and hear compliments before the first bite is even taken.
🥗 Ingredients Breakdown
The Foundation: Legume Love
Black‑eyed peas are the heart of this dish. Their buttery texture and subtle earthy flavor provide a perfect canvas for the bold barbecue glaze. Make sure they’re cooked until just tender—overcooking can turn them mushy, while undercooking leaves a hard bite that clashes with the smooth sauce. If you’re using canned peas, rinse them thoroughly to remove excess sodium and any metallic aftertaste.
Aromatics & Spices: The Flavor Builders
The diced onion brings a sweet crunch that balances the smoky sauce, and the garlic powder adds a depth that feels almost umami. I always dice the onion finely so it melds seamlessly, but if you love a bite-sized crunch, keep the pieces a bit larger. Garlic powder is more uniform than fresh garlic, ensuring the flavor spreads evenly without burning.
The Secret Weapons: Sauce & Fat
Barbecue sauce is the star—choose a brand that leans toward a balanced sweet‑smoky profile, or whisk together ketchup, brown sugar, apple cider vinegar, and a splash of Worcestershire for a DIY version. The olive oil isn’t just for moisture; it acts as a carrier for the sauce, helping it cling to each pea and preventing the mixture from sticking to the pan.
Finishing Touches: Seasoning & Balance
A pinch of salt and pepper is the final polish, brightening the flavors and rounding out the dish. Taste as you go—sometimes a dash more pepper can awaken the sauce, while a pinch more salt can bring out the natural sweetness of the peas. If you want a hint of heat, a pinch of cayenne or a dash of hot sauce can be added at this stage.
With your ingredients prepped and ready, let's get cooking. Here’s where the fun really begins...
🍳 Step-by-Step Instructions
Heat a large skillet over medium heat and add the tablespoon of olive oil. As the oil shimmers, you’ll hear a gentle hiss—this is the first sign that your pan is ready for the flavor party. Swirl the oil to coat the bottom evenly, then add the diced onion, letting it soften for about three minutes. You’ll notice the onion turning translucent and releasing a sweet aroma that fills the kitchen.
Sprinkle the garlic powder over the softened onions, stirring quickly to avoid any bitter burn. The garlic powder will dissolve into the oil, creating a fragrant base that hints at the depth to come. If you’re using fresh garlic, this is the moment you’d add it, but the powder gives a consistent flavor without the risk of burning.
Add the cooked black‑eyed peas to the skillet, stirring gently to coat them with the onion‑garlic mixture. You’ll hear a soft sizzle as the peas meet the hot pan, and the scent of toasted legumes will start to emerge. Cook for another two minutes, allowing the peas to absorb the aromatics and warm through.
Now comes the secret trick: pour in the half‑cup of barbecue sauce while the pan is still hot, then immediately reduce the heat to low. The sauce should bubble gently, not roar, which helps it thicken and cling to each pea. Stir continuously for about four minutes, watching the sauce turn a glossy, deep amber and start to caramelize at the edges.
Season with salt and freshly cracked black pepper, tasting as you go. The seasoning should feel balanced—nothing too salty, and the pepper should provide a gentle heat that lifts the sweetness of the barbecue sauce. Remember, the sauce already contains some salt, so start with a pinch and adjust.
Let the mixture simmer on low for an additional three to five minutes, allowing the flavors to meld. You’ll notice the peas becoming glossy, each one coated like a tiny, savory jewel. The aroma at this stage is intoxicating—a blend of smoky sweetness, onion depth, and a whisper of pepper.
Turn off the heat and let the skillet sit for a minute; this rest allows the glaze to set and the peas to finish absorbing the sauce. When you’re ready to serve, give the pan a final gentle toss to redistribute any sauce that may have settled at the bottom. The result should be a vibrant, glossy side dish that looks as good as it tastes.
And there you have it! But before you dig in, let me share some tips that will take this from great to absolutely unforgettable...
🔐 Expert Tips for Perfect Results
The Taste Test Trick
Before you finish cooking, take a small spoonful and let it cool for a moment. This tiny pause lets your palate catch the balance of sweet, smoky, and salty. If something feels off, now is the perfect time to adjust with a pinch more pepper or a drizzle of honey for extra glaze.
Why Resting Time Matters More Than You Think
Even after you turn off the heat, letting the peas rest for a minute or two allows the sauce to thicken further and cling better. It’s a subtle step that makes the difference between a glossy coating and a watery finish. Trust me, the extra minute is worth it.
The Seasoning Secret Pros Won’t Tell You
A dash of smoked sea salt adds a nuanced smoky flavor that complements the barbecue sauce without adding extra sodium. It’s a tiny upgrade that professional chefs use to elevate simple side dishes. Keep a small container of smoked salt on hand for moments like this.
Pan Choice Matters
A heavy‑bottomed skillet distributes heat evenly, preventing hot spots that can scorch the sauce. If you only have a thin pan, keep the temperature lower and stir more frequently to avoid burning. The right pan ensures a consistent caramelization across every pea.
The Final Garnish Boost
A sprinkle of freshly chopped parsley or cilantro right before serving adds a pop of color and a fresh herbaceous note that cuts through the richness. I love the contrast of the bright green against the deep amber glaze—it’s as pleasing to the eye as it is to the tongue.
🌈 Delicious Variations to Try
One of my favorite things about this recipe is how versatile it is. Here are some twists I've tried and loved:
Smoky Chipotle Kick
Add one finely chopped chipotle pepper in adobo sauce to the skillet after the onions have softened. The smoky heat deepens the barbecue flavor and brings a subtle heat that pairs perfectly with the peas.
Honey‑Mustard Glaze
Swap half of the barbecue sauce for Dijon mustard and stir in a tablespoon of honey. This creates a tangy‑sweet coating that brightens the dish, making it a great accompaniment to grilled chicken.
Mediterranean Twist
Replace the barbecue sauce with a mixture of olive oil, lemon zest, and a splash of pomegranate molasses. Add chopped Kalamata olives and crumbled feta at the end for a Mediterranean flair.
Curry‑Infused Peas
Stir in a teaspoon of curry powder along with the garlic powder, then finish with a drizzle of coconut milk. The result is a creamy, aromatic side that pairs well with grilled fish.
Tex‑Mex Fiesta
Mix in a cup of corn kernels and a handful of black beans after the peas are coated. Top with shredded cheddar, jalapeños, and a squeeze of lime for a festive Tex‑Mex side dish.
📦 Storage & Reheating Tips
Refrigerator Storage
Transfer the cooled peas to an airtight container and store them in the fridge for up to four days. The glaze will keep the peas moist, and the flavors actually improve as they meld together overnight.
Freezing Instructions
Portion the peas into freezer‑safe bags, removing as much air as possible, and freeze for up to three months. When you’re ready to enjoy them, thaw in the refrigerator overnight and reheat gently on the stovetop with a splash of broth to revive the glaze.
Reheating Methods
The trick to reheating without drying out? Add a tablespoon of water or broth to the skillet, cover, and warm over low heat for five minutes, stirring occasionally. This steam‑infused method restores the glossy coating and keeps the peas tender.