Chi-Chi’s Baked Chicken Chimichangas
 Save
Save
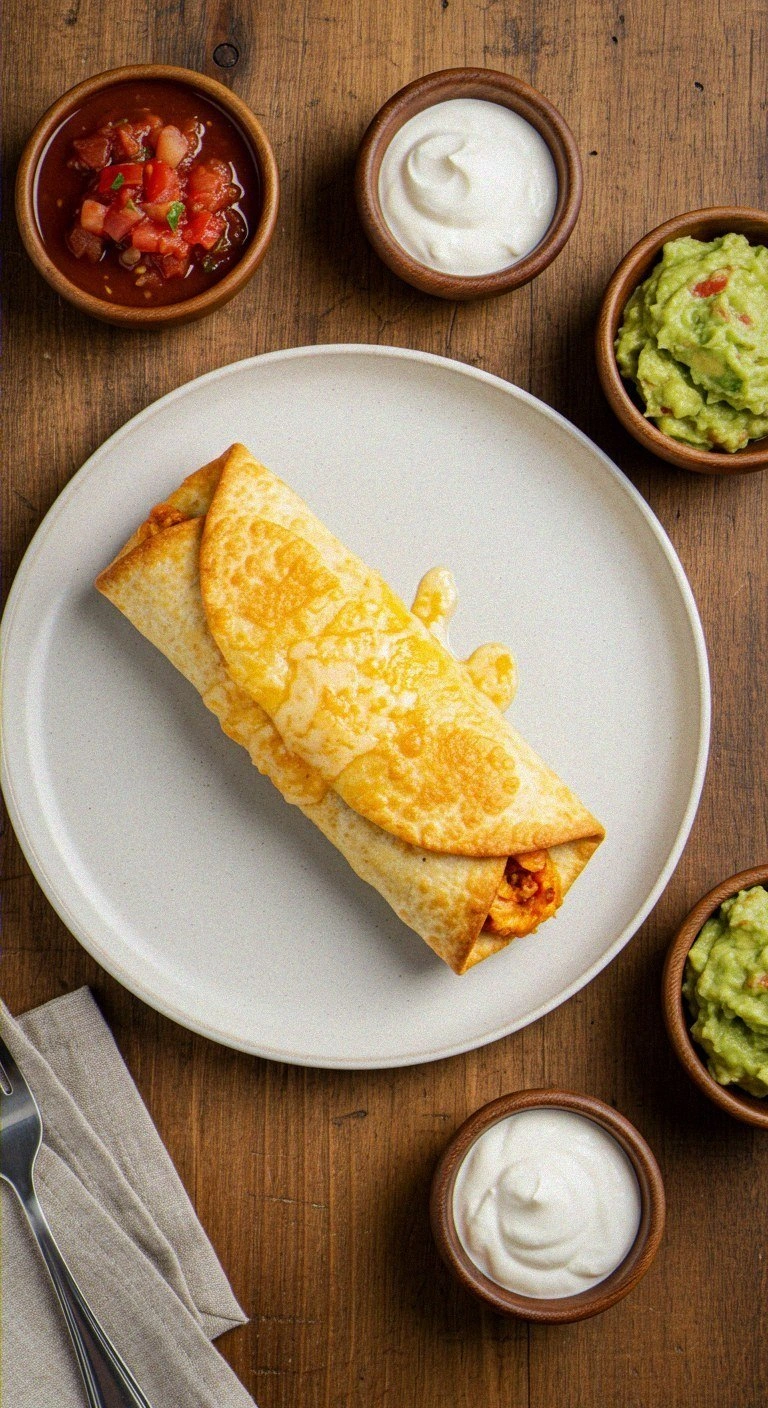
The first time I tried to make Chi‑Chi’s Baked Chicken Chimichangas, the kitchen was filled with the sound of sizzling butter on a hot skillet, the smell of toasted tortillas flirting with smoky cumin, and the excited chatter of my nieces as they hovered over the counter waiting for the first bite. I still remember the exact moment I lifted the foil‑covered baking sheet from the oven and a cloud of golden‑brown steam rose like a fragrant curtain, wrapping the whole house in a warm, comforting hug that felt like a celebration of family and flavor all at once. It wasn’t just a meal; it was a memory in the making, a moment where the ordinary turned extraordinary simply because I chose to bake instead of deep‑fry, allowing the chicken to stay juicy while the tortilla turned crisp without the guilt of a vat of oil. Have you ever wondered why the versions you get at a restaurant taste so different from the ones you try at home? The answer lies in the little secrets that I’m about to reveal, from the way the spices are layered to the timing that makes the cheese melt just right.
What makes this recipe stand out isn’t just the flavor—it’s the balance between tradition and innovation, the way each bite delivers a crunchy exterior that gives way to a tender, juicy filling that sings with bright salsa, mellow cheese, and a hint of smoky heat. Imagine biting into a warm, golden pocket that cracks open with a satisfying snap, releasing a burst of aromatic chicken broth infused with garlic, onion, and a whisper of lime that makes your taste buds do a little dance. The beauty of baking, rather than deep‑frying, is that it keeps the dish lighter while still delivering that beloved crispness, and it also frees up your stovetop for other dishes, making it perfect for a busy weeknight or a relaxed weekend gathering. The secret I’m about to share in step four will change the way you think about binding the filling together, and trust me, you’ll never go back to the old method again.
But there’s more to this story than just the cooking process. Growing up, my abuela would always say that the soul of a dish lives in the love you stir into it, and that sentiment guided every decision I made while perfecting this chimichanga. From selecting the freshest chicken thighs, which stay moist during baking, to choosing flour tortillas that have just the right amount of pliability, each ingredient is a character in the narrative of the dish, and together they create a symphony that feels both familiar and exciting. I’ve tried countless shortcuts—pre‑shredded cheese, canned salsa, even frozen tortillas—and each time something was missing, a tiny note of authenticity that only comes from paying attention to the details. The best part? This recipe is forgiving enough for beginners yet sophisticated enough to impress the most discerning palate, making it the perfect bridge between comfort food and culinary adventure.
Here’s exactly how to make it — and trust me, your family will be asking for seconds, your friends will beg for the recipe, and you’ll discover a few hidden tricks that will make this dish a staple in your home forever. Ready to dive in? Let’s start with why this recipe works so well, then move on to the ingredients that bring it to life, and finally walk through each step with confidence and a dash of excitement. And remember, there’s a secret technique coming up that will elevate the texture in a way you’ve never imagined—stay tuned!
🌟 Why This Recipe Works
- Flavor Depth: By toasting the spices before they meet the chicken, you coax out a richer, more complex aroma that penetrates every bite, turning a simple protein into a layered masterpiece that feels both homey and exotic.
- Texture Harmony: Baking creates a perfectly crisp tortilla that cracks delightfully, while the interior stays moist and tender, offering a satisfying contrast that keeps you reaching for another bite.
- Ease of Preparation: The recipe requires only one pan for the filling and a single baking sheet for the chimichangas, cutting down on cleanup and allowing you to focus on flavor rather than dishwashing.
- Time Efficiency: With a prep time of just fifteen minutes and a bake time of thirty, you can have a restaurant‑quality dish on the table faster than you can say “¡Buen provecho!”—perfect for busy weeknights.
- Versatility: The base recipe is a blank canvas that welcomes additions like black beans, corn, or even a splash of orange juice, letting you tailor it to seasonal produce or personal cravings.
- Nutrition Balance: Using lean chicken breast or thigh meat, low‑fat cheese, and whole‑wheat tortillas (if you prefer) gives you protein, fiber, and a satisfying dose of healthy carbs without excessive grease.
- Ingredient Quality: Fresh herbs, high‑quality salsa, and real cheese elevate the dish from “good” to “memorable,” proving that simple ingredients, when chosen wisely, can create magic.
- Crowd‑Pleasing Factor: The familiar Mexican‑inspired flavors combined with a hand‑held format make this dish a hit at parties, game nights, or family dinners, ensuring everyone leaves the table smiling.
🥗 Ingredients Breakdown
The Foundation: Protein & Tortillas
The heart of any chimichanga is the protein, and for this recipe we use boneless, skinless chicken thighs because their higher fat content keeps the meat moist during the baking process, unlike lean breast meat which can dry out. If you prefer a leaner option, chicken breast works fine as long as you add a splash of chicken broth to the pan to keep it juicy. The tortillas should be medium‑size flour tortillas, about 8‑inch diameter, which provide enough surface area to hold the filling without tearing, yet are thin enough to crisp up beautifully in the oven. Look for tortillas that have a slight yellow tint and a soft, pliable feel; if they feel brittle, a quick 10‑second steam on the stovetop will revive them. The combination of tender chicken and a crisp tortilla creates that signature bite that makes chimichangas so addictive.
Aromatics & Spices: The Flavor Engine
We start with a classic mirepoix of finely diced onion and minced garlic, which forms the aromatic base that infuses the chicken with savory depth. Adding ground cumin, smoked paprika, and a pinch of chili powder introduces earthy warmth, subtle smokiness, and a gentle heat that awakens the palate without overwhelming it. A dash of dried oregano lends a herbaceous note that balances the richness of the cheese later on. For a bright finish, a squeeze of fresh lime juice right before assembling the filling lifts the flavors, creating a harmonious contrast between the smoky spices and the citrusy zing. If you’re adventurous, a pinch of cinnamon or cocoa powder can add an unexpected layer of complexity that will surprise your guests.
The Secret Weapons: Cheese & Salsa
A blend of shredded Monterey Jack and sharp cheddar cheese provides a melty, gooey center that binds the filling together while adding a buttery richness that complements the spices. Monterey Jack melts smoothly, while cheddar contributes a tangy bite that cuts through the richness. For the salsa, we recommend a fresh tomato‑based salsa verde with tomatillos, jalapeños, and cilantro, which brings acidity and freshness to balance the hearty chicken. If you prefer a milder profile, a roasted red‑pepper salsa works beautifully, offering sweetness and a subtle smoky flavor. The cheese and salsa together create a creamy, tangy pocket that makes each bite feel like a mini fiesta.
Finishing Touches: Garnishes & Extras
A dollop of cool sour cream or Greek yogurt adds a silky contrast that softens the heat, while freshly chopped cilantro provides a burst of herbal brightness. Sliced avocado or guacamole brings a buttery richness that pairs perfectly with the crisp tortilla, and a sprinkle of crumbled cotija cheese adds a salty, crumbly finish. For those who love extra crunch, a handful of toasted pumpkin seeds or crushed tortilla chips can be added just before serving. These finishing touches not only enhance flavor but also add texture, making the dish feel more layered and satisfying.
With your ingredients prepped and ready, let's get cooking. Here's where the fun really begins...
🍳 Step-by-Step Instructions
Begin by heating a large skillet over medium‑high heat and adding a tablespoon of olive oil; once the oil shimmers, add the diced onion and sauté for about three minutes until it becomes translucent and fragrant, stirring occasionally to prevent any sticking.
Next, toss in the minced garlic and let it cook for another thirty seconds, just until you hear that irresistible sizzle that signals the garlic is releasing its aromatic oils.
At this point, sprinkle in the cumin, smoked paprika, chili powder, and oregano, allowing the spices to toast lightly—this is the moment where the kitchen fills with a smoky, earthy perfume that hints at the depth to come.
Add the chicken pieces (either shredded cooked chicken or raw diced thighs) to the skillet, stirring to coat them evenly with the seasoned onion‑garlic mixture.
If you’re starting with raw chicken, cook for about eight to ten minutes, turning occasionally, until the meat is no longer pink and begins to brown on the edges, which adds a caramelized flavor.
For pre‑cooked shredded chicken, simply heat through for three to four minutes, letting the meat absorb the spices and become wonderfully fragrant.
Stir in the salsa verde, letting it simmer for two minutes so the flavors meld and the mixture thickens slightly, creating a cohesive filling that will hold together when rolled.
Season with salt and freshly cracked black pepper to taste, then remove the skillet from heat and let the mixture cool for a minute—this pause prevents the cheese from melting prematurely when you assemble the chimichangas.
Lay a tortilla flat on a clean surface, sprinkle a generous handful of the cheese blend across the center, then spoon the chicken‑salsa mixture on top of the cheese, spreading it evenly but leaving a one‑inch border around the edges.
Fold the sides of the tortilla inward, then roll it up tightly, sealing the edge with a dab of water or a light brush of beaten egg to ensure it stays closed during baking.
Place each rolled chimichanga seam‑side down on a parchment‑lined baking sheet, spacing them a couple of inches apart so they crisp evenly.
Brush the tops of the chimichangas with a thin layer of melted butter or a drizzle of olive oil; this will give them a beautiful golden hue and a slightly crunchy exterior without the need for deep‑frying.
Preheat your oven to 400°F (200°C) while you finish assembling the remaining chimichangas, then slide the baking sheet into the middle rack and bake for 20‑25 minutes, or until the tortillas are deep golden‑brown and the cheese inside is bubbling and melted.
Halfway through, rotate the pan for even browning; you’ll notice a faint crackle as the edges begin to puff and the aroma intensifies, signaling that you’re nearing perfection.
While the chimichangas are baking, prepare your garnish station: slice fresh avocado, chop cilantro, and whisk together a quick sour‑cream‑lime sauce by mixing sour cream with lime zest, juice, and a pinch of salt.
Having these ready to drizzle over the hot chimichangas will add a cool, tangy contrast that balances the warm spices and buttery tortilla.
Once baked, remove the chimichangas from the oven and let them rest for three minutes; this short rest allows the filling to settle, making each bite less likely to spill out.
Serve them on a platter, drizzle with the lime‑sour cream sauce, sprinkle with cilantro, and add a side of extra salsa for those who love an extra punch of flavor.
Go ahead, take a taste — you’ll know exactly when it’s right, as the tortilla should crack satisfyingly under your fork while the interior remains luxuriously soft.
And there you have it! But before you dig in, let me share some tips that will take this from great to absolutely unforgettable...
🔐 Expert Tips for Perfect Results
The Taste Test Trick
Before you roll the final chimichanga, spoon a tiny pinch of the filling onto a clean plate, add a sprinkle of cheese, and pop it under the broiler for 30 seconds; this quick test reveals whether the seasoning needs a dash more salt or a splash of lime, saving you from an under‑seasoned final product.
Why Resting Time Matters More Than You Think
Allowing the cooked chicken to rest for five minutes after sautéing lets the juices redistribute, which means the meat stays moist when you combine it with the salsa and cheese. I once rushed this step and ended up with dry, crumbly bites that felt more like a tortilla snack than a hearty chimichanga.
The Seasoning Secret Pros Won’t Tell You
A pinch of smoked sea salt added just before baking amplifies the smoky notes of the cumin and paprika, creating a depth that regular table salt can’t achieve. Pro chefs keep a small jar of smoked salt on hand for precisely this reason, and you’ll notice the difference the very first bite.
The Golden‑Brown Indicator
When the chimichangas reach a deep amber color and you can hear a faint crackle as the edges puff, they’re done. Trust your eyes and ears—over‑baking can dry out the interior, while under‑baking leaves the tortilla soggy.
The Final Drizzle Decision
A drizzle of chipotle‑infused honey just before serving adds a sweet‑smoky glaze that elevates the dish to a whole new level. I discovered this combination at a street market in Oaxaca, and it’s become my secret weapon for impressing guests who think they’ve tried everything.
How to Keep the Tortilla From Splitting
Warm the tortillas for 10 seconds in the microwave or on a dry skillet before filling; the gentle heat makes the dough more pliable, reducing the chance of tears when you roll them up. I once tried to roll cold tortillas straight from the bag and ended up with a half‑finished chimichanga that fell apart in the oven.
🌈 Delicious Variations to Try
One of my favorite things about this recipe is how versatile it is. Here are some twists I've tried and loved:
Southwest Black Bean & Corn
Swap half of the chicken for a mixture of black beans, sweet corn, and diced red bell pepper; the beans add protein and a creamy texture, while the corn contributes a pop of sweetness that balances the smoky spices.
Cheesy Jalapeño Popper
Add finely chopped jalapeños and a dollop of cream cheese to the filling, then top with extra shredded cheddar; the result is a spicy, gooey surprise that feels like a jalapeño popper wrapped in a tortilla.
Mango‑Habanero Fusion
Incorporate diced ripe mango and a drizzle of habanero sauce into the salsa for a sweet‑heat combo that dances on the palate, perfect for summer gatherings when you want a tropical twist.
Breakfast Chimichanga
Replace the chicken with scrambled eggs, crumbled breakfast sausage, and a sprinkle of shredded pepper jack; serve with a side of salsa and avocado for a hearty morning indulgence.
Veggie‑Loaded Delight
Swap the meat entirely for a medley of sautéed zucchini, mushrooms, and spinach, then finish with feta cheese and a splash of balsamic glaze for a lighter, yet still satisfying, version that even the meat‑eaters will love.
📦 Storage & Reheating Tips
Refrigerator Storage
Allow the chimichangas to cool completely, then place them in an airtight container; they will keep fresh for up to three days. For optimal texture, store the sauce and garnishes separately so the tortillas don’t become soggy.
Freezing Instructions
Wrap each cooled chimichanga tightly in plastic wrap, then place them in a freezer‑safe zip‑lock bag. They freeze beautifully for up to two months. When you’re ready to eat, skip the thawing step and bake them straight from frozen at 425°F (220°C) for 25‑30 minutes, or until the tortilla is crisp and the interior is steaming hot.
Reheating Methods
The best way to reheat without drying out is to place the chimichanga on a baking sheet, cover loosely with foil, and bake at 350°F (175°C) for 10‑12 minutes, then remove the foil for the final two minutes to restore crispness. If you’re in a hurry, a quick blast in the air fryer for 5 minutes at 375°F (190°C) works wonders, giving you that fresh‑out‑of‑the‑oven crunch.
❓ Frequently Asked Questions
Can I use pre‑cooked rotisserie chicken instead of cooking it from scratch?
Do I have to bake the chimichangas, or can I fry them?
What type of tortilla gives the best result?
Can I make this recipe vegetarian?
How can I make the chimichangas less spicy?
What’s the best way to prevent the tortilla from becoming soggy?
Can I freeze the assembled but unbaked chimichangas?
What side dishes pair well with chimichangas?

Other Reader Favorites
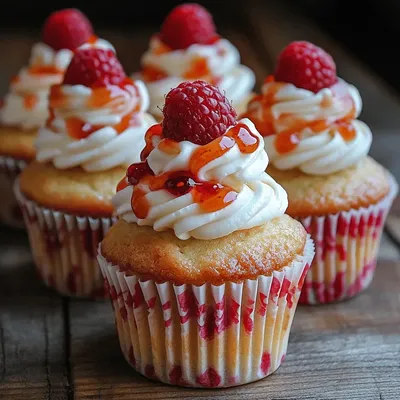 Desserts
Raspberry Cheesecake Cupcakes Recipe
Delicious Raspberry Cheesecake Cupcakes Recipe
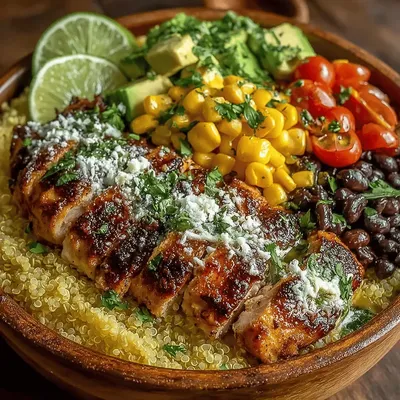 Dinner
Zesty Chipotle Chicken Quinoa Bowls: Flavor Dynamics and Meal Prep Ideas
Delicious Zesty Chipotle Chicken Quinoa Bowls: Flavor Dynamics and Meal Prep Ideas
 Appetizers
Baked Garlic Herb Flatbread Bites
Delicious Baked Garlic Herb Flatbread Bites
 Drinks
Raspberry Bliss Iced Tea: A Refreshing Delight
Delicious Raspberry Bliss Iced Tea: A Refreshing Delight