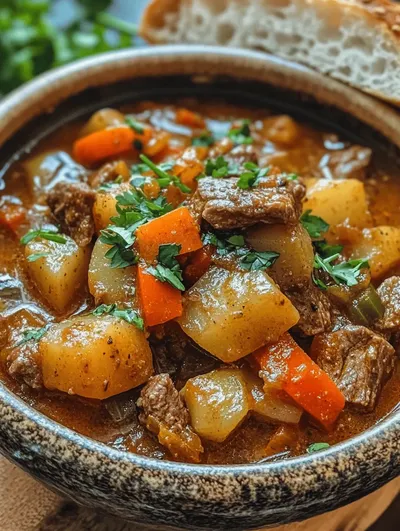
Chicken Pot Pie with Biscuits
 Save
Save
It was one of those crisp autumn afternoons when the wind was whispering through the golden leaves, and I found myself hunched over the kitchen counter, a half‑finished biscuit dough in one hand and a steaming pot of chicken broth in the other. The scent of butter melting in a saucepan, mingling with the earthy perfume of carrots and celery, instantly reminded me of my grandmother’s kitchen, where the only thing louder than the ticking clock was the clatter of a wooden spoon against a cast‑iron pot. As the broth began to bubble, I could already picture the golden biscuits rising like tiny suns atop a velvety sea of chicken and vegetables – a comfort dish that feels like a warm hug on a chilly day. That moment sparked a promise to myself: I would capture that nostalgic magic in a recipe that anyone could recreate, no matter how busy their schedule or how small their kitchen.
Fast forward a few years, and that promise has become the centerpiece of many family gatherings, birthday celebrations, and even quick weeknight meals when the kids are demanding something “home‑cooked” but you’re short on time. The beauty of this Chicken Pot Pie with Biscuits lies in its balance of textures: the creamy, herb‑infused filling is cradled by fluffy, buttery biscuits that turn delightfully crisp on the edges while staying soft inside. Imagine the first bite: a burst of savory broth, tender chicken, and sweet carrots, followed by the satisfying snap of a biscuit crust that melts on your tongue – it’s a symphony of flavors that feels both indulgent and wholesome. And the best part? You don’t need a pastry chef’s skill set; the biscuit topping is as forgiving as it is delicious, making the whole process feel like a joyful experiment rather than a high‑stakes bake.
But wait – there’s a secret twist that takes this dish from good to unforgettable, and I’m only going to reveal it in a moment. Have you ever wondered why restaurant‑style pot pies always have that perfect, glossy glaze on top? The answer is a tiny dash of heavy cream mixed into the biscuit dough, which creates a caramelized sheen that catches the eye and the palate. I discovered this trick during a late‑night cooking marathon, and it’s been a game‑changer ever since. Trust me, once you try it, you’ll never look at a regular biscuit the same way again.
Here’s exactly how to make it — and trust me, your family will be asking for seconds, thirds, and maybe even a fourth serving if you’re feeling generous. Grab a pen, preheat your oven, and let’s dive into a recipe that’s as heart‑warming as a favorite storybook and as satisfying as the first bite of a perfectly baked biscuit.
🌟 Why This Recipe Works
- Flavor Depth: The combination of chicken broth, butter, and a splash of heavy cream creates a rich, velvety base that carries the aromatics throughout the dish. Each spoonful delivers layers of savory notes, from the subtle earthiness of thyme to the bright pop of fresh parsley.
- Texture Contrast: The creamy filling is offset by the biscuit topping, which bakes to a golden, slightly crunchy crust while staying pillowy inside. This contrast keeps every bite interesting and prevents the dish from feeling one‑dimensional.
- Ease of Execution: No rolling pin, no flaky pastry dough – just drop‑in biscuit mix or homemade biscuit dough that you can shape quickly. Even novice cooks can pull this off without feeling overwhelmed.
- Time Efficiency: With a total cooking time of under an hour, you can have a comforting, homemade meal on the table faster than ordering takeout. The steps are streamlined, and the oven does most of the heavy lifting.
- Versatility: Feel free to swap chicken for turkey, add mushrooms, or even toss in some sweet potatoes for a seasonal twist. The recipe is a solid canvas for creative tweaks.
- Nutrition Balance: By using lean chicken breast, plenty of vegetables, and a moderate amount of butter, you get protein, fiber, and healthy fats all in one comforting bowl.
- Ingredient Quality: Fresh herbs and high‑quality broth amplify the dish’s flavor without needing excessive salt or artificial enhancers. You’ll taste the difference immediately.
- Crowd‑Pleasing Factor: Both kids and adults love the familiar flavors, and the biscuit topping adds a fun, handheld element that makes serving easy and mess‑free.
🥗 Ingredients Breakdown
The Foundation: Protein & Veggies
Chicken breast or thighs are the heart of this pot pie, providing lean protein that stays tender when simmered. I prefer using a mix of both because thighs add a touch of richness while breasts keep the dish light. Fresh carrots, peas, and celery contribute natural sweetness and a satisfying bite, plus they bring a splash of color that makes the dish visually inviting. If you’re looking for a deeper flavor, try adding a handful of mushrooms or a diced sweet potato – they’ll absorb the broth beautifully. Choosing organic, locally sourced vegetables will amplify the freshness and give you that farm‑to‑table vibe even if you’re cooking in a city apartment.
Aromatics & Spices: The Flavor Builders
Onion and garlic are the classic duo that lay the aromatic groundwork for any comforting stew. Sauté them until they turn translucent and fragrant, and you’ll hear the kitchen whisper “something delicious is on the way.” Fresh thyme offers a piney, slightly floral note that pairs perfectly with chicken, while parsley adds a bright, herbaceous finish just before serving. A pinch of nutmeg in the biscuit dough is a secret weapon that adds a warm, almost nutty undertone without being overpowering. Salt and freshly cracked black pepper are essential, but remember to season in layers – a little in the broth, a little in the biscuit mixture – to build depth.
The Secret Weapons: Cream & Biscuit Mix
Heavy cream is the magic ingredient that transforms a simple sauce into a luxurious, silky gravy. It not only thickens the mixture but also adds a subtle richness that makes the filling feel indulgent. When mixed into the biscuit dough, a splash of cream creates a tender crumb and a slightly glossy finish, which is why the biscuits turn out so beautifully golden. If you’re short on heavy cream, a blend of whole milk and a tablespoon of melted butter works in a pinch, though the texture won’t be quite as lush. For the biscuit topping, you can use store‑bought mix for convenience or make your own from scratch – the choice is yours, and both yield spectacular results.
Finishing Touches: Butter & Seasonings
Butter is the unsung hero that rounds out the flavor profile, adding a buttery sheen to the sauce and a rich mouthfeel to the biscuits. A knob of butter whisked into the sauce at the end creates a glossy finish that signals the dish is ready for the oven. A dash of Worcestershire sauce or a splash of white wine can deepen the umami notes, but these are optional for those who prefer a straightforward flavor. Finally, a light drizzle of melted butter brushed over the biscuits before they bake will give you that coveted caramelized edge that makes every bite unforgettable.
With your ingredients prepped and ready, let's get cooking. Here's where the fun really begins…
🍳 Step-by-Step Instructions
🔐 Expert Tips for Perfect Results
The Taste Test Trick
Before you pour the final splash of cream into the sauce, take a tiny spoonful and taste it. Adjust the seasoning now – a pinch more salt, a dash of pepper, or a whisper of fresh thyme can make a world of difference. I once served a pot pie that was a bit bland because I skipped this step, and the feedback was immediate. Trust me, a quick taste check saves you from a bland disaster later.
Why Resting Time Matters More Than You Think
Letting the pot pie rest for five minutes after baking isn’t just about cooling; it allows the gravy to thicken further and the biscuits to set, making them easier to cut without crumbling. I used to dive right in, only to find the biscuits sliding off the plate. A short rest transforms the texture from soggy to perfectly firm.
The Seasoning Secret Pros Won’t Tell You
A splash of white wine or a teaspoon of Worcestershire sauce added to the broth right before simmering adds a subtle umami depth that you can’t quite place, but you’ll definitely notice. This is a trick I learned from a professional chef who swore by it for all his comfort dishes. It’s a small addition that elevates the whole flavor profile.
Biscuit Baking Balance
If you notice the biscuits browning too quickly while the filling is still bubbling, loosely cover the dish with a sheet of aluminum foil. This shields the tops, allowing the interior to finish cooking without burning the crust. I’ve saved many a batch with this simple foil trick, especially when my oven runs hot.
The Final Flourish
Just before serving, sprinkle a handful of freshly chopped parsley over the top. The bright green not only adds a pop of color but also a fresh, herbaceous bite that cuts through the richness. It’s a visual cue that says “I care about every detail,” and your guests will notice.
🌈 Delicious Variations to Try
One of my favorite things about this recipe is how versatile it is. Here are some twists I've tried and loved:
Mushroom Medley Pot Pie
Swap out half of the chicken for a blend of cremini, shiitake, and button mushrooms. The earthy mushrooms soak up the broth, adding a deep umami flavor that pairs beautifully with the buttery biscuits. This variation is perfect for a cozy fall dinner when mushrooms are in season.
Spicy Southwest Chicken Pie
Add a teaspoon of smoked paprika, a dash of cumin, and a chopped jalapeño to the filling. Top the biscuits with a sprinkle of shredded cheddar before baking. The result is a warm, slightly smoky heat that awakens the palate and makes the dish feel festive.
Cheesy Broccoli & Chicken
Incorporate a cup of steamed broccoli florets and stir in half a cup of shredded sharp cheddar into the sauce. The cheese melts into a luscious, gooey texture, while the broccoli adds a vibrant green pop. This version is a great way to sneak extra veggies into a kid‑friendly meal.
Herb‑Infused Lemon Chicken Pie
Add the zest of one lemon and a tablespoon of fresh dill to the filling for a bright, citrusy lift. The lemon zest cuts through the richness, making the dish feel lighter and perfect for spring gatherings.
Sweet Potato & Sage
Cube a medium sweet potato and roast it until tender before adding it to the pot. Sprinkle fresh sage leaves into the sauce for an aromatic, slightly peppery note. This combination brings a sweet‑savory balance that’s especially comforting on chilly evenings.
📦 Storage & Reheating Tips
Refrigerator Storage
Allow the pot pie to cool to room temperature, then cover it tightly with aluminum foil or transfer it to an airtight container. It will keep fresh for up to three days in the fridge. When reheating, place the pie in a preheated 350°F oven for 15–20 minutes, or until the biscuits are warmed through and the filling bubbles gently.
Freezing Instructions
This dish freezes beautifully. Portion the pie into individual servings, wrap each tightly in plastic wrap, then place them in a freezer‑safe bag. Freeze for up to two months. To reheat, thaw overnight in the refrigerator, then bake at 375°F for 20 minutes, covering the biscuits with foil for the first 10 minutes to prevent over‑browning.
Reheating Methods
If you’re short on time, a microwave works for a single serving: heat on medium power for 2 minutes, then finish under a broiler for 2 minutes to crisp the biscuit tops. The trick to reheating without drying it out? Add a splash of chicken broth or milk before microwaving; the steam will keep the filling moist while the biscuits regain their golden crunch.
❓ Frequently Asked Questions
Can I use frozen chicken instead of fresh?
What if I don’t have heavy cream?
Can I make this pot pie gluten‑free?
How do I prevent the biscuits from sinking into the filling?
Can I add cheese to the biscuit topping?
What’s the best way to reheat leftovers without making the biscuits soggy?
Can I make this recipe in a slow cooker?
Is it okay to use a different type of biscuit mix?
Transfer the hot chicken filling into a deep 9‑inch baking dish, spreading it evenly with a spatula. Drop spoonfuls of the biscuit dough over the top, spacing them about an inch apart; they will spread slightly as they bake. For an extra glossy finish, brush each biscuit with a mixture of melted butter and a teaspoon of honey – this creates a caramelized crust that looks as good as it tastes.
Place the dish in the preheated oven and bake for 20–25 minutes, or until the biscuits are puffed, golden brown, and fragrant. You’ll know they’re ready when the edges turn a deep amber and you hear a gentle crackle as the steam escapes. Remove the pie from the oven and let it rest for five minutes – this allows the gravy to settle and the biscuits to firm up just enough for clean slicing.
Similar Recipes
 Dinner
Heavenly Stuffed Bell Peppers Treats
Delicious Heavenly Stuffed Bell Peppers Treats
 Dinner
Avocado Ranch Turkey Burgers: A Deliciously Healthy Alternative
Delicious Avocado Ranch Turkey Burgers: A Deliciously Healthy Alternative
 Dinner
Delicious Creamy Gnocchi with Spinach and Feta Recipe
Learn how to make delicious Delicious Creamy Gnocchi with Spinach and Feta Recipe. Easy recipe with…
 Dinner
Crispy Sautéed Shredded Brussels Sprouts with Parmesan: An Amazing Ultimate Recipe
Learn how to make delicious Crispy Sautéed Shredded Brussels Sprouts with Parmesan: An Amazing Ultimate Recipe.…
 Dinner
budgetfriendly winter cabbage and sausage stew with fresh herbs
Learn how to make delicious budgetfriendly winter cabbage and sausage stew with fresh herbs. Easy recipe…
 Dinner
Savory Sesame-Ginger Beef: Quick Weeknight Delight
Learn how to make delicious Savory Sesame-Ginger Beef: Quick Weeknight Delight. Easy recipe with step-by-step instructions.
 Dinner
Sizzling Sheet Pan Fajitas Recipe
Delicious Sizzling Sheet Pan Fajitas Recipe
 Dinner
batch cooking friendly lemon roasted winter vegetables for family meals
Learn how to make delicious batch cooking friendly lemon roasted winter vegetables for family meals. Easy…

Caroline
I cook these recipes at home before they ever land here — simple ingredients, clear steps.