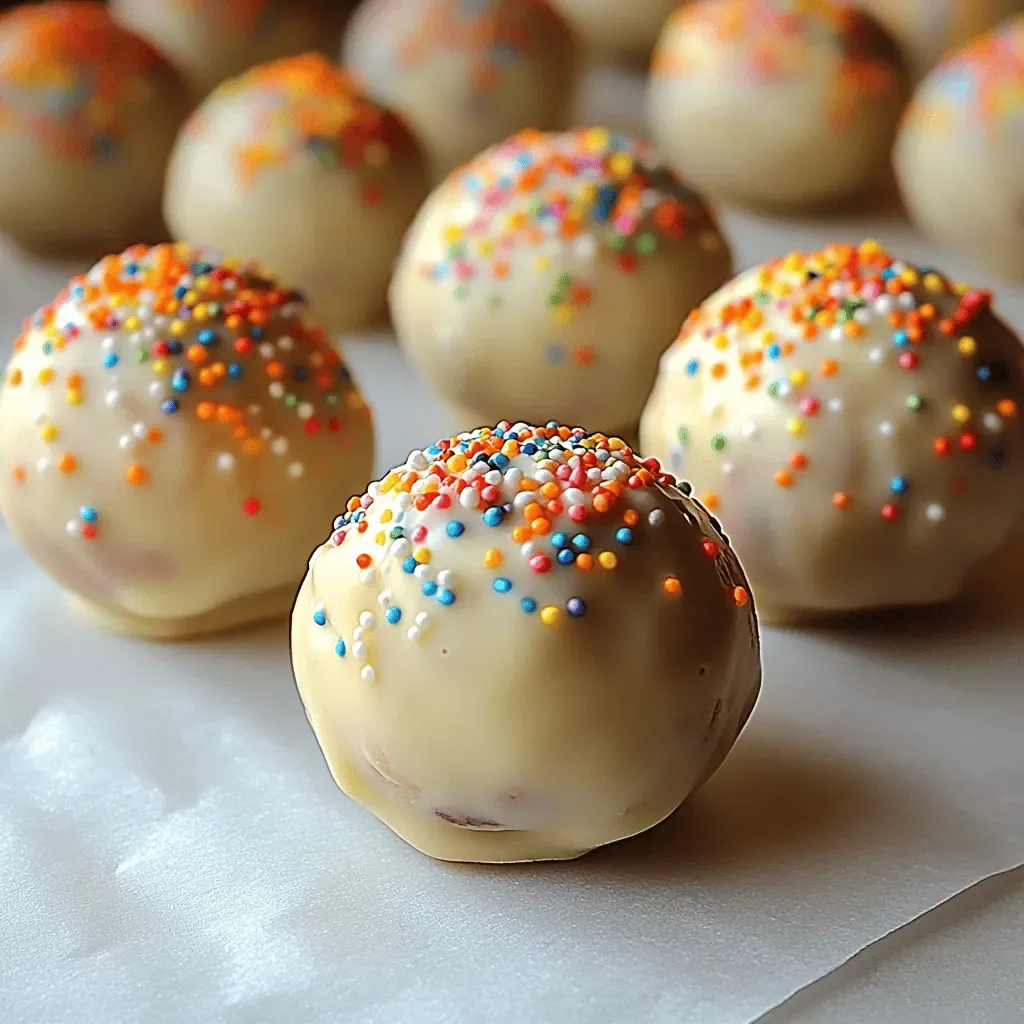
Imagine a sunrise on a plate, where creamy banana meets silky chocolate in a bite‑size treat that feels both indulgent and wholesome. That’s the magic of Choco‑Banana Bliss Pops, a breakfast‑brunch star that turns ordinary mornings into a celebration.
What makes this recipe stand out is the perfect balance of natural sweetness from ripe bananas, the richness of dark chocolate, and a whisper of crunchy nuts—all frozen into a handheld delight that’s easy to eat on the go.
Kids will love the fun pop‑sicle shape, while adults appreciate the sophisticated flavor combo. Serve them at weekend brunches, after‑school snacks, or even as a pre‑workout boost for a quick, energizing bite.
The process is straightforward: blend, dip, freeze, and garnish. In just ten minutes of active time you’ll have a batch of frozen treats that stay fresh all week, ready to pull from the freezer whenever cravings strike.
Why You'll Love This Recipe
Quick & Simple: Only a few minutes of prep and no baking required, making it perfect for busy mornings or last‑minute brunches.
Nutritious Indulgence: Ripe bananas provide potassium and fiber, while dark chocolate adds antioxidants without overwhelming sugar.
Customizable Fun: Swap toppings, change the chocolate type, or add a swirl of nut butter for endless flavor variations.
Kid‑Friendly Appeal: The pop shape feels like a treat, encouraging children to enjoy fruit they might otherwise skip.
Ingredients
The foundation of these pops is ripe, creamy bananas that blend smoothly with a touch of vanilla and a splash of milk for a silky texture. Dark chocolate provides a deep, slightly bitter coat that balances the fruit’s sweetness, while a sprinkle of toasted nuts adds crunch and a hint of salt. Optional toppings like shredded coconut or drizzle of honey let you finish each pop with a personal touch.
Base Blend
- 3 large ripe bananas
- 1/2 cup plain Greek yogurt
- 2 tablespoons honey or maple syrup
- 1 teaspoon pure vanilla extract
- 2 tablespoons whole‑milk or almond milk
Chocolate Coating
- 1 cup dark chocolate chips (70% cacao)
- 1 tablespoon coconut oil
Toppings & Garnish
- 1/4 cup toasted chopped almonds or pistachios
- 2 tablespoons shredded coconut (optional)
- Extra honey for drizzling (optional)
Together, these components create a harmonious bite: the banana‑yogurt base stays creamy even when frozen, while the chocolate shell hardens into a satisfying snap. The nuts and coconut add texture contrast, and the optional honey drizzle offers an extra layer of natural sweetness that ties everything together.
Step-by-Step Instructions
Preparing the Banana Base
Slice the bananas into ½‑inch thick rounds, then arrange them on a parchment‑lined baking sheet. In a high‑speed blender, combine the banana slices, Greek yogurt, honey, vanilla, and milk. Blend until the mixture is completely smooth, stopping to scrape down the sides as needed. This creates a creamy puree that will freeze into a firm yet melt‑in‑your‑mouth texture.
Freezing the Pops
Spoon the banana puree into silicone pop molds, filling each cavity about three‑quarters full. Insert wooden or metal sticks, then place the molds upright in the freezer. Allow the base to set for at least 1 hour, or until firm enough to handle without breaking.
Melting the Chocolate
While the banana cores are freezing, combine dark chocolate chips and coconut oil in a microwave‑safe bowl. Microwave in 30‑second bursts, stirring between each burst, until the chocolate is fully melted and glossy. The oil ensures a thin coating that hardens quickly once dipped.
Dipping & Decorating
- Quick dip. Remove a frozen banana pop from the mold, holding the stick. Submerge it in the melted chocolate, swirling to coat the entire surface. The cold core will cause the chocolate to set within seconds, creating a crisp shell.
- Add toppings. While the chocolate is still wet, sprinkle toasted almonds, shredded coconut, or a pinch of sea salt over the surface. Press gently so the toppings adhere before the chocolate hardens.
- Freeze again. Place the freshly dipped pops back onto the parchment sheet and return them to the freezer for another 15‑20 minutes. This final chill guarantees the coating is fully set and the pops are ready to serve.
Serving
When you’re ready to enjoy, run the sticks under warm water for a few seconds to loosen the pops, then slide them onto a plate. Serve immediately for a refreshing bite, or keep them sealed in a freezer bag for up to a week.
Tips & Tricks
Perfecting the Recipe
Use over‑ripe bananas. The sweeter, softer the fruit, the smoother the puree and the richer the flavor.
Freeze in a single layer. This prevents the base from sticking together and makes removal from the mold effortless.
Keep chocolate thin. Adding a little extra coconut oil if the glaze feels too thick ensures an even coat that hardens quickly.
Work quickly. The frozen core can cause chocolate to set too fast; have all toppings ready before you start dipping.
Flavor Enhancements
Add a pinch of sea salt to the chocolate for a sweet‑salty contrast, or swirl in a teaspoon of almond butter before the final freeze for a nutty undertone. A dusting of cocoa powder after dipping gives an extra chocolatey depth without extra sugar.
Common Mistakes to Avoid
Do not over‑blend the banana base; excess air can cause ice crystals that make the pop icy rather than creamy. Also, avoid using low‑quality chocolate—cheap chocolate can become grainy when it hardens.
Pro Tips
Freeze sticks. Chill the wooden sticks in the freezer for 10 minutes; they won’t melt the chocolate upon contact.
Use a silicone brush. For an ultra‑smooth coating, brush the chocolate onto the pop rather than dipping.
Layer flavors. Drizzle a thin layer of white chocolate before the dark coating for a marbled effect.
Store in airtight bags. Remove as much air as possible to prevent freezer burn and preserve texture.
Variations
Ingredient Swaps
Replace bananas with frozen mango or strawberries for a tropical twist. Swap dark chocolate for white chocolate or milk chocolate if you prefer a sweeter coating. Nuts can be exchanged for crushed pretzels, granola, or toasted pumpkin seeds to suit seasonal cravings.
Dietary Adjustments
Use dairy‑free yogurt (coconut or almond) for a vegan version, and choose vegan dark chocolate chips. For a low‑sugar option, substitute honey with a few drops of stevia or monk fruit sweetener. Gluten‑free is automatic as all ingredients are naturally gluten‑free.
Serving Suggestions
Pair the pops with a fresh fruit salad or a dollop of whipped coconut cream for extra indulgence. They also work as a playful addition to a brunch buffet alongside mini pancakes, yogurt parfaits, and fresh juices.
Storage Info
Leftover Storage
Allow the pops to return to room temperature for a minute, then place them in a zip‑top freezer bag or airtight container. Keep them in the freezer for up to 2 weeks; the chocolate coating remains crisp, and the banana interior stays creamy.
Reheating Instructions
These pops are meant to be enjoyed frozen, but if you prefer a softer bite, run the stick under warm water for 5‑10 seconds before eating. This gently thaws the interior without melting the chocolate shell.
Frequently Asked Questions
Choco‑Banana Bliss Pops bring together the comfort of fruit, the decadence of chocolate, and the convenience of a grab‑and‑go breakfast. With straightforward steps, flexible variations, and handy storage tips, you’ll feel confident serving them any day of the week. Feel free to experiment with toppings and flavors—making them truly your own. Enjoy every cool, creamy bite!