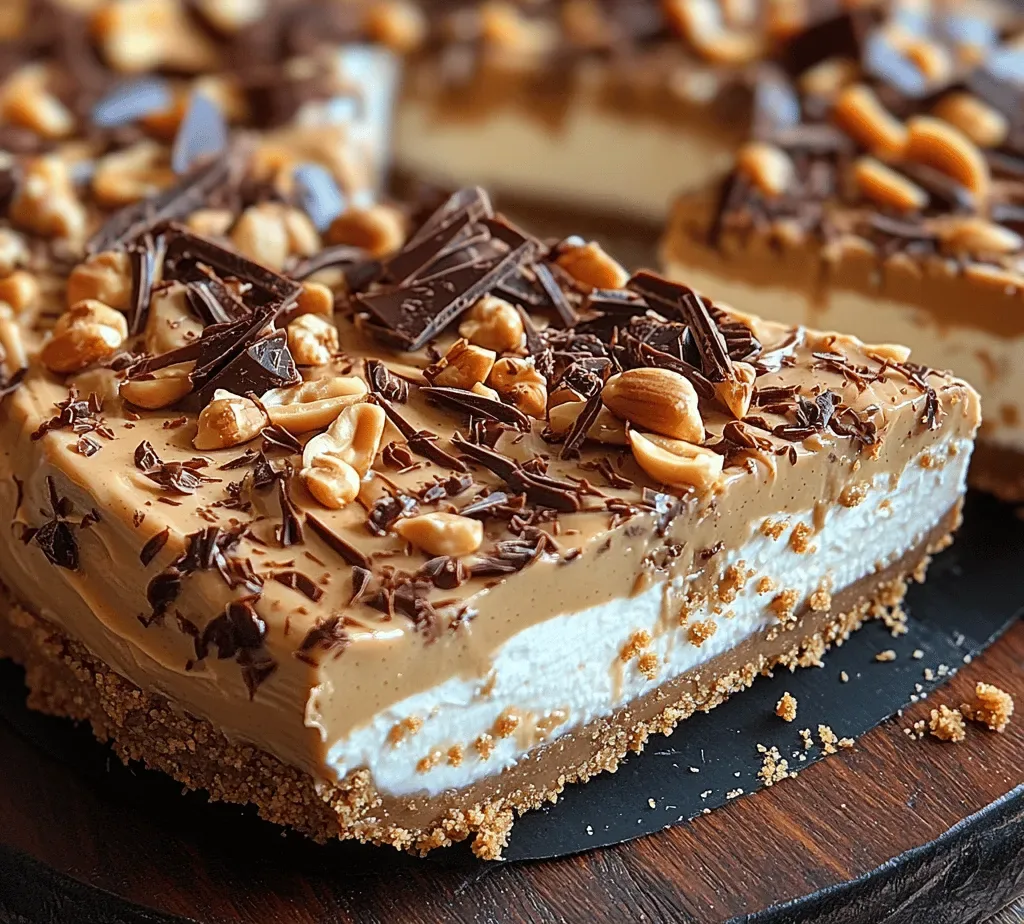
Creamy No-Bake Peanut Butter Delight: A Decadent Dessert Experience

WANT TO SAVE THIS RECIPE?

Introduction to Creamy No-Bake Peanut Butter Delight

In the world of desserts, few things are as enticing as the thought of a no-bake treat. No-bake desserts have gained popularity for their simplicity and ease of preparation, allowing dessert lovers to whip up something delicious without the need for an oven. They are perfect for warm weather gatherings, impromptu celebrations, or even quiet evenings at home when the craving for something sweet hits. The Creamy No-Bake Peanut Butter Delight stands out among no-bake options, offering a rich, creamy experience that is both indulgent and satisfying.

Peanut butter is a beloved ingredient in desserts across the globe. Its unique combination of nuttiness and sweetness makes it incredibly versatile, pairing beautifully with a variety of flavors. Whether it’s in cookies, cakes, or pies, peanut butter has a way of elevating desserts to new heights. The Creamy No-Bake Peanut Butter Delight takes this beloved ingredient and transforms it into a luscious dessert that is sure to impress anyone who tries it.

What sets this no-bake dessert apart is its harmonious blend of creamy textures and rich flavors. The dessert features a smooth filling made from creamy peanut butter and cream cheese, enveloped in a buttery graham cracker crust. Each bite is a delightful experience, as the velvety filling melts in your mouth, perfectly balancing the sweetness and savory notes of peanut butter. Whether you’re serving it at a family gathering, a potluck, or simply treating yourself at home, this dessert is sure to be a crowd-pleaser.

Let’s dive deeper into the components of this delicious treat, exploring what makes each ingredient essential to achieving the perfect Creamy No-Bake Peanut Butter Delight.

Understanding the Ingredients

The Crust

The foundation of any great dessert lies in its crust, and the Creamy No-Bake Peanut Butter Delight is no exception. The crust is crafted from graham cracker crumbs, melted butter, and a touch of sugar. Graham crackers provide a delightful crunch and a hint of sweetness, creating a satisfying texture that contrasts beautifully with the creamy filling. They also impart a subtle flavor profile reminiscent of classic cheesecake crusts, making them an ideal choice for this dessert.

Melted butter plays a crucial role in binding the graham cracker crumbs together, ensuring that the crust holds its shape when sliced. It also adds richness to the crust, enhancing its flavor. A sprinkle of sugar adds a touch of sweetness, which helps to balance the slightly savory notes of the filling. Together, these ingredients create a flavorful base that perfectly complements the creamy filling.

The Filling

The filling is where the magic happens in the Creamy No-Bake Peanut Butter Delight. The star of the show is undoubtedly the peanut butter, which lends its rich, nutty flavor to the dessert. This recipe calls for smooth peanut butter, which creates a velvety texture that blends seamlessly with the other ingredients. The creaminess of the peanut butter is balanced by the tangy flavor of cream cheese, which adds depth to the filling while enhancing its overall texture.

To achieve the right level of sweetness, powdered sugar is incorporated into the filling. Unlike granulated sugar, powdered sugar dissolves easily, ensuring a smooth and creamy consistency without any graininess. Additionally, a splash of vanilla extract amplifies the flavor, adding a warm, aromatic note that enhances the overall taste of the dessert. The combination of these ingredients creates a luxurious filling that is both indulgent and satisfying, making every bite a true delight.

The Whipped Cream

To elevate the Creamy No-Bake Peanut Butter Delight even further, heavy whipping cream is folded into the filling. This addition is key to achieving a light and airy texture, making the dessert feel indulgent without being overwhelmingly heavy. The whipped cream adds a cloud-like quality to the filling, allowing it to maintain its structure while still being incredibly creamy. It serves to balance the richness of the peanut butter and cream cheese, creating a harmonious blend of flavors and textures that is simply irresistible.

Garnishing Options

While the Creamy No-Bake Peanut Butter Delight is delicious on its own, garnishing options can take it to the next level. Toppings like chocolate shavings, chopped peanuts, and additional whipped cream not only enhance the presentation but also add extra layers of flavor and texture. Chocolate shavings provide a rich, decadent touch that complements the peanut butter beautifully, while chopped peanuts add a satisfying crunch that contrasts with the creamy filling.

A dollop of whipped cream on top can create an elegant finish, making the dessert visually appealing and inviting. These garnishing options allow for customization, giving you the freedom to add your personal touch to this delightful treat.

Step-by-Step Instructions for Preparation

Now that we’ve covered the essential ingredients, let’s dive into the preparation process for the Creamy No-Bake Peanut Butter Delight. This step-by-step guide will walk you through each stage, ensuring that you achieve the perfect dessert with ease.

Preparing the Crust

1. Gather Your Ingredients: Start by collecting all the ingredients needed for the crust. You will need graham cracker crumbs, melted butter, and granulated sugar.

2. Preheat Your Oven (Optional): While this is a no-bake recipe, some prefer to lightly toast the graham cracker crumbs to enhance their flavor. If you choose to do so, preheat your oven to 350°F (175°C).

3. Crush the Graham Crackers: If you haven’t purchased pre-crushed graham cracker crumbs, you can easily crush whole graham crackers using a food processor or by placing them in a zip-top bag and crushing them with a rolling pin until fine crumbs form.

4. Mix the Ingredients: In a mixing bowl, combine the graham cracker crumbs, melted butter, and sugar. Use a spatula or fork to mix thoroughly until the crumbs are evenly coated with butter and the mixture resembles wet sand.

5. Form the Crust: Lightly grease a 9-inch springform pan to prevent sticking. Press the crumb mixture into the bottom of the pan, using your fingers or the back of a measuring cup to create an even layer. Make sure to press down firmly to ensure the crust holds together once set.

6. Chill the Crust: Place the crust in the refrigerator for about 15-20 minutes to allow it to firm up before adding the filling. This step is essential for achieving a sturdy crust that can hold the creamy filling.

As you prepare the crust, the anticipation of the delicious Creamy No-Bake Peanut Butter Delight builds. Stay tuned for the next steps where we will create the delectable filling and assemble the dessert, ensuring that every bite is a testament to the perfect blend of flavors and textures.

In the world of desserts, few things are as enticing as the thought of a no-bake treat. No-bake desserts have gained popularity for their simplicity and ease of preparation, allowing dessert lovers to whip up something delicious without the need for an oven. They are perfect for warm weather gatherings, impromptu celebrations, or even quiet evenings at home when the craving for something sweet hits. The Creamy No-Bake Peanut Butter Delight stands out among no-bake options, offering a rich, creamy experience that is both indulgent and satisfying.

Mixing Process: Achieving the Right Consistency

To create a perfect base for your Creamy No-Bake Peanut Butter Delight, the mixing process is crucial. Start by combining your graham cracker crumbs, melted butter, and a pinch of salt in a medium mixing bowl. Using a fork or a spatula, ensure that all the crumbs are evenly coated with the butter, which helps in binding the crust together.

Once mixed, transfer the crumb mixture into your prepared 9-inch springform pan. Here’s where the pressing technique comes into play. Use the back of a measuring cup or your fingers to press the mixture firmly into the bottom of the pan. The key here is to ensure that it’s packed tightly; this creates a solid base that will hold the filling without crumbling. If the crust is not pressed firmly enough, it may fall apart when sliced. A well-pressed crust also enhances the flavor by allowing the butter to infuse into the crumbs, creating a delightful texture.

Making the Filling

Now, let’s move on to the filling. Start by beating the cream cheese in a large mixing bowl. It’s essential that your cream cheese is at room temperature to avoid lumps. Use an electric mixer on medium speed and beat until it’s smooth and creamy, which typically takes about 2 minutes. This step is vital for achieving a velvety texture in your filling.

Once your cream cheese is smooth, slowly add in the creamy peanut butter, powdered sugar, and vanilla extract. Beat the mixture until fully combined and there are no visible streaks. The powdered sugar not only sweetens the filling but also helps to stabilize it, ensuring a firm yet creamy consistency.

Whipping the Cream

Next up is whipping the cream, a crucial step that contributes to the lightness of your dessert. In a separate bowl, pour in the heavy whipping cream. Using a clean mixer bowl and beaters (this ensures there’s no residual fat from the cream cheese), whip the cream on medium-high speed.

Keep an eye on the cream as you whip; it will transition from liquid to soft peaks and eventually to stiff peaks. Stiff peaks are formed when the cream holds its shape firmly when the beaters are lifted. Be cautious not to over-whip, as this can turn your cream into butter. Aim to stop just as stiff peaks form; the cream should be thick but still maintain a fluffy texture.

Combining the Mixtures

Once your whipped cream is ready, it’s time to combine it with the peanut butter mixture. This step requires a gentle folding technique to preserve the airiness of the whipped cream. Start by adding about a third of the whipped cream into the peanut butter mixture; fold it in using a rubber spatula. Use a gentle motion, scraping the bottom and sides of the bowl to incorporate it without deflating the whipped cream.

Continue to fold in the remaining whipped cream in two more additions, being careful to maintain the lightness throughout. The goal is to achieve a uniform mixture that’s airy yet cohesive, creating a delightful filling that will set beautifully in the refrigerator.

Assembling and Chilling

With your crust and filling ready, pour the peanut butter filling over the prepared crust in the springform pan. Use a spatula to smooth the top evenly, making sure it reaches the edges of the crust. This presentation is essential as it will be the first thing your guests see when served.

Once assembled, cover the pan with plastic wrap or a lid, and place it in the refrigerator. Allow the cheesecake to chill for at least 4 hours, or preferably overnight. This chilling period is crucial as it enables the filling to set properly, resulting in a sliceable dessert that holds its shape. The flavors will also deepen during this time, enhancing the overall taste experience.

Serving Suggestions

When it comes to serving your Creamy No-Bake Peanut Butter Delight, presentation matters. Carefully remove the sides of the springform pan once the cheesecake is set. Use a sharp, clean knife to slice the cheesecake into wedges. For an appealing presentation, consider garnishing each slice with a dollop of whipped cream, a sprinkle of crushed peanuts, or a drizzle of chocolate sauce.

This dessert is perfect for various occasions, from birthday parties and family gatherings to casual get-togethers with friends or as a special treat for yourself. It’s versatile and can be served as a showstopper at a dinner party or enjoyed in a more relaxed setting. Pair it with coffee or tea for a delightful afternoon snack, or serve it with fresh fruit for a refreshing contrast.

Nutritional Information

Understanding the nutritional aspects of your Creamy No-Bake Peanut Butter Delight can help you enjoy it mindfully. Each slice offers a delightful blend of indulgence and nutrition. Peanut butter is a great source of protein and healthy fats, while the cream cheese adds calcium and firmness to the filling.

While this dessert is rich and creamy, moderation is key. One slice provides a satisfying treat without overindulgence, allowing you to enjoy the flavors without straying too far from your dietary goals. Consider serving smaller slices if you’re sharing with a group, ensuring everyone can enjoy this delightful dessert without guilt.

Conclusion: The Joy of No-Bake Desserts

Creating a Creamy No-Bake Peanut Butter Delight is a joyful experience that highlights the ease and satisfaction of no-bake desserts. There’s something incredibly rewarding about crafting a delicious treat without the need for an oven. This recipe is perfect for those who might feel intimidated by traditional baking methods or simply want a quicker way to satisfy their sweet tooth.

Encouraging readers to explore more no-bake recipes can unlock a world of possibilities in the kitchen. With minimal equipment and straightforward techniques, these desserts can elevate any dining experience. Whether for special occasions or everyday treats, no-bake desserts like this one bring joy and indulgence to any table. Enjoy making this delightful dessert and sharing it with loved ones, creating memories that are as sweet as the treat itself.

In the world of desserts, few things are as enticing as the thought of a no-bake treat. No-bake desserts have gained popularity for their simplicity and ease of preparation, allowing dessert lovers to whip up something delicious without the need for an oven. They are perfect for warm weather gatherings, impromptu celebrations, or even quiet evenings at home when the craving for something sweet hits. The Creamy No-Bake Peanut Butter Delight stands out among no-bake options, offering a rich, creamy experience that is both indulgent and satisfying.

No-Bake Peanut Butter Cheesecake – So Rich & Creamy!

Indulge in the creamy goodness of a no-bake dessert with this Creamy No-Bake Peanut Butter Delight. Featuring a buttery graham cracker crust and a luscious filling made from smooth peanut butter and cream cheese, this treat is perfect for any occasion. It's easy to prepare and requires no oven, making it a great choice for warm weather or last-minute gatherings. Top it off with chocolate shavings or whipped cream for an elegant finish. Enjoy a decadent experience that will impress everyone!

Ingredients
  

For the crust:

1 ½ cups graham cracker crumbs

½ cup unsalted butter, melted

¼ cup granulated sugar

For the filling:

16 oz cream cheese, softened

1 cup creamy peanut butter

1 cup powdered sugar

1 tsp vanilla extract

1 cup heavy whipping cream

For garnishing:

Chocolate shavings or cocoa powder

Chopped peanuts

Whipped cream (optional)

Instructions
 

Prepare the crust: In a medium bowl, mix together graham cracker crumbs, melted butter, and granulated sugar until well combined. The mixture should resemble wet sand. Press this mixture firmly into the bottom of a 9-inch springform pan to form an even crust. Refrigerate while preparing the filling.

    Make the filling: In a large mixing bowl, beat the softened cream cheese with an electric mixer until smooth and creamy, about 2 minutes. Add the peanut butter, powdered sugar, and vanilla extract, and continue mixing until fully incorporated and smooth.

      Whip the cream: In a separate bowl (you can use a stand mixer), whip the heavy cream until stiff peaks form. Be careful not to over-whip it, as you want it to remain airy.

        Combine: Gently fold the whipped cream into the peanut butter mixture using a spatula. Ensure you give it a gentle hand to keep the texture light and airy.

          Assemble the cheesecake: Pour the filling over the prepared crust and smooth out the top with a spatula. Cover the cheesecake with plastic wrap and refrigerate for at least 4 hours, or overnight for best results.

            Serve: Once set, remove the sides of the springform pan. Garnish your cheesecake with chocolate shavings, chopped peanuts, or whipped cream, as desired. Slice and enjoy!

              Prep Time, Total Time, Servings: 30 minutes | 4 hours + chill time | 8 slices

                WANT TO SAVE THIS RECIPE?

                Leave a Comment

                Recipe Rating