Crispy Pepper Jack Potato Bombs: The Ultimate Recipe Guide
 Save
Save
Imagine a bite‑sized explosion of cheesy, spicy goodness that crackles with a golden‑brown crust—welcome to Crispy Pepper Jack Potato Bombs, the ultimate breakfast‑brunch treat. These little power‑packs take humble potatoes and turn them into a show‑stopping star that will have everyone reaching for seconds.
What makes them truly special is the marriage of creamy pepper jack cheese with a light, airy interior, all encased in a perfectly seasoned breadcrumb coating that stays crisp even after a quick dip in sauce.
Kids, college students, and busy professionals alike will love them as a hearty morning snack or a lazy‑Sunday brunch centerpiece. Pair them with fresh fruit, a bright salad, or a steaming mug of coffee for a balanced start to the day.
The process is straightforward: boil, mash, shape, coat, and bake. A few quick steps, a handful of pantry staples, and you’ll have a crowd‑pleasing dish that looks as impressive as it tastes.
Why You'll Love This Recipe
Bold Flavor Combo: Pepper jack’s spicy tang melds with buttery potatoes, delivering a punchy taste that awakens the palate without overwhelming it.
Simple Prep: With only a few steps and minimal equipment, you can whip up a batch in under an hour—perfect for busy mornings.
Versatile Serving: Serve them solo, with a dipping sauce, or alongside eggs and fruit; they adapt to any brunch spread you imagine.
Kid‑Approved Crunch: The crispy exterior hides a soft, cheesy center, making them irresistible to even the pickiest eaters.
Tips & Tricks
Perfecting the Recipe
Cool the Mash Slightly. Letting the potato‑cheese mash sit for 5‑7 minutes prevents the balls from falling apart when you roll them.
Even Coating. Tap each ball gently after each coating step to remove excess flour or breadcrumbs; this avoids soggy spots.
Use Panko. Panko breadcrumbs give a lighter, airier crunch than traditional breadcrumbs, keeping the bombs from feeling heavy.
High Heat. Baking at 425°F ensures the exterior crisps quickly while the interior stays molten.
Flavor Enhancements
Add a teaspoon of finely grated jalapeño to the mash for extra heat, or stir in a tablespoon of chopped sun‑dried tomatoes for a sweet‑savory twist. A drizzle of truffle oil just before serving elevates the dish to gourmet status.
Common Mistakes to Avoid
Skipping the resting step after mashing can cause the balls to crumble during coating. Over‑crowding the baking sheet leads to steam buildup, which softens the crust. Always give each bomb breathing room.
Pro Tips
Season the Flour. Add a pinch of salt and pepper to the flour for an extra layer of flavor right at the base.
Use a Wire Rack. Placing the bombs on a wire rack set over the baking sheet promotes even airflow, keeping the bottom crisp.
Check Doneness with a Thermometer. Aim for an internal temperature of 165°F (74°C) to guarantee they’re hot throughout.
Make Ahead. Shape and coat the bombs up to a day ahead; keep them refrigerated uncovered, then bake when ready.
Variations
Ingredient Swaps
Swap pepper jack for sharp cheddar or mozzarella for a milder melt. Use sweet potatoes instead of Yukon Gold for a naturally sweeter profile. For a protein boost, fold in cooked, crumbled bacon or chopped ham before shaping the balls.
Dietary Adjustments
For gluten‑free diners, replace all‑purpose flour with rice flour and use gluten‑free panko. Vegans can substitute the cheese with a sharp vegan cheddar, use flax‑egg (1 tbsp ground flax + 3 tbsp water) in place of eggs, and keep the rest of the ingredients plant‑based.
Serving Suggestions
Pair the bombs with a simple arugula salad dressed in lemon vinaigrette, or serve alongside a bowl of hearty tomato bisque for a comforting brunch combo. A side of avocado slices adds creaminess, while a fresh fruit platter balances the spice.
Storage Info
Leftover Storage
Allow any leftovers to cool to room temperature, then transfer them to an airtight container. Store in the refrigerator for up to 3 days. For longer keeping, freeze the unbaked, coated bombs on a parchment sheet, then bag them once solid; they’ll last 2‑3 months.
Reheating Instructions
Reheat refrigerated bombs in a preheated 375°F oven for 10‑12 minutes, or until the coating is crisp again. Frozen bombs need 18‑20 minutes, turning halfway through. A quick broil (1‑2 minutes) at the end restores extra crunch without drying the interior.
Frequently Asked Questions
Can I make these potato bombs ahead of time?
What if I don’t have panko breadcrumbs?
Can I add a dipping sauce?
How do I know when they’re done?
These Crispy Pepper Jack Potato Bombs bring together bold flavor, satisfying crunch, and effortless preparation—making them the perfect centerpiece for any breakfast or brunch gathering. By following the step‑by‑step guide, mastering the coating technique, and using the tips provided, you’ll achieve consistent, restaurant‑quality results every time. Feel free to experiment with the suggested swaps or add your own twist; cooking is an adventure, after all. Serve them hot, share them wide, and enjoy every cheesy, spicy bite!
Crispy Pepper Jack Potato Bombs: The Ultimate Recipe Guide
Delicious Crispy Pepper Jack Potato Bombs: The Ultimate Recipe Guide
Ingredients
Main Ingredients
- 4 cups Yukon Gold potatoes, peeled and cubed
- 1 cup shredded pepper jack cheese
- 2 large eggs, lightly beaten
- ½ cup all‑purpose flour
Coating & Breadcrumbs
- 1 cup panko breadcrumbs
- ½ teaspoon smoked paprika
- ¼ teaspoon garlic powder
Seasonings & Garnish
- Salt and freshly ground black pepper, to taste
- 2 tablespoons chopped fresh chives
- ¼ cup sour cream (optional dipping sauce)
Instructions
Breading the Potato Balls
- Flour Coat. Place the flour in a shallow dish. Roll each potato ball in the flour, shaking off excess. The flour creates a dry surface that helps the egg adhere, preventing the breadcrumbs from slipping off during baking.
- Egg Dip. Transfer the floured balls to a second bowl with the beaten eggs. Submerge each ball, turning to ensure a complete coating. The egg acts as the glue that binds the breadcrumbs to the potato sphere.
- Breadcrumb Mix. Combine panko, smoked paprika, garlic powder, salt, and pepper in a third dish. Roll the egg‑coated balls in this mixture, pressing gently so the crumbs cling firmly. A generous coating guarantees the desired crunch.
Similar Recipes
 Appetizers
Garlic Herb Garden Twists: A Delightful Appetizer for Any Occasion
Delicious Garlic Herb Garden Twists: A Delightful Appetizer for Any Occasion
 Appetizers
Fluffy No-Knead Focaccia Bread Recipe
Delicious Fluffy No-Knead Focaccia Bread Recipe
 Appetizers
Paw-some Pet Salad Bowl: A Wholesome Delight for Your Furry Friend
Delicious Paw-some Pet Salad Bowl: A Wholesome Delight for Your Furry Friend
 Appetizers
Sweet Potato Crunch Bites Recipe: A Delicious and Nutritious Treat
Delicious Sweet Potato Crunch Bites Recipe: A Delicious and Nutritious Treat
 Appetizers
Cacio e Pepe Chicken Wings: A Flavorful Fusion of Italian Tradition and American Comfort
Delicious Cacio e Pepe Chicken Wings: A Flavorful Fusion of Italian Tradition and American Comfort
 Appetizers
creamy spinach and potato soup with garlic and lemon zest
Whip up this velvety spinach potato soup brightened with garlic and lemon zest. Quick, healthy, soul-warming—grab…
 Appetizers
Crispy Bang Bang Salmon Bites: A Flavorful Delight for Any Occasion
Delicious Crispy Bang Bang Salmon Bites: A Flavorful Delight for Any Occasion
 Appetizers
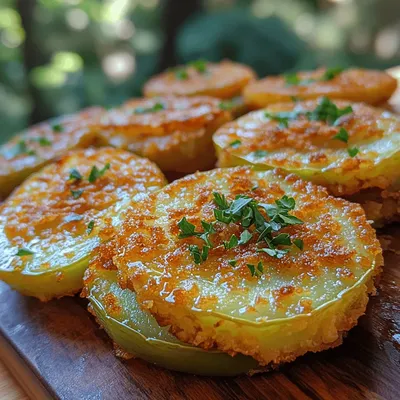
Crispy Southern-Style Fried Green Tomatoes: A Classic Recipe
Delicious Crispy Southern-Style Fried Green Tomatoes: A Classic Recipe

Caroline
I cook these recipes at home before they ever land here — simple ingredients, clear steps.