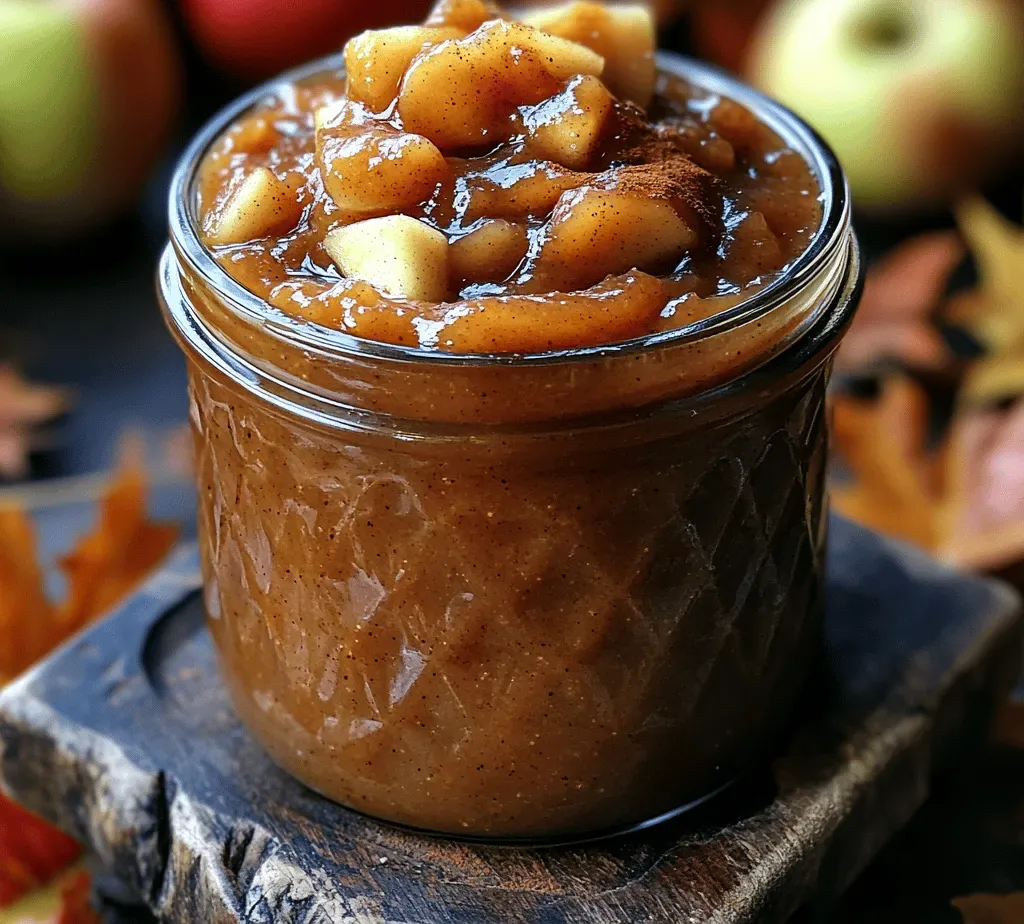
Imagine the scent of caramelized apples, warm cinnamon, and a hint of nutmeg drifting through your kitchen on a crisp autumn morning. That’s the magic of our Slow Cooker Apple Butter, a spread that turns ordinary toast into a celebration of fall flavors.
What sets this recipe apart is the slow‑cooker method, which gently coax‑s the natural sugars from the apples, creating a silky, deep‑gold spread without the need for constant stirring. A splash of bourbon and a pinch of sea salt add complexity, making each bite both sweet and intriguingly savory.
This apple butter is perfect for anyone who loves cozy breakfasts—families gathering around the table, brunch parties with friends, or a quiet weekend treat for two. Serve it on warm biscuits, swirl it into oatmeal, or dollop it over pancakes for a truly indulgent start to the day.
The process is delightfully hands‑off: slice the apples, combine the ingredients in the slow cooker, set the timer, and let the appliance do the work while you enjoy a leisurely morning. When the timer dings, you’ll have a velvety, aromatic butter ready to spread.
Why You'll Love This Recipe
Deep Autumn Flavor: The combination of apples, cinnamon, and a splash of bourbon creates a rich, seasonal taste that feels like a hug in a jar.
Set‑and‑Forget Convenience: Once the ingredients are in the slow cooker, you can walk away, making it ideal for busy mornings or lazy weekends.
Versatile Uses: Spread it on toast, swirl into yogurt, or use as a glaze for roasted pork—its sweet‑spicy profile works in both sweet and savory dishes.
Natural Sweetness: No refined sugars are needed; the apples provide all the sweetness, keeping the spread wholesome and kid‑friendly.
Ingredients
For this apple butter I rely on fresh, crisp apples and a balanced blend of spices to achieve that classic autumn character. The slow cooker does the heavy lifting, turning the fruit into a smooth, spread‑ready consistency while preserving the bright apple notes. A splash of bourbon deepens the flavor, and a pinch of sea salt lifts the sweetness without making it cloying. The result is a spread that’s both comforting and sophisticated.
Apples & Fruit
- 4 lbs (about 8‑10) firm apples, peeled, cored, and diced
- 1/2 cup unsweetened apple juice
Sweeteners & Spices
- 1/4 cup pure maple syrup
- 1 tsp ground cinnamon
- 1/2 tsp ground nutmeg
- 1/4 tsp ground cloves
- 1/2 tsp sea salt
Liquid & Enhancements
- 2 tbsp bourbon (optional, for depth)
- 1 tbsp lemon juice (brightens flavor)
The apples provide the natural sweetness and body, while the maple syrup adds a caramel‑like richness that pairs perfectly with the warm spices. The bourbon is optional but recommended for an adult‑friendly depth; it evaporates slightly during cooking, leaving a subtle, smoky undertone. Sea salt balances the sweetness, and the lemon juice prevents the butter from turning overly sweet, keeping the flavor bright and layered.
Step-by-Step Instructions
Preparing the Fruit
Begin by washing, peeling, coring, and dicing the apples into roughly ½‑inch cubes. Uniform pieces ensure even cooking and a smooth final texture. Toss the diced apples with the lemon juice to prevent browning and to add a subtle tang that balances the eventual sweetness.
Building the Slow‑Cooker Base
- Layer the Apples. Place the prepared apple cubes into the slow cooker, spreading them in an even layer. This ensures each piece is exposed to the heat and spices uniformly.
- Add Liquids and Sweeteners. Pour the apple juice, maple syrup, and bourbon over the apples. Stir gently to coat the fruit; the liquid will help create steam and prevent the apples from drying out.
- Season Generously. Sprinkle the cinnamon, nutmeg, cloves, and sea salt across the mixture. The spices will infuse the apples as they break down, creating the signature warm aroma.
- Set the Cooker. Cover and cook on the low setting for 6‑8 hours, or on high for 4‑5 hours. The low, slow heat gently caramelizes the sugars, turning the apples into a thick, spreadable purée.
- Blend to Perfection. Once the apples are tender (they should fall apart with a fork), use an immersion blender directly in the slow cooker to puree the mixture until smooth. For an ultra‑silky texture, blend for 2‑3 minutes, scraping the sides as needed.
- Final Adjustments. Taste the butter; if you prefer a sweeter note, drizzle in a little extra maple syrup. If the flavor feels too intense, a splash more lemon juice will brighten it. Stir well to incorporate.
Finishing & Storing
Transfer the hot apple butter to sterilized glass jars, leaving about ¼‑inch headspace. Seal while still warm to create a light vacuum seal. Let the jars cool to room temperature before refrigerating. The butter will thicken further as it cools, achieving a perfect spreadable consistency.
Tips & Tricks
Perfecting the Recipe
Choose the Right Apples. A mix of sweet (Fuji, Gala) and tart (Granny Smith) apples creates depth and prevents the butter from becoming one‑dimensional.
Don’t Rush the Cook. Low‑and‑slow is key; the longer caramelization period develops the complex flavor profile that defines true apple butter.
Blend While Warm. Blending hot butter yields a smoother texture. If you prefer a chunkier spread, pulse the blender briefly instead of full‑speed.
Flavor Enhancements
Add a teaspoon of vanilla extract after blending for a fragrant undertone, or stir in a pinch of smoked paprika for a subtle, smoky edge. For extra richness, swirl in a tablespoon of unsalted butter just before jarring.
Common Mistakes to Avoid
Skipping the lemon juice can lead to a flat, overly sweet butter, while over‑blending can turn the spread too thin. Also, avoid opening the lid during the cooking cycle; each peek releases steam and prolongs cooking time.
Pro Tips
Sterilize Jars Properly. Boil jars and lids for 10 minutes before filling to extend shelf life and prevent spoilage.
Adjust Sweetness Gradually. Taste after the initial blend; you can always add more maple syrup, but you can’t remove excess sweetness.
Use a Heavy‑Bottomed Slow Cooker. It distributes heat evenly, preventing hot spots that could scorch the butter.
Variations
Ingredient Swaps
Swap maple syrup for honey or brown rice syrup for a different sweetness profile. Replace bourbon with a splash of apple brandy or omit alcohol entirely for a kid‑friendly version. For a spicy twist, stir in a pinch of cayenne or a drizzle of chipotle hot sauce after blending.
Dietary Adjustments
The recipe is naturally gluten‑free and dairy‑free. To make it vegan, use maple syrup (already vegan) and skip the butter swirl. For a low‑sugar version, reduce maple syrup by half and add a sugar‑free sweetener such as erythritol, adjusting to taste.
Serving Suggestions
Spread on toasted sourdough, swirl into overnight oats, or dollop on top of fluffy pancakes. It also works beautifully as a glaze for roasted pork tenderloin or as a dip for crisp apple slices at a brunch buffet.
Storage Info
Leftover Storage
Allow the apple butter to cool completely, then transfer to airtight glass jars. Store in the refrigerator for up to 3 weeks. For longer keeping, freeze in portion‑size containers for up to 3 months; thaw in the fridge overnight before use.
Reheating Instructions
Reheat gently on the stovetop over low heat, stirring frequently, until it reaches a spreadable consistency. Alternatively, microwave in 30‑second intervals, stirring between bursts, until warmed through. Adding a splash of apple juice or water while reheating restores any lost moisture.
Frequently Asked Questions
This Slow Cooker Apple Butter captures the essence of autumn in a jar—sweet, spiced, and effortlessly smooth. By following the step‑by‑step guide, you’ll create a versatile spread that shines on toast, in baked goods, or as a glaze for savory dishes. Feel free to experiment with the suggested swaps and make it your own. Enjoy the comforting flavors of fall, spooned straight from the jar onto your favorite breakfast treat!