Introduction
Focaccia bread is a beloved staple in Italian cuisine, cherished for its airy texture and versatile nature. This flatbread, often seasoned with olive oil and herbs, finds its way to tables around the world, serving as a delightful accompaniment to meals or a base for scrumptious sandwiches. The beauty of focaccia lies not just in its flavor but also in its adaptability; it can be customized to suit a variety of palates, making it a favorite among home bakers and gourmet chefs alike.
In this article, we will explore a unique approach to creating focaccia—through a no-knead recipe that promises simplicity without compromising on taste. This method is perfect for those who may be intimidated by traditional bread-making techniques that often require extensive kneading and precise timing. The no-knead focaccia method allows you to enjoy the process of making bread with minimal effort, yielding a fluffy and flavorful loaf that will impress your family and friends.
Expect to find a detailed, step-by-step guide that breaks down the entire process of making no-knead focaccia bread. We will delve into the essential ingredients that contribute to the bread’s delightful texture and flavor, along with insights that will elevate your baking experience. Whether you are a seasoned baker or a novice in the kitchen, this article aims to inspire you to make your own homemade focaccia, filling your home with the irresistible aroma of freshly baked bread.
Understanding Focaccia Bread
Focaccia bread has its roots deeply embedded in Italian culinary traditions, dating back to ancient times. While its exact origins are somewhat murky, it is widely believed that focaccia was originally baked by the Etruscans, who were among the first to cultivate wheat in Italy. The name “focaccia” is derived from the Latin word “focus,” meaning “hearth,” which reflects the bread’s method of baking on hot stones or in an oven, often directly on the hearth.
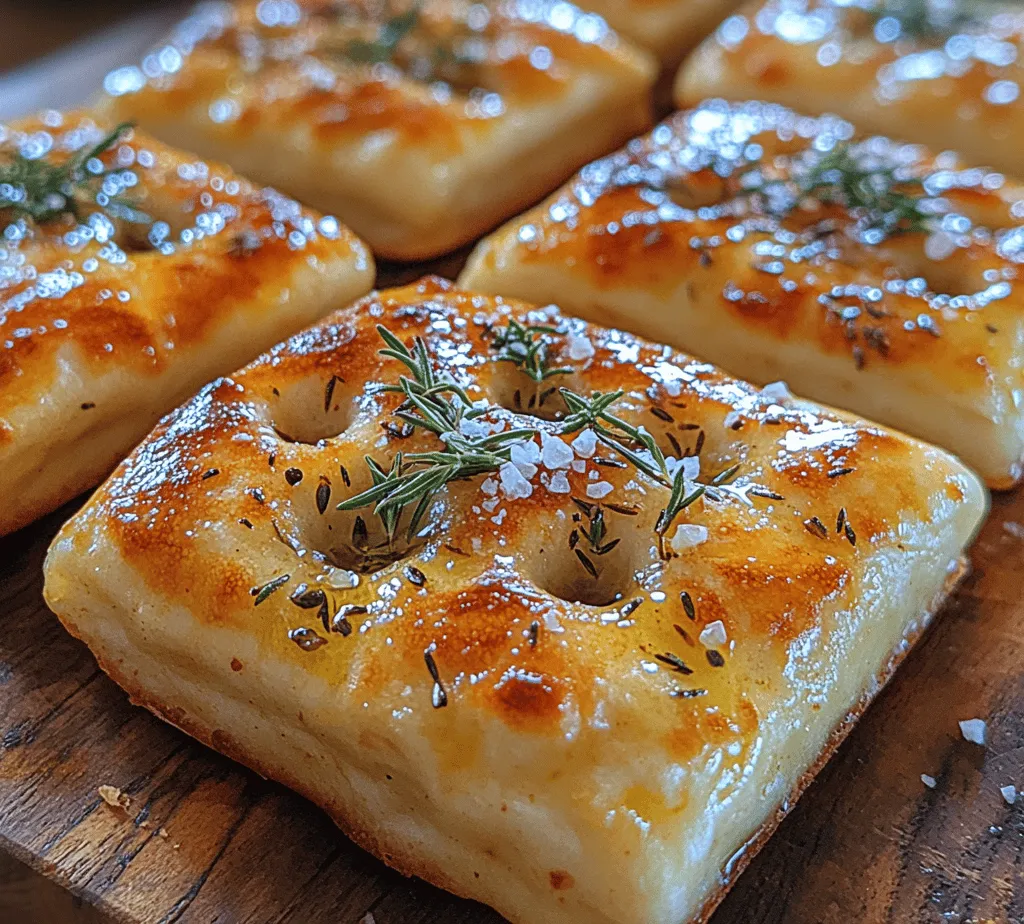
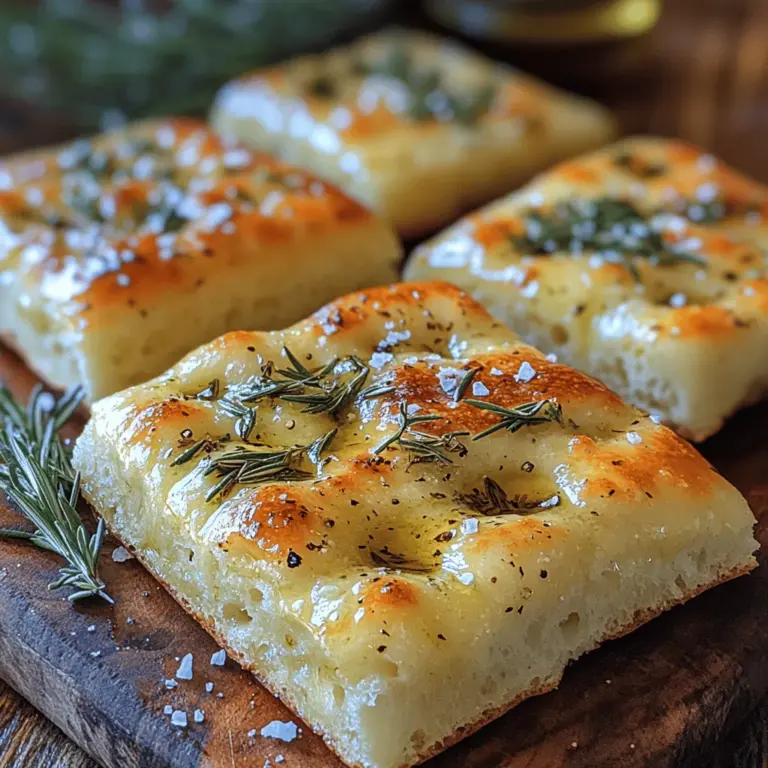
Traditionally, focaccia is a flat, oven-baked bread that is characterized by its soft, chewy interior and a crisp, golden exterior. It is typically flavored with olive oil, salt, and various toppings, such as herbs, olives, or tomatoes. Beyond serving as an accompaniment to meals, focaccia is incredibly versatile; it can be sliced and used for sandwiches, served as an appetizer dipped in olive oil, or enjoyed on its own as a snack.
One of the defining features of focaccia is its texture. A well-made focaccia should have an airy crumb structure, created by the fermentation process that occurs during rising. The addition of olive oil not only enriches the flavor but also contributes to the bread’s characteristic tenderness. Each bite should deliver a delightful balance of flavors, with the richness of the olive oil and the aromatic notes from herbs mingling harmoniously.
Essential Ingredients for No-Knead Focaccia
To embark on your no-knead focaccia journey, it’s essential to gather the right ingredients. Each component plays a crucial role in achieving the desired texture and flavor of the bread. Let’s break down the essential ingredients for this recipe:
All-Purpose Flour
All-purpose flour forms the backbone of your focaccia, providing the necessary structure to the bread. Its moderate protein content allows for a good rise while keeping the bread tender. For best results, opt for unbleached all-purpose flour, which has not undergone chemical treatments that can alter its baking properties.
Warm Water
Water is a vital ingredient in any bread recipe, as it activates the yeast and helps to hydrate the flour. In this no-knead focaccia recipe, warm water (around 100°F or 38°C) is used to ensure proper yeast activation. This temperature range is ideal for encouraging yeast growth without killing the yeast, allowing for a good rise during fermentation.
Instant Yeast
Instant yeast, also known as rapid-rise or quick-rise yeast, is a fast-acting leavening agent that simplifies the bread-making process. It can be mixed directly into the dry ingredients without the need for proofing, making it perfect for a no-knead recipe. The quick-acting properties of instant yeast help achieve a light and airy focaccia in a shorter amount of time.
Kosher Salt
Kosher salt is an essential ingredient in bread-making, not only for flavor but also for strengthening the dough structure. It enhances the overall taste of the focaccia and helps control yeast activity during fermentation. Using kosher salt is recommended due to its coarse texture, which dissolves evenly in the dough.
Extra Virgin Olive Oil
The use of extra virgin olive oil in focaccia is what sets it apart from other breads. Its rich flavor and health benefits contribute significantly to the final product. Olive oil not only adds moisture to the dough but also helps create that coveted crispy crust. Additionally, drizzling olive oil on top of the focaccia before baking enhances the golden color and adds depth to the flavor profile.
Garlic Powder and Fresh Herbs
While optional, garlic powder and fresh herbs are fantastic additions that elevate the flavor of your focaccia. Garlic powder adds a subtle, aromatic quality, while fresh herbs like rosemary or thyme provide a burst of freshness. Feel free to experiment with different herbs and spices, adapting the recipe to your taste preferences.
Flaky Sea Salt
Flaky sea salt is the finishing touch that adds a delightful crunch to the focaccia’s surface. It enhances the flavor with bursts of saltiness while providing a pleasing textural contrast to the soft interior. Sprinkle a generous amount of flaky sea salt over the top of the dough before baking to achieve that signature focaccia look and taste.
The Art of Making No-Knead Focaccia
Mixing the Dough
Now that you have gathered all the essential ingredients, it’s time to start making your no-knead focaccia. The mixing process is straightforward and requires minimal effort. In a large mixing bowl, combine the all-purpose flour, instant yeast, kosher salt, and any desired flavorings, such as garlic powder or dried herbs. Stir the dry ingredients together until they are well incorporated.
Next, slowly pour in the warm water and a generous amount of extra virgin olive oil. Using a wooden spoon or spatula, mix the ingredients until they come together to form a rough, shaggy dough. The dough should be sticky and slightly tacky, which is a sign that you’ve added enough liquid. Do not worry about achieving a perfectly smooth dough at this stage; the beauty of no-knead bread is that you don’t need to knead the dough.
The First Rise
Once the dough is mixed, cover the bowl with plastic wrap or a clean kitchen towel. This step is crucial for allowing the dough to rise and develop its flavor. Place the bowl in a warm, draft-free area of your kitchen and let it rest for approximately 2 to 3 hours. During this time, the yeast will ferment and produce carbon dioxide, causing the dough to rise and expand.
As the dough rises, keep an eye on its appearance. You should notice it becoming puffy and bubbly, indicating that fermentation is taking place. The ideal dough should double in size, with a rough and airy texture that promises a light focaccia. Once the rising time is complete, you are ready to shape and bake your focaccia, moving one step closer to enjoying your homemade bread masterpiece.
Stay tuned for the next part of this article, where we will guide you through the shaping, second rise, and baking process to create the ultimate fluffy and flavorful no-knead focaccia bread.

Shaping the Dough
Once your focaccia dough has completed its initial rise, it’s time to shape it for baking. This part of the process is crucial as it determines the final texture of your bread. To begin shaping, lightly flour your work surface to prevent sticking. Gently turn the dough out from the bowl onto the floured surface.
Using floured hands, carefully stretch the dough into a rectangle or circle, depending on your preference and the type of pan you are using. Avoid pressing down too hard; the goal is to preserve as many air bubbles as possible. This gentle handling is vital for achieving the desired fluffy texture in your focaccia.
Techniques for Transferring the Dough to the Baking Dish Without Deflating
Transferring your shaped dough to the baking dish can be a delicate process. A great technique is to use a large spatula or your hands, ensuring you lift the dough without applying too much pressure. If you’re using a baking sheet, you can also place it directly on the pan, allowing the dough to spread naturally.
Once in the dish, if you need to adjust the shape, use your fingertips to gently coax the dough into the corners or edges without flattening it. This helps maintain the airiness that contributes to the light, fluffy texture of your focaccia.
Tips on Handling the Dough Gently to Maintain Airiness
To keep your focaccia light and airy, remember these tips:
– Always flour your hands and work surface when working with the dough.
– Use a light touch; avoid heavy pressing or rolling.
– If the dough is sticky, sprinkle a bit more flour rather than adding excessive pressure.
– Allow the dough to relax for a minute if it resists stretching, as this will make it easier to shape.
The Second Rise
After shaping, it’s essential to allow the focaccia to undergo a second rise. This step is crucial as it contributes significantly to the overall fluffiness of your bread. During this rise, the yeast continues to work, creating more air pockets and enhancing the flavor.
Time Considerations and Environmental Factors That Affect Rising
The time required for this second rise can vary based on environmental factors such as temperature and humidity. Typically, you should let the dough rise for about 30-45 minutes in a warm, draft-free area. If your kitchen is cool, consider placing the dough in an oven with just the light on or near a warm stovetop.
Keep an eye on the dough; it should become noticeably puffy and expand in size. If your kitchen is particularly warm, the dough may rise faster, so adjust your timing accordingly.
Preparing for Baking
With your dough perfectly shaped and risen, it’s time to prepare for baking.
Preheating the Oven
Preheating your oven is a critical step in achieving that perfect crispy crust that focaccia is known for. Aim to preheat your oven to a temperature of 425°F (220°C). A hot oven helps create steam, which is essential for a good rise and crust formation.
Recommended Oven Settings and Tips for Best Results
For the best results, use the conventional baking setting rather than convection, as the latter can dry out the bread. If your oven has a baking stone or steel, place it in the oven during preheating. This will help maintain consistent heat and improve the crust quality.
Dimpling and Topping the Dough
Before baking, it’s time to create those signature dimples in your focaccia. Using your fingertips, gently press down into the surface of the dough, creating deep wells. This technique not only gives focaccia its distinctive look but also allows the olive oil and toppings to pool, enhancing flavor and moisture.
Techniques for Creating Dimples and Ensuring They Are Filled with Oil
To ensure the dimples are filled with oil, drizzle a generous amount of high-quality extra virgin olive oil over the surface before and after dimpling. The oil will seep into the wells, enriching the flavor and keeping the bread moist during baking.
Suggestions for Topping Variations, Including Herb Combinations and Additional Seasonings
Focaccia is incredibly versatile when it comes to toppings. Here are some delicious variations to consider:
– Herb Infusion: Sprinkle fresh rosemary or thyme over the surface for a classic Italian flavor.
– Garlic Lovers: Add minced garlic or whole cloves for a robust taste.
– Cheesy Delight: Top with grated Parmesan or mozzarella cheese.
– Mediterranean Twist: Incorporate sun-dried tomatoes, olives, or feta cheese for a flavorful addition.
– Spicy Kick: Add red pepper flakes or sliced jalapeños for a bit of heat.
Baking the Focaccia
With the oven preheated and your focaccia ready, it’s time to bake. Carefully place the pan in the oven and set a timer for 20-25 minutes.
Detailed Baking Instructions and What to Expect During Baking
During baking, your focaccia will rise further and develop a beautiful golden-brown color. Keep an eye on it, as oven temperatures can vary. If the top is browning too quickly, you can cover it loosely with aluminum foil to prevent burning while allowing it to continue cooking through.
Indicators of Doneness: Color, Texture, and Aroma
Your focaccia is done when it is beautifully golden brown on top, and the edges are slightly crisp. The texture should feel light and airy when you tap the bottom of the bread; it should sound hollow. The aroma of freshly baked bread should fill your kitchen, signaling that it’s time to take it out and cool.
Cooling and Serving the Focaccia
Once baked, it’s essential to allow your focaccia to cool before slicing into it. This cooling time helps set the crumb structure and enhances the texture.
Importance of Cooling Time and How It Affects Texture
Let the focaccia cool in the pan for about 10-15 minutes, then transfer it to a wire rack to cool completely. Cooling on a rack prevents moisture from building up underneath, which can lead to a soggy bottom.
Serving Suggestions: Best Ways to Enjoy Focaccia, Including Drizzling with Olive Oil or Pairing with Dips
Focaccia is delightful on its own, but there are many ways to enhance your eating experience:
– Drizzle with Olive Oil: Serve warm with a drizzle of high-quality olive oil and a sprinkle of sea salt.
– Dipping Sauces: Pair with balsamic vinegar, olive oil, or a homemade garlic dip.
– Sandwich Base: Use slices of focaccia as a base for sandwiches, layering with meats, cheeses, and roasted veggies.
– Accompany Soups and Salads: Focaccia also pairs wonderfully with soups and salads, adding a hearty element to your meal.
Nutritional Information
Focaccia can be a delicious addition to your diet, and while it’s a treat, it’s essential to be mindful of portion sizes. A standard serving size of focaccia is about 1 ounce, which typically contains around 100 calories. The nutritional benefits of focaccia include:
– Carbohydrates: A good source of energy.
– Fats: Healthy fats from olive oil.
– Vitamins and Minerals: Depending on the toppings, you can also add various nutrients.
Conclusion
Making your own focaccia bread at home is not just about the final product; it’s about the joy of the baking process and the aroma that fills your kitchen. The versatility of focaccia allows you to experiment with flavors and toppings, ensuring that you can create a version that suits your taste.
Encourage yourself to try this recipe, as each step is an opportunity to learn and enjoy baking. The satisfaction of sharing homemade focaccia with family and friends is truly unmatched, and it’s sure to become a favorite in your household. Embrace the art of bread-making, and enjoy the delicious rewards of your efforts!


