Introduction
Focaccia bread is a beloved staple in Italian cuisine, celebrated for its airy texture and rich flavor. Its versatility makes it a perfect accompaniment to meals, a base for sandwiches, or simply enjoyed on its own, drizzled with olive oil and sprinkled with sea salt. This Italian flatbread is characterized by its golden, crispy crust and soft, fluffy interior, making it irresistible to many. Its popularity has transcended borders, with home bakers and professional chefs alike embracing this delectable bread for its simplicity and delicious results.
One of the most appealing ways to make focaccia is through the no-knead method. This technique allows for minimal hands-on time while still producing a light, chewy, and flavorful loaf. The no-knead approach is especially attractive for those who may feel intimidated by traditional bread-making methods that require extensive kneading and precise timing. With just a few simple steps, you can create a focaccia that rivals those found in the finest Italian bakeries.
Using fresh, high-quality ingredients is paramount in achieving the best flavor and texture in your focaccia. When you opt for fresh herbs, quality olive oil, and robust flour, you elevate the bread beyond the ordinary, creating a loaf that is truly memorable.
Understanding Focaccia Bread
Focaccia is more than just bread; it embodies the essence of Italian culinary tradition. This flatbread has a unique texture that’s both crispy on the outside and soft on the inside, often enhanced by the generous use of olive oil. The flavor is rich, with a slightly salty profile that pairs beautifully with various toppings, from herbs and olives to roasted vegetables and cheeses. Focaccia is often used as a base for sandwiches or served alongside soups and salads, making it a versatile addition to any meal.
The historical roots of focaccia can be traced back to ancient Rome, where it was known as “panis focacius,” meaning “hearth bread.” Traditionally baked on the hearth of the oven, focaccia evolved over the centuries, adapting to the regional ingredients and baking techniques of Italy. Each region boasts its own variations of focaccia, showcasing local flavors and preferences. For instance, Liguria is famous for its “focaccia alla genovese,” which is often topped with olive oil and sea salt, while Apulia is known for its “focaccia barese,” characterized by tomatoes and olives.
These regional differences highlight not only the diversity of Italian cuisine but also the creativity that can be infused into this simple bread. Whether you prefer a classic version or something more adventurous, focaccia offers endless possibilities for customization.
Key Ingredients for Fluffy No-Knead Focaccia
To create a delightful focaccia, understanding the key ingredients and their roles is essential. Each component contributes to the overall structure, flavor, and texture of the bread.
– All-Purpose Flour: This is the backbone of your focaccia. All-purpose flour provides the necessary structure for the bread, allowing it to rise beautifully while maintaining a soft crumb. For an even more airy texture, consider using bread flour, which has a higher protein content.
– Salt: Salt is crucial not only for enhancing the flavor of the focaccia but also for controlling yeast activity. It strengthens the gluten structure, ensuring a chewy texture, and helps in developing the bread’s overall flavor.
– Instant Yeast: The leavening agent in this recipe, instant yeast, allows for quick rising without the need for prolonged fermentation. It is convenient and reliable, making it a favorite among home bakers.
– Warm Water: Warm water activates the yeast, helping it to bloom and produce carbon dioxide, which is essential for the dough’s rise. The temperature of the water should be around 100°F (38°C) to ensure optimal activation without killing the yeast.
– Olive Oil: A generous amount of olive oil not only adds moisture to the dough but also creates a tender crumb. The oil contributes to the rich flavor of the focaccia and enhances the overall eating experience.
– Fresh Rosemary: This fragrant herb is a classic topping for focaccia, imparting an aromatic note that complements the bread’s flavors. Fresh herbs elevate the dish, providing a burst of freshness with every bite.
– Optional Toppings: One of the great joys of making focaccia is the ability to customize it according to your preferences. You can experiment with different toppings, such as sliced olives, sun-dried tomatoes, or even caramelized onions, to create a loaf that reflects your tastes.
Step-by-Step Instructions for Making Focaccia
The process of making fluffy no-knead focaccia is straightforward and rewarding. Follow these detailed instructions to create your own delicious loaf.
Mixing the Dry Ingredients
Begin by gathering your dry ingredients. In a large mixing bowl, combine 4 cups of all-purpose flour, 2 teaspoons of salt, and 2 teaspoons of instant yeast. It’s important to mix these ingredients thoroughly to ensure even distribution. Using a whisk or a fork, combine the flour, yeast, and salt until they are well integrated. This step is essential, as it prevents any clumps of yeast or salt from forming in the dough.
Tip for Achieving the Right Texture: When measuring your flour, avoid packing it into the measuring cup. Instead, spoon the flour into the cup and level it off with a knife. This method ensures you are using the right amount of flour, which is crucial for the dough’s consistency.
Incorporating Wet Ingredients
Next, it’s time to add the wet ingredients. Create a well in the center of the dry ingredients and pour in 1 ¾ cups of warm water and ¼ cup of olive oil. Using a spatula or wooden spoon, gently mix the ingredients together until they form a shaggy dough. The dough will be sticky and wet, which is expected for no-knead bread.
How to Combine Wet and Dry Ingredients Effectively: Avoid overmixing; the goal is just to bring the ingredients together. You want to ensure that there are no dry flour pockets remaining in the bowl. If the dough seems too dry, you can add a little more water, one tablespoon at a time, until you achieve the desired consistency.
First Rise
Once the dough is mixed, it’s time for the first rise. Cover the bowl with plastic wrap or a clean kitchen towel and set it in a warm, draft-free location for about 1 to 2 hours. The dough should roughly double in size during this time, which is essential for developing flavor and texture.
Explanation of the Fermentation Process: This initial fermentation allows the yeast to feed on the sugars in the flour, producing carbon dioxide gas that causes the dough to rise. As it ferments, the dough develops a complex flavor profile that enhances the overall taste of the focaccia.
Ideal Conditions for Rising Dough: A warm kitchen is ideal for the rising process. If your kitchen is cool, you can place the bowl in a slightly warm oven (turned off) or near a radiator. Alternatively, you can fill a shallow dish with hot water and place it alongside the dough to create a warm, humid environment.
Preparing the Baking Pan
While the dough is rising, it’s a good time to prepare your baking pan. Choose a baking dish or sheet pan, preferably one that is at least 12×17 inches, and generously grease it with olive oil. The oil will not only prevent the dough from sticking but also contribute to the crispy crust that focaccia is known for.
After the first rise, you will transfer the dough to the prepared pan. This step is crucial in shaping your focaccia; the dough should be gently stretched and spread to fill the pan, ensuring an even thickness throughout.
As you can see, making fluffy no-knead focaccia is an approachable and enjoyable process that yields incredible results. The next steps will involve additional rising and baking techniques to complete this culinary masterpiece, ensuring that your focaccia is everything you desire: crispy on the outside, pillowy on the inside, and bursting with flavor.

Techniques to Ensure a Non-Stick Surface for a Perfect Crust
To achieve that coveted crusty exterior on your focaccia, it’s essential to prepare your baking surface properly. Here are some techniques to ensure your focaccia doesn’t stick and develops a beautiful crust:
1. Use Parchment Paper: Line your baking sheet or pan with parchment paper. This not only prevents sticking but also helps with easy clean-up. Ensure that the paper extends beyond the edges of the pan for easy removal.
2. Oil Generously: Coat the baking surface with a generous amount of olive oil. The oil not only prevents sticking but also contributes to a rich flavor and crispy texture. Aim for a thin layer of oil, making sure to cover the entire surface.
3. Dust with Flour: If you prefer, you can dust the oiled surface lightly with flour or semolina. This adds an extra layer of non-stick protection and enhances the crust’s texture.
Shaping the Dough
Shaping your focaccia is a crucial step that impacts its final texture and appearance. When handling the dough, it’s important to be gentle to maintain the air bubbles that contribute to its fluffiness.
1. Flour Your Hands: Lightly flour your hands to prevent sticking while you work with the dough.
2. Gently Stretch the Dough: Turn the dough out onto your prepared baking surface. Using your fingertips, gently stretch it into a rectangle or circle, depending on your pan shape. Be careful not to press too hard; you want to keep as many air bubbles intact as possible.
3. Even Thickness: Aim for an even thickness across the dough, about 1 to 1.5 inches thick. This will ensure even cooking and a consistent texture throughout.
Second Rise
The second rise is a critical phase in developing the fluffy texture that makes focaccia special.
1. Cover and Rest: After shaping, cover the dough with a clean kitchen towel or plastic wrap. Allow it to rise in a warm, draft-free area for about 30 to 45 minutes. This additional rest allows the yeast to ferment further, which enhances the flavor and produces a lighter, airier bread.
2. Check for Puffed Up Texture: You’ll know your dough is ready when it has puffed up noticeably. This extra rise is key to achieving that light and airy crumb structure.
Preheating the Oven
An optimal baking temperature is vital for achieving a perfect focaccia crust.
1. Temperature Settings: Preheat your oven to 450°F (232°C). A high temperature helps to create steam in the oven, which is crucial for the bread to rise and develop that golden, crispy crust.
2. Use a Baking Stone: If you have one, place a baking stone in the oven while it preheats. This will help distribute heat evenly and improve crust development.
Dimpling and Topping the Dough
Dimpling is a signature part of focaccia that not only adds visual appeal but also enhances the flavor absorption of toppings.
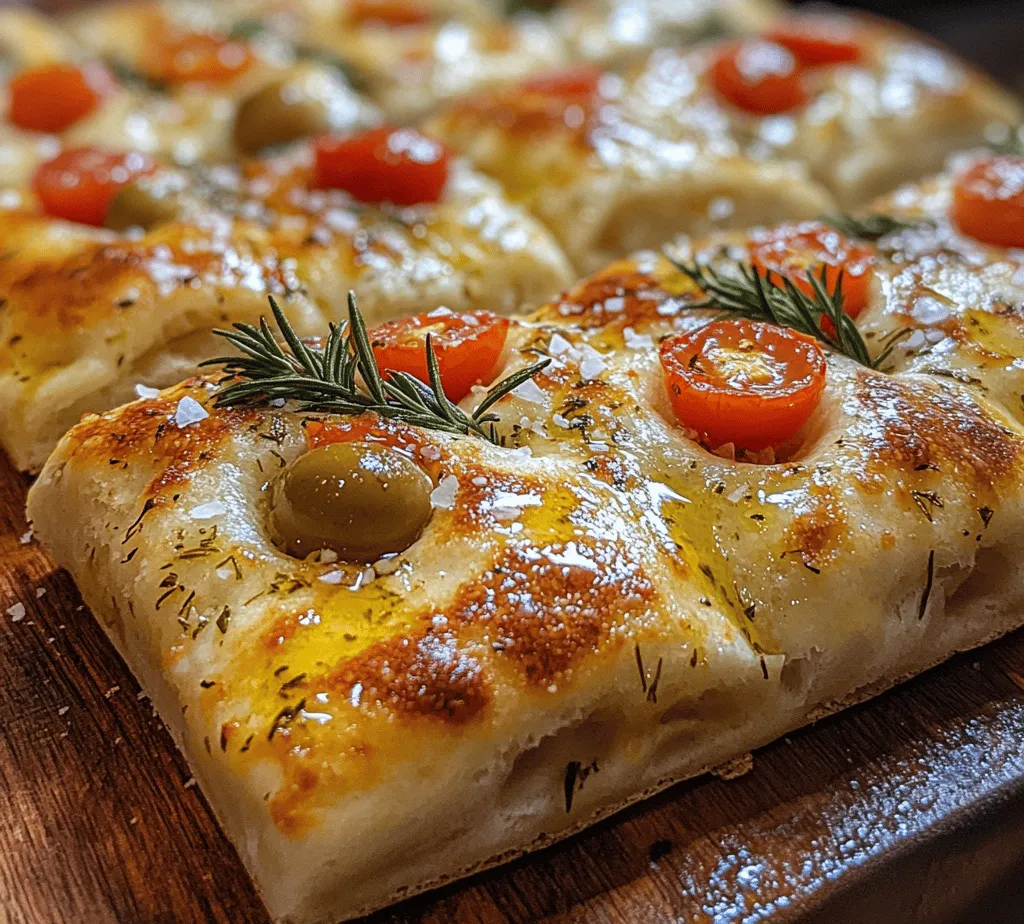
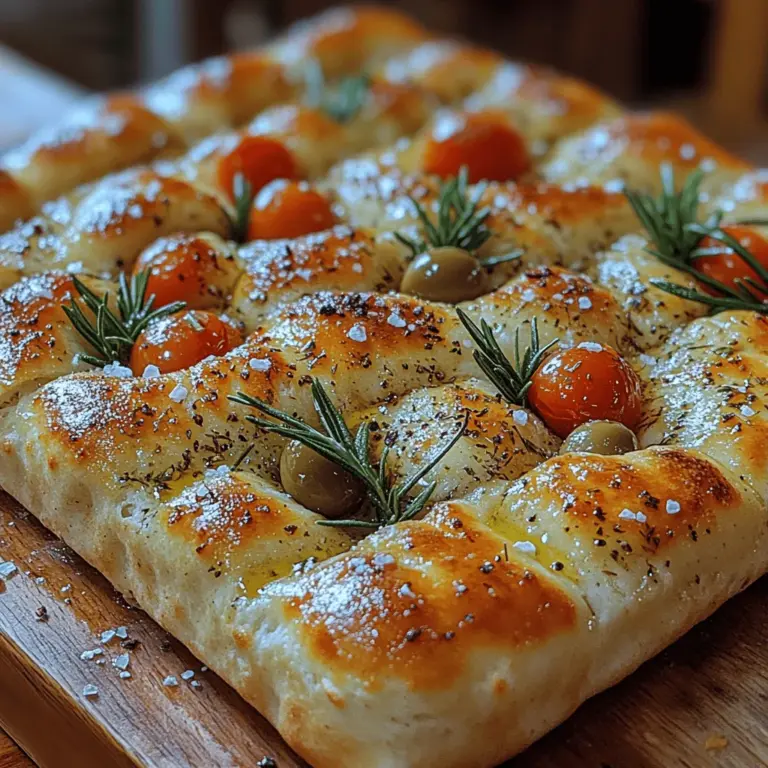
1. Creating Dimples: Once the dough has finished its second rise, use your fingertips to create deep dimples all over the surface of the dough. Push down gently, being careful not to deflate the dough too much. These dimples will hold olive oil and toppings, allowing for maximum flavor infusion.
2. Topping Suggestions:
– Classic Toppings: Traditional toppings include coarse sea salt and fresh rosemary. These add a wonderful savory flavor.
– Additional Options: Consider adding sliced olives, cherry tomatoes, or thinly sliced onions for extra texture and flavor. For a twist, sprinkle with grated Parmesan or feta cheese before baking.
Baking the Focaccia
Understanding how to identify when your focaccia is done is essential.
1. Indicators of Doneness: Bake your focaccia for about 20-25 minutes or until it is golden brown. You can tap the bottom of the loaf; it should sound hollow. The top should be crispy, and the edges should have a delightful golden hue.
2. Oven Monitoring: Keep an eye on the focaccia as it bakes. Ovens can vary in temperature, so adjust your baking time as necessary to achieve the perfect crust.
Cooling and Serving
Cooling is an often overlooked step that can significantly affect the final taste and texture of your focaccia.
1. Cooling on a Rack: Once baked, remove the focaccia from the oven and transfer it to a wire rack. This allows air to circulate around the bread, preventing the bottom from becoming soggy.
2. Best Serving Practices: Allow the focaccia to cool for at least 10-15 minutes before slicing. This resting period helps the texture set, making it easier to cut. Serve warm or at room temperature, drizzled with a bit of olive oil or accompanied by balsamic vinegar for dipping.
Flavor Variations and Customization Options
One of the exciting aspects of making focaccia is the ability to customize it to your tastes.
1. Herb Variations: Experiment with different herbs such as thyme, oregano, or basil. Fresh herbs can add unique flavors that elevate the bread.
2. Savory vs. Sweet: For a sweet variation, consider adding caramelized onions or a sprinkle of sugar and cinnamon. Dried fruits like figs or apricots can also be incorporated for a delightful sweet-savory contrast.
3. Pairing Suggestions: Focaccia pairs beautifully with various dishes. Serve it alongside soups and salads, or use it to make sandwiches. It also complements antipasti platters, offering a wonderful base for cured meats and cheeses.
Storing and Reheating Focaccia
To maintain the freshness of your focaccia, proper storage practices are essential.
1. Storing: Store leftover focaccia in an airtight container at room temperature for up to 2 days. If you want it to last longer, wrap it tightly in plastic wrap and store it in the refrigerator for up to a week.
2. Reheating: To reheat, preheat your oven to 350°F (175°C). Wrap the focaccia in aluminum foil to retain moisture, and heat for about 10-15 minutes. This will help restore its original texture. Alternatively, you can slice and toast it lightly in a skillet for a crispy edge.
Health Benefits of Focaccia Ingredients
Focaccia can be a wholesome addition to your diet, thanks to its nutritious ingredients.
1. Nutritional Insights: The primary ingredients in focaccia—flour, water, yeast, and salt—provide carbohydrates and protein. Whole grain flour can boost fiber content, making it a healthier choice.
2. Benefits of Olive Oil and Fresh Herbs: Olive oil is a heart-healthy fat rich in antioxidants. Fresh herbs not only enhance flavor but also provide vitamins and minerals.
Conclusion
Making homemade focaccia is a delightful and rewarding experience that allows for creativity in the kitchen. The joy of sharing this fluffy, flavorful bread with family and friends is unparalleled. Don’t hesitate to experiment with toppings and flavors to find combinations that excite your palate.
Focaccia has a rich history in culinary traditions, embodying the art of bread-making. Each loaf you create is a testament to the simple yet profound joy of cooking. Embrace the process, and you’ll find that this no-knead focaccia becomes a staple in your kitchen, serving as a canvas for your culinary creativity and a delicious companion to your meals.


