Irresistible Easy Chicken Parmesan Recipe for Dinner Delight
 Save
Save
I still remember the first time I tried to recreate that restaurant‑style chicken Parmesan at home. The kitchen was warm, the window was open to a breezy summer evening, and the scent of garlic and simmering tomato sauce drifted from the pot like a promise of comfort. As I lifted the lid, a cloud of fragrant steam hit me, carrying notes of sweet basil, tangy tomatoes, and a whisper of melted mozzarella that made my mouth water instantly. I could almost hear the sizzle of the chicken hitting the pan, a golden chorus that signaled the start of something truly special. That moment sparked a culinary adventure that has become a family favorite, and today I’m sharing every detail with you.
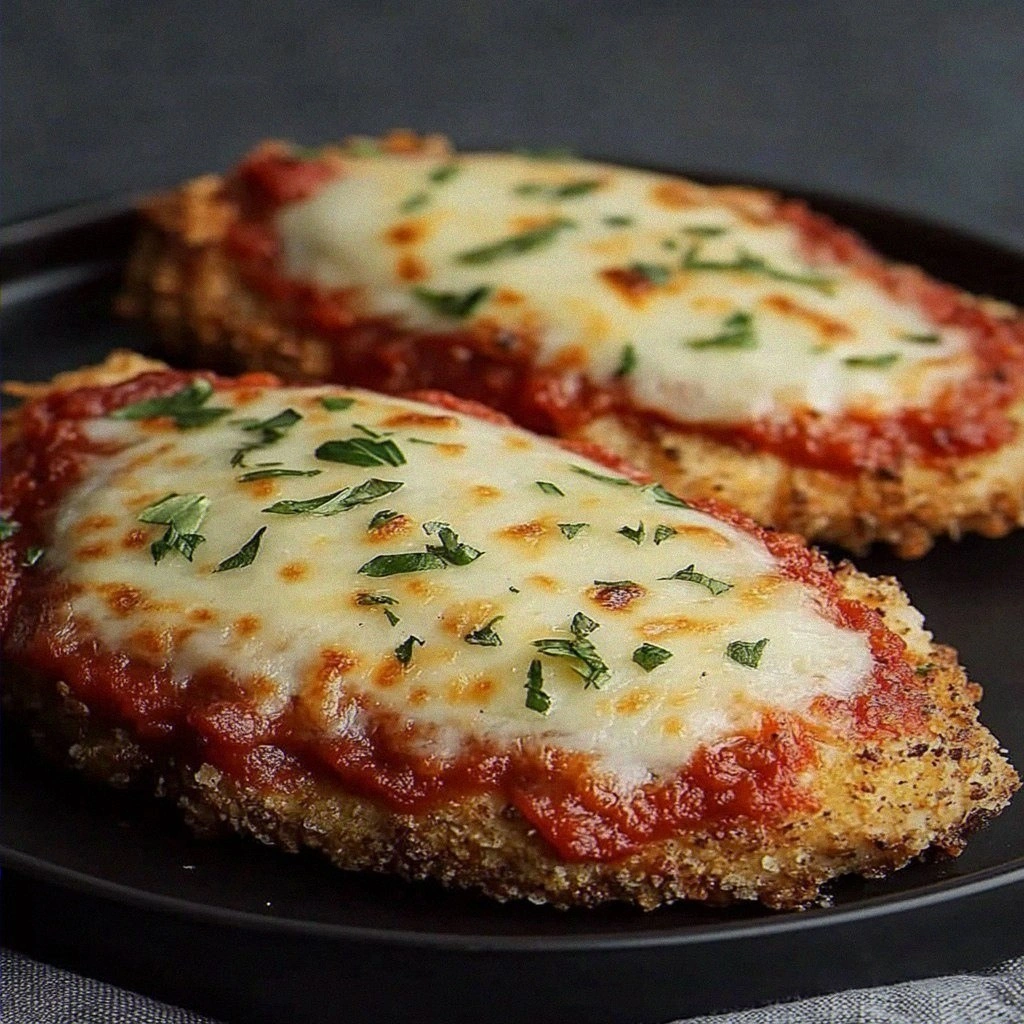
What makes this chicken Parmesan “irresistible” isn\'t just the classic Italian flavors; it\'s the way each element works together to create a symphony of taste and texture. The chicken stays juicy inside while the coating turns delightfully crisp, the marinara sauce brings a bright acidity that cuts through the richness, and the mozzarella stretches in those perfect, gooey ribbons that make every bite feel like a hug. Imagine the contrast of a crunchy crust giving way to tender meat, all bathed in a bubbling sea of cheese and sauce—your taste buds will thank you. But wait, there’s a secret trick in step 4 that elevens your flavor depth beyond anything you’ve tried before. Trust me, you’ll want to bookmark this recipe.
Why should this recipe earn a spot on your dinner table? Because it’s designed for real life—no fancy equipment, no obscure ingredients, just pantry staples and a few simple techniques that turn ordinary chicken into a show‑stopping entrée. Whether you\'re feeding a bustling family, impressing friends at a casual get‑together, or simply craving a comforting night in, this dish fits the bill. The best part? It\'s quick enough to fit into a busy weeknight schedule, yet elegant enough to feel like a celebration. So roll up your sleeves, gather your ingredients, and let\'s dive into a cooking experience that will become a cherished tradition in your home.
Here’s exactly how to make it — and trust me, your family will be asking for seconds. I\'ll walk you through each step, share a handful of pro tips, and even reveal a few variations that let you customize the dish to suit any craving. Ready? Let’s get cooking and turn an ordinary dinner into an unforgettable delight.
🌟 Why This Recipe Works
- Flavor Depth: The combination of Italian‑seasoned breadcrumbs, a rich marinara, and melted mozzarella creates layers of flavor that build with each bite, delivering a balanced taste that’s both savory and slightly sweet.
- Texture Contrast: A crisp, golden crust gives way to juicy, tender chicken underneath, while the sauce adds a silky smoothness and the cheese offers a stretchy, melty finish.
- Ease of Preparation: All steps use common kitchen tools—just a skillet, a baking dish, and a whisk—so even beginners can achieve restaurant‑grade results without a steep learning curve.
- Time Efficiency: With a total cook time under an hour, you can have a hearty, satisfying dinner on the table even after a long day at work.
- Versatility: This base recipe welcomes countless twists—from swapping mozzarella for provolone to adding a layer of sautéed spinach—making it adaptable for different dietary preferences.
- Nutrition Balance: Lean chicken provides protein, while the sauce offers antioxidants from tomatoes, and a modest amount of cheese adds calcium without overwhelming the dish.
- Ingredient Quality: By using fresh, high‑quality ingredients you control the flavor, texture, and overall healthfulness, which is often lost in pre‑packaged meals.
- Crowd‑Pleasing Factor: Even picky eaters love the familiar flavors, and the golden, cheesy appearance makes it an instant visual winner on any dinner table.
🥗 Ingredients Breakdown
The Foundation
Boneless, Skinless Chicken Breasts: About 3‑4 chicken breasts will do nicely; they’re the canvas for all the flavors we’ll layer on. Choose breasts that are uniform in thickness so they cook evenly—if they’re thick, consider butterflying them or pounding them to an even ½‑inch thickness. This ensures a consistent bite and prevents the interior from staying pink while the exterior crisps. I always prefer to let the chicken rest at room temperature for about 15 minutes before seasoning; it helps the salt penetrate more evenly.
Salt and Pepper: A pinch of salt and a dash of pepper enhance the chicken’s natural flavors and act as a subtle seasoning before the coating. Don’t be shy—season both sides generously, because the crust will lock in those flavors during frying. If you love a bit of heat, a pinch of crushed red pepper flakes can be added to the seasoning mix for an unexpected kick.
Aromatics & Spices
All‑Purpose Flour: This is the first layer that helps the egg adhere to the chicken, creating a barrier that keeps the meat moist. Using a light dusting prevents the coating from becoming gummy. For a slightly nuttier flavor, you can swap half of the flour for whole‑wheat flour, but keep the texture in mind.
Eggs: You’ll need two large eggs, beaten well for the breading process. The egg acts as the glue that holds the breadcrumbs to the chicken, and a little milk or water added to the beat can make the coating even more tender. I once omitted the eggs and ended up with a dry, crumbly crust—lesson learned!
The Secret WeaponsThe Secret Weapons
Breadcrumbs: Use Italian‑seasoned breadcrumbs for extra flavor; they give the chicken its delightful crunch and infuse herbs like oregano and basil right into the crust. If you want a gluten‑free version, swap in crushed gluten‑free crackers or panko made from rice flour. For an extra burst of aroma, toast the breadcrumbs lightly in a dry pan before using them.
Olive Oil: Essential for frying that beautiful golden crust; extra virgin works best because it adds a fruity note that complements the tomato sauce later on. Use enough to coat the pan—about ¼ cup—so the chicken doesn’t stick and achieves an even color. I love to heat the oil until it shimmers; that’s the sweet spot before the chicken hits the pan.
Finishing Touches
Marinara Sauce: Store‑bought or homemade—both options work brilliantly to bring everything together. Look for a sauce with no added sugars or excess salt; a simple blend of crushed tomatoes, garlic, onion, and basil works wonders. If you have time, simmer the sauce for 15 minutes with a splash of red wine for depth.
Shredded Mozzarella Cheese: About two cups for topping; because who doesn’t love cheese? Choose a blend of whole‑milk mozzarella for meltability and part‑skim for a slightly firmer texture. For an extra flavor boost, mix in a handful of grated Parmesan or Pecorino right before baking.
With your ingredients prepped and ready, let’s get cooking. Here’s where the fun really begins, and you’ll discover that a few simple tricks can turn this classic into a show‑stopping masterpiece.
🍳 Step‑by‑Step Instructions
🔐 Expert Tips for Perfect Results
The Taste Test Trick
Before you slide the chicken into the oven, take a tiny bite of the crust. It should be golden, fragrant, and have a faint hint of herbs from the breadcrumbs. If it tastes flat, sprinkle a pinch of extra Italian seasoning onto the crust before baking. This tiny adjustment can elevate the entire dish.
Why Resting Time Matters More Than You Think
After frying, let the chicken rest on a wire rack for 3‑4 minutes. This pause allows the juices to redistribute, preventing them from spilling out when you add the sauce. I once cut into the chicken immediately, and the juices ran straight into the sauce, making it watery—lesson learned.
The Seasoning Secret Pros Won’t Tell You
Add a dash of smoked paprika to the breadcrumb mix. It adds a subtle smoky depth that mimics the flavor of a wood‑fired oven without any extra equipment. This secret is why my version often receives compliments about its “restaurant‑style” taste.
Baking vs. Broiling – When to Choose Each
If you love a bubbly, slightly charred cheese topping, finish the dish under the broiler for the last 2‑3 minutes. Keep a close eye on it; the cheese can go from perfectly browned to burnt in seconds. For a gentler melt, stick with the oven’s bake setting at 375°F for 20 minutes.
Choosing the Right Cheese Blend
While mozzarella provides that classic melt, mixing in a handful of grated Parmesan adds a sharp, salty edge that cuts through the richness. I’ve also tried a blend of mozzarella and provolone for a deeper flavor and a stretchier melt. Experiment to find your favorite combination.
Sauce Matters – Fresh vs. Jarred
A quick simmer of canned tomatoes with fresh garlic, a splash of olive oil, and a pinch of sugar can transform a store‑bought sauce into something that tastes homemade. If you have time, roast the tomatoes first for a caramelized sweetness that elevates the entire dish.
🌈 Delicious Variations to Try
One of my favorite things about this recipe is how versatile it is. Here are some twists I\'ve tried and loved:
Mediterranean Spinach & Feta
Layer a handful of sautéed spinach and crumbled feta between the sauce and mozzarella before baking. The salty feta and earthy spinach add a fresh, tangy dimension that pairs beautifully with the rich sauce.
Spicy Jalapeño Popper
Mix diced jalapeños and a spoonful of cream cheese into the mozzarella layer. The heat from the jalapeños and the creamy bite of the cheese create a bold flavor that surprises the palate.
Pesto‑Swirl
Stir a couple of tablespoons of basil pesto into the marinara sauce before spreading it over the chicken. This adds an herbaceous, nutty undertone that makes the dish feel elevated without extra effort.
BBQ‑Infused
Replace half of the marinara with your favorite BBQ sauce and add a sprinkle of smoked Gouda on top. The sweet‑smoky flavor profile turns the classic into a backyard‑style favorite.
Eggplant Parmesan Twist
Swap the chicken for thinly sliced, breaded eggplant rounds for a vegetarian version. The same sauce and cheese work perfectly, and the eggplant’s creamy interior mimics the tenderness of chicken.
📦 Storage & Reheating Tips
Refrigerator Storage
Allow the leftovers to cool to room temperature (no more than 2 hours), then store them in an airtight container. They stay fresh for up to 3 days. When reheating, keep the sauce separate until the last minute to prevent sogginess.
Freezing Instructions
Wrap each portion tightly in plastic wrap, then place them in a freezer‑safe bag. Freeze for up to 2 months. To reheat, thaw overnight in the refrigerator, then bake at 350°F for 20‑25 minutes until heated through.
Reheating Methods
The trick to reheating without drying it out? Add a splash of water or extra marinara to the dish, cover with foil, and bake at 325°F for 15 minutes. For a crispier crust, uncover for the last 5 minutes. Microwaving is an option, but you’ll lose the delightful crunch.
❓ Frequently Asked Questions
Can I use chicken thighs instead of breasts?
What if I don\'t have Italian‑seasoned breadcrumbs?
How can I make the sauce less acidic?
Is it okay to bake the chicken instead of frying?
Irresistible Easy Chicken Parmesan Recipe for Dinner Delight
Learn how to make delicious Irresistible Easy Chicken Parmesan Recipe for Dinner Delight. Easy recipe with step-by-step instructions.
Ingredients
Instructions
Pat the chicken breasts dry with paper towels, then season both sides generously with salt and pepper. Let them sit for about 5 minutes; this brief rest allows the seasoning to penetrate the meat, creating a subtle flavor foundation. While they rest, prepare a “dredging station”: three shallow dishes—one with flour, one with beaten eggs, and one with seasoned breadcrumbs. The order of coating is crucial: flour first, then egg, then breadcrumbs.
Dredge each breast in the flour, shaking off any excess. The flour should lightly coat the surface, creating a dry layer that helps the egg adhere. Next, dip the floured chicken into the beaten eggs, ensuring every nook is wet. Finally, press the chicken into the breadcrumb mixture, turning it over until fully coated. For an extra thick crust, double‑dip: repeat the egg and breadcrumb steps once more.