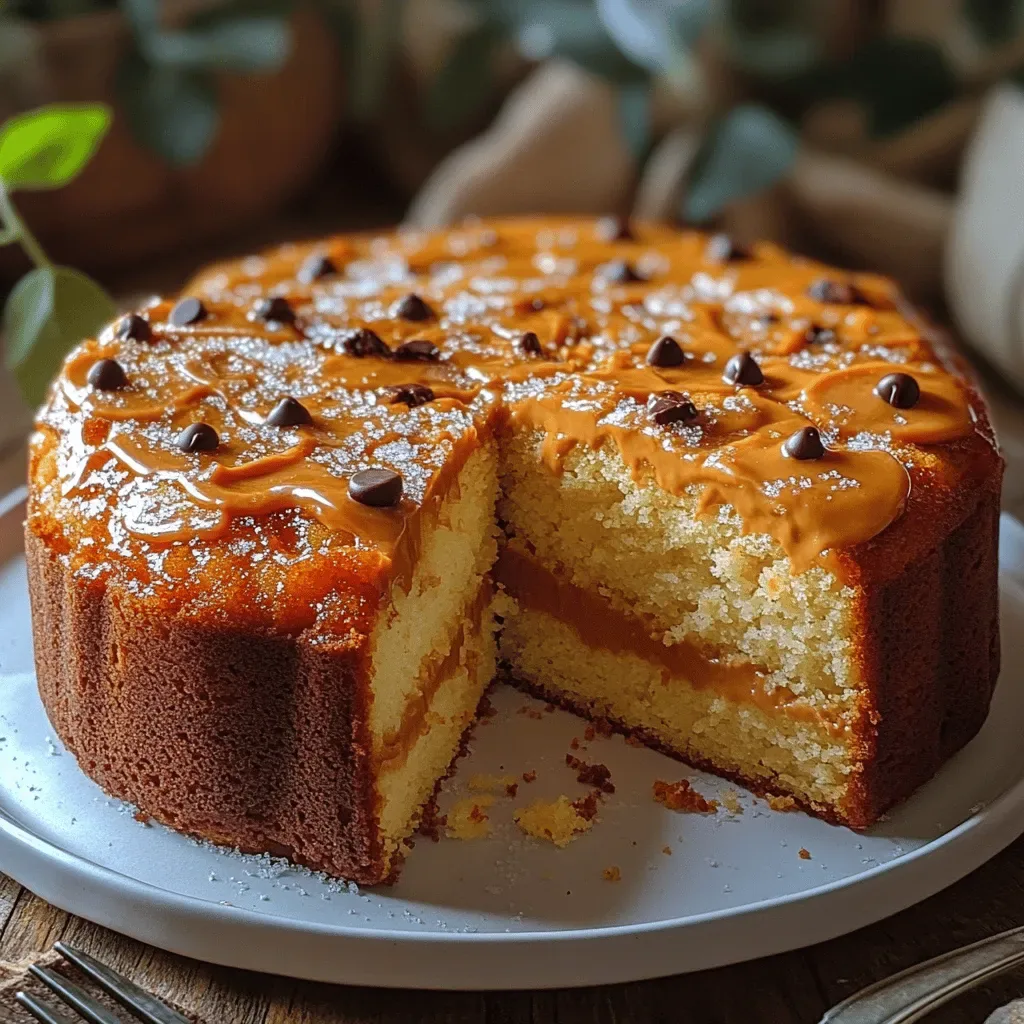
Protein Peanut Butter Cheesecake Cups: A Deliciously Healthy Dessert

WANT TO SAVE THIS RECIPE?

Introduction

In recent years, the world of desserts has undergone a significant transformation as health-conscious consumers seek out ways to indulge their sweet tooth without compromising their dietary goals. The rise of healthy desserts has introduced us to a plethora of options that are not only delicious but also packed with nutrition. One standout example of this trend is the protein peanut butter cheesecake cup—a delightful treat that balances the rich flavors of peanut butter and cream cheese while providing a protein boost that keeps you satisfied.

These protein peanut butter cheesecake cups are the perfect solution for those who crave something sweet yet want to maintain a healthy lifestyle. They combine the creamy, indulgent qualities of traditional cheesecake with the added benefits of protein-rich ingredients, making them an ideal snack or dessert for fitness enthusiasts, busy professionals, and anyone looking for a guilt-free indulgence. The combination of textures—from the smooth cheesecake filling to the crunchy crust—creates a delightful eating experience that will please even the most discerning palates.

In this article, we will explore the ingredients that make these cheesecake cups both tasty and nutritious, followed by a step-by-step guide on how to prepare this delicious recipe. So, let’s dive into the world of protein-packed treats and discover how to make these irresistible peanut butter cheesecake cups!

Understanding the Ingredients

To create the perfect protein peanut butter cheesecake cups, it’s essential to understand the key components that contribute to their flavor, texture, and nutritional profile. Each ingredient plays a crucial role in achieving the balance that makes these treats so appealing.

Low-Fat Cream Cheese

Low-fat cream cheese is a cornerstone of this recipe, providing the creamy texture that is synonymous with cheesecake while keeping the calorie count in check. Unlike traditional cream cheese, which can be high in fat and calories, low-fat cream cheese allows you to enjoy the rich flavor without the guilt. It contributes to the overall creaminess of the filling, ensuring that each bite is smooth and satisfying.

Greek Yogurt

Greek yogurt is another significant ingredient in this recipe, known for its impressive protein content and probiotic benefits. By incorporating Greek yogurt, you not only enhance the nutritional value of the cheesecake cups but also add a tangy flavor that balances the sweetness of the other ingredients. The probiotics found in Greek yogurt can also support gut health, making this dessert as beneficial as it is delicious.

Natural Peanut Butter

When it comes to peanut butter, opting for natural varieties without added sugars or hydrogenated oils is key. Natural peanut butter is rich in healthy fats, protein, and essential nutrients, making it a wholesome addition to this recipe. Its creamy consistency and nutty flavor blend perfectly with the other ingredients, creating a rich and indulgent filling that’s both satisfying and nutritious. Plus, the natural sweetness of peanut butter enhances the overall flavor profile of the cheesecake cups.

Sweeteners

Sweeteners play a vital role in balancing the flavors of the cheesecake cups. In this recipe, you have the option to use either honey or maple syrup, both of which are natural sweeteners with unique benefits. Honey is known for its antioxidant properties and can provide quick energy, while maple syrup contains minerals like manganese and zinc. Choosing either of these sweeteners over refined sugar allows you to enjoy a dessert that is not only sweeter but also healthier and more wholesome.

Protein Powder

The addition of protein powder elevates these cheesecake cups to a whole new level of nutrition. Available in various types—such as whey, casein, pea, or soy—protein powder increases the protein content of the dessert, making it an excellent choice for post-workout recovery or as a filling snack. When selecting a protein powder, consider your dietary preferences and goals. Each type has its own unique benefits, so choose one that aligns with your nutritional needs.

Crust Alternatives

Lastly, the crust of your cheesecake cups can significantly impact both the flavor and texture. You can choose to use crushed graham crackers for a traditional cheesecake flavor or opt for almond flour as a gluten-free alternative. Almond flour not only adds a nutty taste but also increases the protein content of the crust. Depending on your dietary preferences, either option will create a solid base for the creamy cheesecake filling.

Step-by-Step Instructions for Protein Peanut Butter Cheesecake Cups

Now that we’ve covered the essential ingredients that make up these protein peanut butter cheesecake cups, let’s move on to the preparation process. This detailed breakdown will guide you through each step, ensuring that you achieve perfect results every time.

Preparing the Cup Base

1. Gather Your Ingredients: Start by gathering all the ingredients for the crust. If you’re using graham crackers, you’ll need about one cup of crushed crackers. For an almond flour crust, measure out one cup of almond flour, along with a couple of tablespoons of melted coconut oil or butter and a tablespoon of sweetener (honey or maple syrup).

2. Mix the Ingredients: In a mixing bowl, combine the crushed graham crackers or almond flour with the melted coconut oil or butter and sweetener. Mix until the mixture resembles wet sand, ensuring that all the dry ingredients are evenly coated.

3. Line the Muffin Tin: Prepare a muffin tin by lining it with cupcake liners or lightly greasing it to prevent sticking. This step is crucial for easy removal after chilling.

4. Press the Mixture into the Cups: Spoon about a tablespoon of the crust mixture into each muffin cup. Using the back of a measuring spoon or your fingers, firmly press the mixture down to create an even base. This will help hold the cheesecake filling in place and enhance the overall texture of the dessert.

Making the Cheesecake Filling

1. Combine the Cheese and Yogurt: In a mixing bowl, add 8 ounces of low-fat cream cheese and one cup of Greek yogurt. Using an electric mixer or a whisk, blend the two ingredients together until they are completely smooth and creamy.

2. Add Peanut Butter and Sweetener: Next, incorporate half a cup of natural peanut butter into the mixture, along with your choice of sweetener (honey or maple syrup). Mix well until the peanut butter is fully integrated, and the mixture is fluffy and creamy.

3. Incorporate Protein Powder: Add in your protein powder—about one scoop or roughly 30 grams—mixing until it’s well combined. This addition not only boosts the protein content but also helps create a thicker consistency in the filling.

4. Adjust the Flavor: Taste the mixture and adjust the sweetness or peanut butter flavor as needed. You can add more sweetener or a pinch of salt to enhance the flavors, ensuring that the filling is perfectly balanced.

Filling the Cups

1. Portion the Filling: Once the cheesecake filling is ready, it’s time to fill the prepared crusts. Using a spoon or a piping bag for more precision, portion the filling into each muffin cup, filling them about three-quarters full to allow for some expansion during chilling.

2. Smooth the Top: After filling each cup, use a spatula or the back of a spoon to smooth the tops of the cheesecake cups. This will create a polished appearance and make them more visually appealing.

Chilling the Cups

1. Refrigerate: Place the muffin tin in the refrigerator and allow the cheesecake cups to chill for at least 2 to 4 hours, or until they are set. Chilling is a crucial step, as it allows the flavors to meld together and the filling to firm up, resulting in a perfectly textured dessert.

2. Serve: Once chilled, you can carefully remove the cheesecake cups from the muffin tin by lifting them out of the cupcake liners. They can be served immediately or stored in an airtight container in the refrigerator for up to a week.

By following these steps, you’ll create a batch of delightful protein peanut butter cheesecake cups that are sure to please your taste buds while keeping your health goals in check. In the next part, we will explore additional tips for achieving the best results and answer some common questions related to this recipe. Stay tuned!

In recent years, the world of desserts has undergone a significant transformation as health-conscious consumers seek out ways to indulge their sweet tooth without compromising their dietary goals. The rise of healthy desserts has introduced us to a plethora of options that are not only delicious but also packed with nutrition. One standout example of this trend is the protein peanut butter cheesecake cup—a delightful treat that balances the rich flavors of peanut butter and cream cheese while providing a protein boost that keeps you satisfied.

Serving Suggestions

To elevate your Protein Peanut Butter Cheesecake Cups, consider these creative serving suggestions that will enhance their presentation and flavor.

1. Garnish with Nuts: Top each cheesecake cup with a sprinkle of chopped peanuts or a drizzle of creamy peanut butter. This not only adds texture but also reinforces the rich peanut flavor.

2. Chocolate Drizzle: A light drizzle of melted dark chocolate can elevate these cups to a whole new level. Use a piping bag or a spoon to create an elegant design on top of the cups.

3. Fresh Fruit: Add a slice of banana or a few berries (like raspberries or strawberries) on top for a pop of color and freshness. The tartness of the fruit balances the sweetness of the cheesecake, making each bite delightful.

4. Coconut Flakes: Sprinkle some unsweetened shredded coconut on top for a tropical twist. Coconut adds a subtle sweetness and a chewy texture that complements the creamy cheesecake.

5. Serve in Style: Consider serving the cups in decorative ramekins or clear dessert cups. This not only enhances the visual appeal but also allows guests to see the layers of deliciousness.

By incorporating these garnishes and presentation tips, your Protein Peanut Butter Cheesecake Cups will be as visually appealing as they are delicious, making them perfect for any occasion.

Nutritional Benefits of Protein Peanut Butter Cheesecake Cups

These cheesecake cups are not just a tasty treat; they are also packed with nutritional benefits thanks to their wholesome ingredients.

Protein Content

One of the standout features of this recipe is its high protein content. Each serving contains a substantial amount of protein, which is essential for muscle repair and growth, making these cups a perfect post-workout snack. The protein primarily comes from Greek yogurt and protein powder, which contribute to a balanced macronutrient profile. Incorporating these ingredients can help you meet your daily protein needs, especially for those following an active lifestyle or trying to maintain muscle mass.

Healthy Fats

The main source of healthy fats in this recipe is peanut butter. Rich in monounsaturated fats, peanut butter supports heart health by improving cholesterol levels. Healthy fats are crucial for hormone production, nutrient absorption, and providing sustained energy. Incorporating moderate amounts of healthy fats into your diet can help you feel fuller for longer, reducing the likelihood of snacking on less nutritious options throughout the day.

Low Sugar Content

This recipe is designed to be lower in sugar by using natural sweeteners like honey or maple syrup instead of refined sugars. This not only helps maintain stable blood sugar levels but also ensures that you can enjoy a guilt-free dessert. By opting for natural sweeteners, you also add trace minerals and antioxidants to your diet, making this dessert a healthier choice.

Customization Options

One of the best aspects of the Protein Peanut Butter Cheesecake Cups is their versatility. Here are some ways to customize the recipe to accommodate various dietary preferences and needs.

Vegan Alternatives

If you’re looking to create a plant-based version of these cheesecake cups, there are simple substitutions you can make:

Cream Cheese Substitute: Use a vegan cream cheese alternative made from nuts or soy.

Greek Yogurt Replacement: Opt for coconut yogurt or almond-based yogurt for a dairy-free option.

Sweeteners: Replace honey with agave syrup or maple syrup to keep it vegan-friendly.

With these substitutions, you can enjoy the same decadent taste while adhering to a vegan lifestyle.

Flavor Variations

Feel free to experiment with different flavors to suit your personal taste. Here are some ideas:

Chocolate Peanut Butter: Add cocoa powder or melted dark chocolate to the mixture for a rich chocolate-peanut butter flavor.

Fruit-Infused: Blend in some pureed fruit like strawberries or bananas for a fruity twist. You can also layer fresh fruit in between the cheesecake layers for added flavor and texture.

Spiced Up: Incorporate spices such as cinnamon or nutmeg for a warm flavor profile, perfect for fall-themed gatherings.

Allergy-Friendly Options

To cater to those with food allergies, consider these modifications:

Nut-Free: Substitute peanut butter with sunflower seed butter or soy nut butter to create a nut-free version.

Gluten-Free: Ensure that any granola or crust used is certified gluten-free. Most of the ingredients in this recipe are naturally gluten-free, making it easy to adapt without gluten.

With these customization options, everyone can enjoy their own version of these delicious cheesecake cups.

Storage and Shelf Life

Proper storage is key to maintaining the freshness and quality of your Protein Peanut Butter Cheesecake Cups.

Refrigeration Tips

After preparing, allow the cheesecake cups to cool completely before placing them in an airtight container. Store them in the refrigerator, where they can last for about 5–7 days. When ready to eat, you can enjoy them cold or let them sit at room temperature for a few minutes to soften slightly.

Freezing Options

If you want to extend the shelf life of your cheesecake cups, freezing is a great option. To freeze:

1. Allow the cups to cool and set completely.

2. Place them in freezer-safe containers or wrap them individually in plastic wrap and then foil.

3. Label and date your containers before placing them in the freezer.

These cheesecake cups can be frozen for up to 3 months. When you’re ready to enjoy them, thaw them in the refrigerator overnight for the best texture. Avoid thawing at room temperature, as this can cause condensation and alter the consistency.

Conclusion

Protein Peanut Butter Cheesecake Cups are a delightful blend of taste and nutrition, making them an ideal guilt-free dessert for any occasion. With a high protein content, healthy fats, and low sugar levels, these cups not only satisfy your sweet tooth but also contribute positively to your dietary goals.

The recipe’s versatility allows for numerous customization options, ensuring that everyone can enjoy a delicious treat tailored to their preferences. Whether you’re indulging in them as a post-workout snack or serving them at a gathering, these cheesecake cups are sure to impress.

Don’t hesitate to experiment with different flavors, toppings, and dietary adaptations. The ease of preparation combined with the health benefits makes these cheesecake cups a must-try in your kitchen. Embrace the joy of creating a dessert that aligns with your health goals while still delivering on taste. Enjoy making these delicious treats and sharing them with friends and family!

In recent years, the world of desserts has undergone a significant transformation as health-conscious consumers seek out ways to indulge their sweet tooth without compromising their dietary goals. The rise of healthy desserts has introduced us to a plethora of options that are not only delicious but also packed with nutrition. One standout example of this trend is the protein peanut butter cheesecake cup—a delightful treat that balances the rich flavors of peanut butter and cream cheese while providing a protein boost that keeps you satisfied.

Protein Peanut Butter Cheesecake Cups: A Guilt-Free Treat for Dessert Lovers

Discover the delicious world of protein peanut butter cheesecake cups, where indulgence meets nutrition. These creamy, flavorful cups combine low-fat cream cheese, Greek yogurt, and natural peanut butter for a guilt-free dessert that satisfies your sweet tooth. Perfect for fitness enthusiasts and those looking to enjoy a wholesome treat, this easy recipe offers a protein boost, low sugar content, and customizable options to cater to all dietary needs. Enjoy making and sharing this delightful dessert!

Ingredients
  

1 cup low-fat cream cheese, softened

1/2 cup Greek yogurt (plain or vanilla)

1/3 cup natural peanut butter (no added sugar)

1/4 cup honey or maple syrup (adjust for sweetness)

1/2 teaspoon vanilla extract

1/2 cup protein powder (vanilla or chocolate flavor)

1/4 teaspoon salt

1/2 cup crushed graham crackers (or almond flour for a gluten-free option)

Optional: 1/4 cup dark chocolate chips or cacao nibs for topping

Instructions
 

Prepare the Cup Base:

    - In a mixing bowl, combine the crushed graham crackers (or almond flour) with 2 tablespoons of melted coconut oil or butter. Mix until well combined.

      - Press about 1 tablespoon of the mixture into the bottom of each cup in a muffin tin or silicone molds to form the base. Set aside.

        Make the Cheesecake Filling:

          - In a separate mixing bowl, add the softened cream cheese, Greek yogurt, peanut butter, honey (or maple syrup), vanilla extract, protein powder, and salt.

            - Using a hand mixer or a whisk, mix until all the ingredients are well blended and smooth. Be careful not to overmix.

              Fill the Cups:

                - Spoon the cheesecake mixture over the prepared crust in each cup, filling them about 3/4 full.

                  - If desired, sprinkle some dark chocolate chips or cacao nibs on top of each cheesecake cup for added texture and flavor.

                    Chill the Cups:

                      - Cover the muffin tin or molds with plastic wrap or a lid and refrigerate for at least 2 hours or until set. The longer they chill, the firmer they will become.

                        Serve:

                          - Once chilled, carefully remove the cheesecake cups from the tin or molds. For an extra touch, drizzle with additional melted peanut butter or chocolate before serving. Enjoy these guilt-free treats!

                            Prep Time: 15 minutes | Total Time: 2 hours 15 minutes | Servings: 12 cups

                              WANT TO SAVE THIS RECIPE?

                              Leave a Comment

                              Recipe Rating