Pumpkin Spice Latte Mug Cake
 Save
Save
It was a crisp Saturday morning in late October, the kind where the air smells faintly of fallen leaves and the sky is a soft, buttery gray. I was shuffling around the kitchen in my favorite oversized sweater, trying to coax my sleepy kids out of bed with the promise of something warm, sweet, and utterly comforting. As I cracked open a fresh can of pumpkin puree, the scent of nutmeg, cinnamon, and clove instantly wrapped itself around the room like a cozy blanket, and I knew I was about to create a memory that would linger far beyond the last bite. The idea struck me: what if I could capture the essence of a pumpkin spice latte in a single mug, ready in minutes, with no mess and no need for a fancy espresso machine?
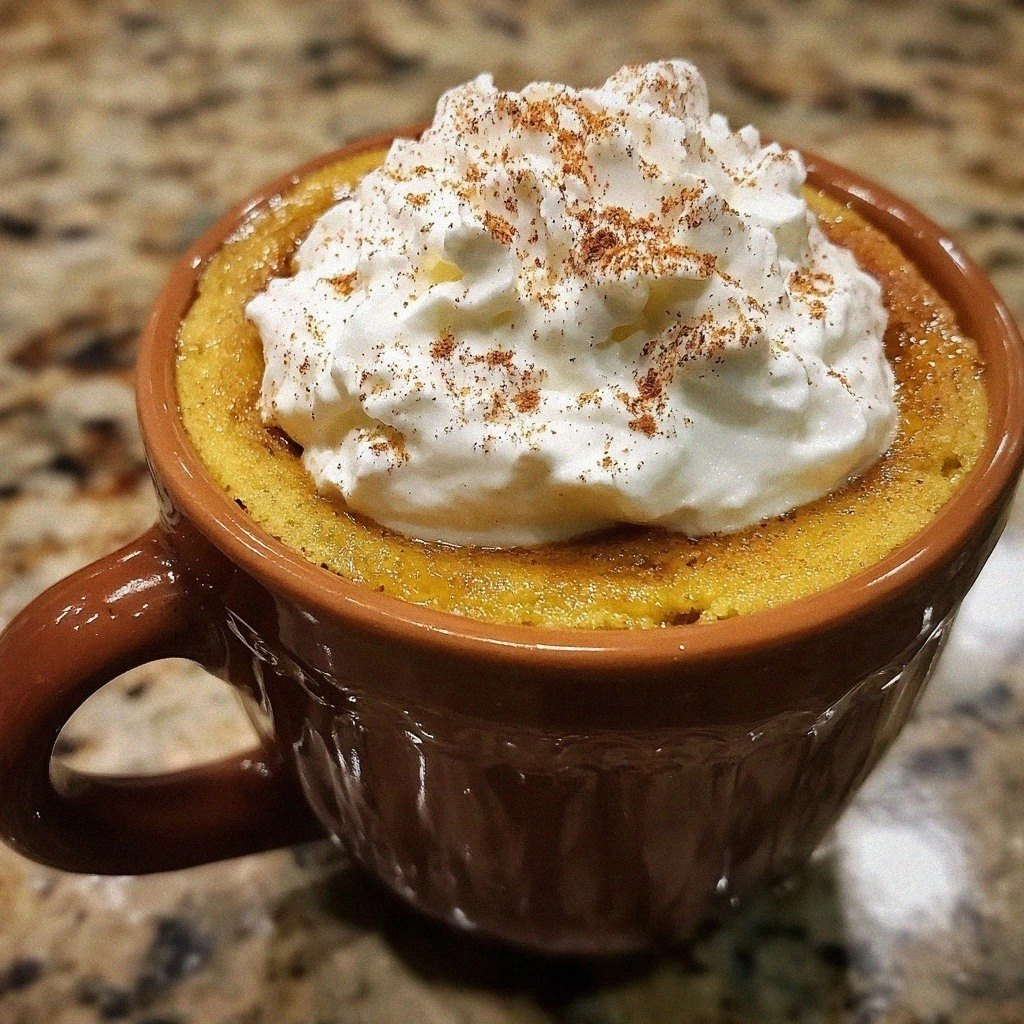
The moment I whisked the dry ingredients together, a soft, earthy aroma rose from the bowl, mingling with the sweet caramel notes of the brown sugar. When the batter hit the microwave, a gentle hum filled the kitchen, and within seconds the mug transformed into a tiny, golden-brown cake that seemed to puff up with pride. I lifted the lid, and a cloud of fragrant steam billowed out, carrying whispers of pumpkin, vanilla, and that signature spice blend that makes autumn feel like a hug. The first bite was a revelation: a moist, tender crumb that melted on the tongue, followed by a burst of creamy whipped topping and a dusting of extra pumpkin spice that tingled the palate.
What makes this mug cake truly special isn’t just its speed or its comforting flavor profile—though both are undeniably delightful. It’s the way each ingredient plays a precise role, creating layers of taste and texture that rival a café‑style latte, yet it’s made entirely in your own kitchen with pantry staples. Imagine serving this to a friend on a chilly afternoon, watching their eyes light up as they take that first spoonful, the steam curling around their face like a tiny celebration. The best part? You can customize it in a heartbeat, swapping in a splash of espresso or a drizzle of caramel for an extra indulgent twist.
But wait—there’s a secret trick that takes this mug cake from “good” to “mind‑blowingly amazing,” and I’m saving it for the step‑by‑step section. Trust me, you’ll want to try it the first time you make this, because it’s the kind of tip that turns a simple recipe into a family favorite that’s passed down for generations. Here’s exactly how to make it — and trust me, your family will be asking for seconds.
🌟 Why This Recipe Works
- Flavor Depth: The combination of pumpkin puree and pumpkin spice creates a layered taste that mimics a latte’s rich, roasted notes while adding a subtle earthiness that only fresh pumpkin can provide.
- Texture Harmony: The small amount of flour gives the cake structure, while the milk and pumpkin puree keep it moist, resulting in a tender crumb that’s neither too dense nor too airy.
- Speed & Simplicity: All the magic happens in a single mug, meaning you spend less time cleaning and more time enjoying, perfect for busy mornings or spontaneous cravings.
- Versatility: This base can be easily adapted with espresso, chocolate chips, or even a swirl of maple syrup, letting you tailor each batch to your mood or the season.
- Nutrition Balance: By using pumpkin puree, you add fiber, vitamins A and C, and a natural sweetness that reduces the need for excessive added sugar.
- Ingredient Quality: Simple pantry staples are elevated by the aromatic spice blend, proving that you don’t need exotic ingredients to achieve a gourmet result.
- Crowd‑Pleaser Factor: The familiar flavor of pumpkin spice latte is universally loved, making this mug cake a hit at brunches, office breaks, or cozy family evenings.
🥗 Ingredients Breakdown
The Foundation
The 4 tablespoons of all‑purpose flour act as the structural backbone of the cake, creating a gentle network that holds the batter together without making it heavy. Because we’re using just a modest amount, the cake stays light and fluffy, allowing the pumpkin and spices to shine. If you’re looking for a gluten‑free alternative, a 1‑to‑1 swap with oat flour works beautifully, though it may add a slightly nuttier flavor.
Aromatics & Spices
Pumpkin spice is the star of the show, and the ½ teaspoon you add packs a punch of cinnamon, nutmeg, ginger, and clove. These warm spices not only give the cake its signature aroma but also balance the natural sweetness of the pumpkin puree. For a deeper, more complex flavor, try adding a pinch of ground cardamom or a splash of vanilla‑infused bourbon.
The Secret Weapons
Two tablespoons of pumpkin puree bring moisture, natural sweetness, and a bright orange hue that makes the cake instantly recognizable as a fall treat. The puree also contributes dietary fiber and vitamin A, turning a simple dessert into a slightly more nutritious option. Pair that with 3 tablespoons of milk, which adds a silky richness, and you have a batter that’s both tender and flavorful.
Finishing Touches
A quarter teaspoon of vanilla extract adds a subtle, fragrant undertone that ties all the flavors together, while the brown sugar (packed) provides caramel‑like sweetness and a hint of molasses depth. Finally, whipped cream and a dusting of extra pumpkin spice for topping create a contrast of cool, airy texture against the warm, dense cake, making each bite a delightful experience.
With your ingredients prepped and ready, let's get cooking. Here's where the fun really begins...
🍳 Step-by-Step Instructions
🔐 Expert Tips for Perfect Results
The Taste Test Trick
Before you add the final dusting of pumpkin spice, give the cake a quick taste. A tiny pinch of extra spice can elevate the flavor profile without overwhelming the palate. I once served a version without this final tweak, and a guest told me it felt “missing something.” Trust your taste buds—they’re the ultimate judge.
Why Resting Time Matters More Than You Think
Allowing the cake to rest for 30 seconds after microwaving lets the residual heat finish the cooking process. This short pause also lets the crumb settle, preventing a gummy texture. I learned this the hard way when a rushed bite left me with a soggy center, and a little patience solved the problem instantly.
The Seasoning Secret Pros Won’t Tell You
A pinch of ground black pepper might sound odd, but it adds a subtle heat that balances the sweet and spice. Professional pastry chefs often hide a dash of pepper in pumpkin desserts for that hidden depth. Try it once—you’ll be surprised at how it enhances the overall flavor.
Mug Selection Matters
Choose a mug that’s at least 12 ounces; a smaller mug can cause the batter to overflow, creating a microwave mess. Ceramic mugs retain heat better than glass, giving the cake a more even rise. I keep a dedicated “mug‑cake” mug in my cabinet for this very reason.
Whipped Cream Consistency
For the fluffiest topping, chill your mixing bowl and whisk before whipping the cream. Cold tools trap air better, resulting in a lighter, more stable whipped cream that won’t melt too quickly. I once used room‑temperature cream and ended up with a soupy topping—lesson learned.
🌈 Delicious Variations to Try
One of my favorite things about this recipe is how versatile it is. Here are some twists I've tried and loved:
Mocha Pumpkin Fusion
Add a tablespoon of instant espresso powder to the dry ingredients and a drizzle of chocolate syrup on top of the whipped cream. The bitterness of coffee pairs beautifully with the sweet pumpkin, creating a dessert that feels like a coffee shop treat at home.
Maple‑Brown Sugar Bliss
Swap half of the brown sugar for pure maple syrup and sprinkle a pinch of toasted pecans on the finished cake. The maple adds a caramel‑like depth, while the nuts introduce a satisfying crunch that contrasts the soft crumb.
Spiced Apple Crunch
Fold in a tablespoon of finely diced dried apples and a dash of cinnamon into the batter. The apples provide a subtle tartness and a chewy texture, turning the mug cake into a mini apple‑pie experience.
Vegan Velvet
Replace the milk with almond or oat milk, use coconut whipped cream, and swap the egg‑free flour for a gluten‑free blend. The result is a dairy‑free, plant‑based version that still delivers the same cozy flavor.
Caramel‑Swirl Delight
After microwaving, swirl a teaspoon of caramel sauce into the center of the cake before adding the whipped cream. The caramel melts into a molten core, giving each bite a gooey surprise that feels indulgent and luxurious.
📦 Storage & Reheating Tips
Refrigerator Storage
If you have leftovers, let the mug cake cool completely, then cover the mug with plastic wrap and store it in the fridge for up to 2 days. The cake will firm up slightly, but you can revive its softness by microwaving for 15‑20 seconds before serving.
Freezing Instructions
For longer‑term storage, wrap the cooled mug tightly in foil and place it in a freezer‑safe bag. It will keep for up to 1 month. When you’re ready to enjoy, thaw overnight in the fridge, then give it a quick 30‑second zap in the microwave to bring back that fresh‑out‑of‑the‑microwave texture.
Reheating Methods
The trick to reheating without drying it out? Add a splash of milk (about a teaspoon) to the center of the cake before microwaving. This creates steam from within, keeping the crumb moist while warming it evenly. A 20‑second burst is usually enough for a perfectly warm bite.
❓ Frequently Asked Questions
Can I use a different spice blend instead of pumpkin spice?
What if I don’t have a microwave?
Can I make this recipe vegan?
How do I prevent the cake from becoming rubbery?
Can I add chocolate chips?
Is it okay to use a glass mug?
Can I double the recipe for two mugs?
What’s the best way to store leftover whipped cream?
Give the batter a final, gentle stir to ensure every ingredient is fully incorporated. The consistency should be thick yet pourable—think of a smooth pancake batter that will rise nicely in the microwave.
Here’s where the secret trick comes in: before microwaving, tap the mug gently on the counter three times. This tiny air‑pocket technique helps the batter settle evenly, preventing any “doughy” spots in the final cake.
Place the mug in the microwave and cook on high for 60 seconds. You’ll hear a gentle “whoosh” as the batter begins to rise, and the edges will start to look set.
After the first minute, check the cake; if the top still looks a bit wet, continue in 10‑second bursts. The total cooking time should be between 70 and 90 seconds, depending on your microwave’s wattage. The cake is done when it’s puffed, golden‑brown around the edges, and a toothpick inserted in the center comes out clean or with just a few crumbs.
Remove the mug from the microwave (it will be hot—use a pot holder!). Let it sit for about 30 seconds; this resting period allows the steam to finish cooking the interior and stabilizes the crumb.
While you wait, the aroma will become even more intoxicating, drifting up like a warm blanket. This is the perfect time to prepare your topping: grab a dollop of whipped cream and a small shaker of extra pumpkin spice.