Deliciously Spicy & Crunchy Hatch Chili Quesadillas Recipe
Introduction
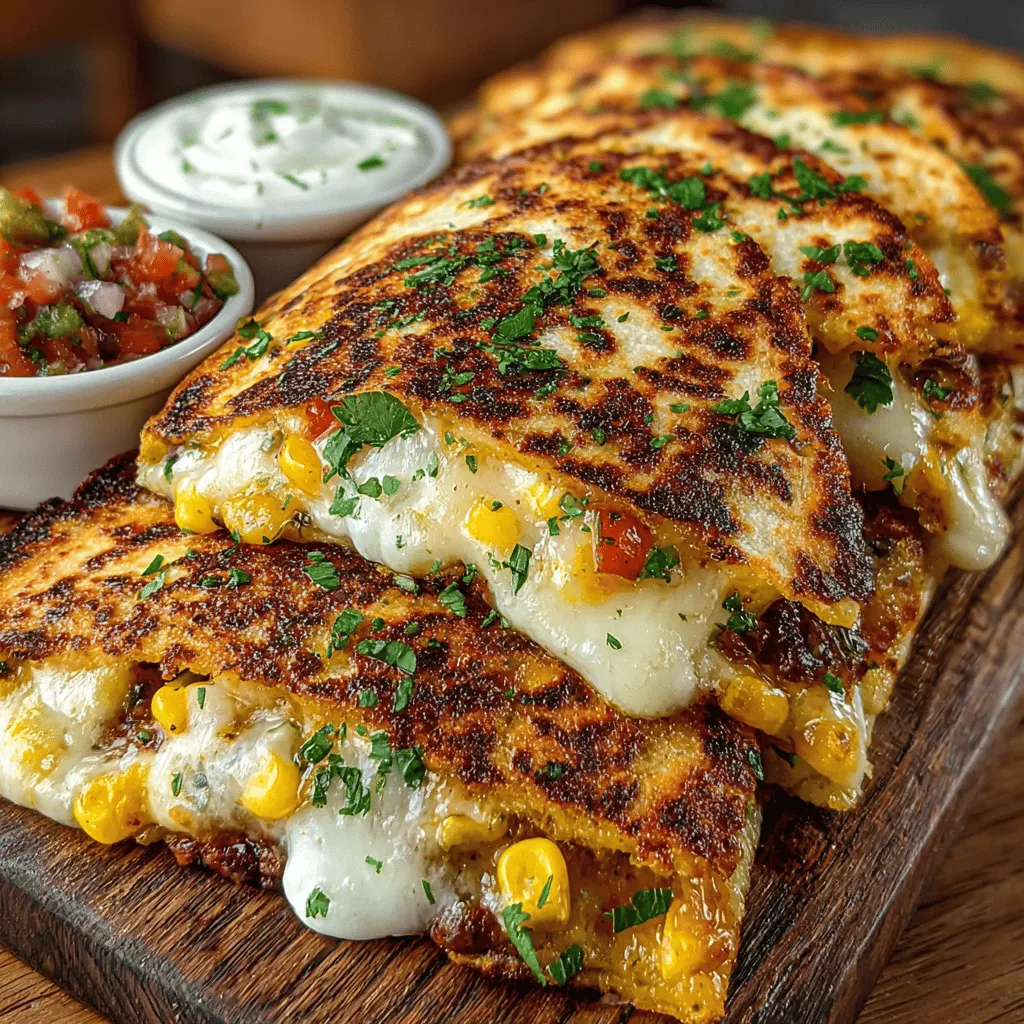
Indulging in a plate of cheesy, spicy quesadillas is one of life’s simple pleasures. The combination of flavors and textures—from the crispiness of the tortilla to the gooeyness of melted cheese—creates a delightful culinary experience that is both comforting and exciting. This recipe for Spicy & Crunchy Hatch Chili Quesadillas takes your typical quesadilla to the next level by incorporating the robust flavors of roasted Hatch green chiles along with the creamy richness of Monterey Jack and sharp cheddar cheeses. The result is a mouthwatering dish that packs a flavorful punch, making it ideal for a quick weeknight dinner or a festive weekend gathering.
As we explore this recipe, you’ll discover not only the ingredients and preparation methods but also the cultural significance of quesadillas and the unique characteristics of Hatch chiles. These flavorful quesadillas are sure to become a family favorite, offering a delightful blend of taste and texture that will leave everyone reaching for seconds.
Understanding the Ingredients
To make the perfect Spicy & Crunchy Hatch Chili Quesadillas, understanding the role of each ingredient is essential. Each component contributes to the overall flavor and texture of the dish, ensuring a satisfying experience in every bite. Let’s take a closer look at the key ingredients that make this recipe a standout.
Flour Tortillas
When it comes to quesadillas, flour tortillas are often the preferred choice for several reasons. Their soft yet flexible texture allows for easy folding and handling, making them ideal for encasing the delicious filling. Unlike corn tortillas, which can be more fragile and prone to breaking, flour tortillas provide a sturdier base that holds up well during cooking. This flexibility also means they achieve a perfectly crispy exterior when grilled or pan-fried, adding a delightful crunch that complements the gooey filling. Whether you’re preparing a quick meal at home or serving guests, flour tortillas ensure that each quesadilla is both easy to assemble and enjoyable to eat.
Cheeses: Monterey Jack and Sharp Cheddar
The cheeses chosen for this recipe are key to achieving the perfect melt and flavor. Monterey Jack is known for its mild, buttery taste and excellent melting properties, making it an ideal base for any cheesy dish. When paired with sharp cheddar, which brings a robust and tangy flavor to the mix, the combination creates a harmonious blend that elevates the quesadilla to new heights. The sharpness of the cheddar contrasts beautifully with the creamy Monterey Jack, ensuring a rich, satisfying filling that oozes deliciousness with each bite. This cheese duo not only enhances the flavor but also contributes to the appealing gooey texture that everyone loves in a quesadilla.
Hatch Green Chiles: The Star Ingredient
At the heart of this recipe lies the Hatch green chiles, a beloved ingredient celebrated for their unique taste and heat. Grown in the Hatch Valley of New Mexico, these chiles are known for their distinctive flavor profile, which combines a mild to medium heat with earthy undertones. Roasting the chiles before adding them to the quesadilla brings out their natural sweetness and adds a smoky depth that elevates the dish. The roasting process not only enhances the flavor but also softens the chiles, making them easier to incorporate into the filling.
For those who may not have access to fresh Hatch chiles, there are alternatives that can still provide a similar flavor experience. Canned Hatch chiles are widely available and can be a convenient substitute. Alternatively, you can use other types of green chiles, such as Anaheim or poblano peppers, which also offer a mild heat and can be roasted for added flavor.
Complementary Ingredients: Onions and Corn
To further enhance the flavor and texture of the quesadillas, diced red onions and sweet corn are included in the filling. The red onions add a touch of sharpness and color, providing a contrast to the creamy cheeses and roasted chiles. Their slight crunch also contributes to the overall texture of the quesadilla. Sweet corn, on the other hand, not only adds a pop of sweetness but also a delightful bite that complements the other ingredients. Together, these complementary ingredients create a well-rounded filling that is both flavorful and satisfying.
Spices That Enhance Flavor
No dish is complete without the right blend of spices, and this quesadilla recipe is no exception. Ground cumin, smoked paprika, and garlic powder work together to enhance the overall flavor profile of the filling. Cumin brings an earthy warmth that pairs beautifully with the chiles and cheeses, while smoked paprika adds a hint of smokiness that mirrors the roasting process of the chiles. A touch of garlic powder adds depth and richness, ensuring that every bite is bursting with flavor. These spices are essential in creating a filling that is not only delicious but also complex, making the quesadillas stand out.
Cooking Method Overview
Now that we have covered the essential ingredients that make up the Spicy & Crunchy Hatch Chili Quesadillas, it’s time to discuss the cooking method. The preparation of these quesadillas is straightforward and can be completed in a matter of minutes, making them a perfect choice for busy weeknights or impromptu gatherings.
The cooking process begins by roasting the Hatch chiles until they are charred and tender, allowing their flavors to develop fully. Once the chiles are roasted and peeled, they are combined with the cheeses, corn, onions, and spices, creating a delectable filling. The next step involves heating a skillet and placing a flour tortilla in the pan, followed by a generous portion of the filling. Another tortilla is placed on top, and the quesadilla is cooked until golden brown on both sides, ensuring a crispy exterior and gooey interior.
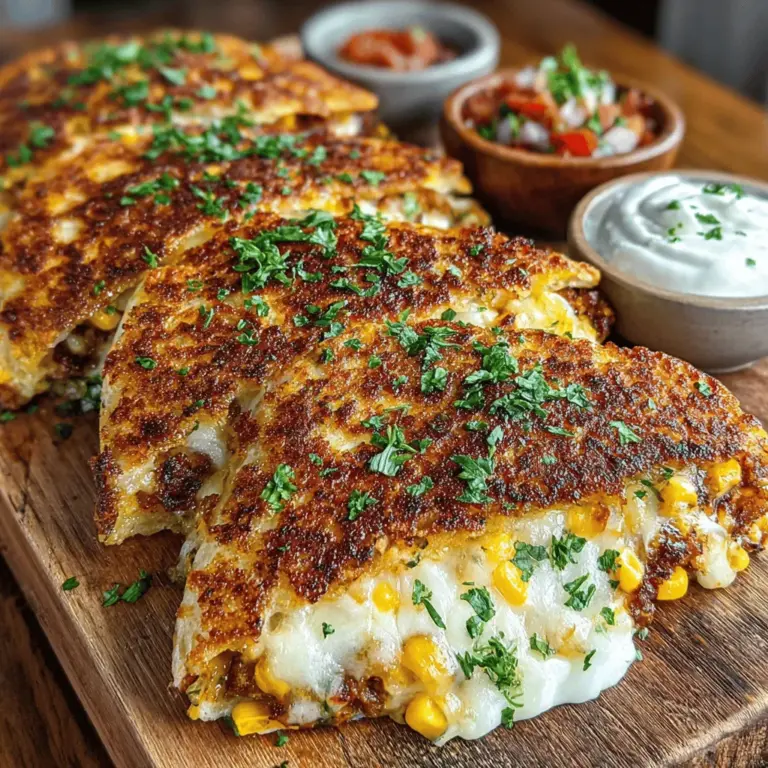
Once cooked, the quesadillas can be sliced into wedges and served with an array of toppings, such as salsa, guacamole, or sour cream, for added flavor and texture. This simple yet effective cooking method ensures that each quesadilla is perfectly crispy and packed with flavor, making them a hit at any meal.
In the next section, we will dive deeper into the specifics of each ingredient and provide tips for customizing your quesadillas to suit your tastes. Whether you prefer a little more heat or additional toppings, there are endless possibilities to explore with this delicious recipe.

Prepping the Hatch Chiles
To create the perfect Spicy & Crunchy Hatch Chili Quesadillas, the first step is prepping your Hatch chiles. Roasting these chiles enhances their natural flavor and adds a delightful smokiness. Here’s how to do it:
Step-by-Step Roasting Instructions
1. Select Your Chiles: Choose fresh Hatch chiles that are firm and bright in color. Look for a mix of mild and hot chiles to balance flavor and spice levels.
2. Roasting Methods:
– Oven Method: Preheat your oven to 450°F (232°C). Place the chiles on a baking sheet lined with parchment paper, ensuring they are spaced apart. Roast for about 20 minutes, turning halfway through, until the skins are blistered and charred.
– Grill Method: Preheat your grill to medium-high heat. Place the chiles directly on the grates and roast for about 10-15 minutes, turning occasionally until all sides are charred.
– Stovetop Method: Use a gas burner to directly char the chiles over medium flame. Place them directly on the flame, turning them with tongs until the skin is evenly charred.
3. Steaming the Chiles: Once roasted, place the chiles in a bowl and cover with a kitchen towel or plastic wrap. This steaming process helps loosen the skins, making them easier to peel. Let them sit for about 10-15 minutes.
4. Peeling and Seeding: After steaming, peel off the charred skin. It should come off easily. Cut the chiles open and remove the seeds and stems. Chop the chiles into small pieces for mixing into your quesadilla filling.
Mixing the Filling
Now that your Hatch chiles are prepped, it’s time to create a flavorful filling. This mixture will not only feature the chiles but also a variety of complementary ingredients.
Detailed Instructions for Filling
1. Ingredients for Filling:
– 1 cup shredded cheese (a mix of Monterey Jack and sharp cheddar works well)
– 1 cup cooked and chopped chicken or a plant-based alternative for a vegetarian option
– 1/2 cup chopped onions (red or white)
– 1/4 cup fresh cilantro, chopped
– 1 teaspoon garlic powder
– Juice of 1 lime
– Salt and pepper to taste
2. Combining Ingredients: In a large mixing bowl, combine the shredded cheese, chopped chicken, roasted Hatch chiles, onions, cilantro, garlic powder, lime juice, salt, and pepper. Stir until all ingredients are evenly mixed. Taste the filling and adjust seasoning if necessary to ensure a balanced flavor.
Assembling the Quesadillas
With your filling ready, it’s time to assemble the quesadillas. Proper assembly is crucial to ensure even cooking and maximum flavor.
Instructions for Assembly
1. Prepare Your Tortillas: Use large flour tortillas for a good balance of flexibility and sturdiness.
2. Filling Distribution: On one half of each tortilla, generously spoon your filling mixture. Leave about an inch of space along the edges to prevent spillage during cooking.
3. Folding the Tortilla: Carefully fold the tortilla in half over the filling, pressing down gently to seal it. For extra security, you can lightly brush the edges with a bit of water or egg wash to help them stick together.
4. Repeat: Continue the process until all your tortillas are filled and folded.
Cooking Techniques for Crispy Quesadillas
Achieving that perfect crispy texture is all about heat management and oil usage during the cooking process.
Frying Instructions
1. Heat the Pan: Place a non-stick skillet or cast-iron pan over medium heat. Allow it to warm up for about 2-3 minutes.
2. Oil Preparation: Add a tablespoon of oil (vegetable or olive oil) to the pan. Swirl it around to evenly coat the surface.
3. Cooking the Quesadillas: Place one or two quesadillas in the pan, depending on its size. Cook for about 3-4 minutes on one side, or until it turns golden brown and crispy.
4. Flipping: Carefully flip the quesadilla using a spatula. Add a little more oil if needed before cooking the other side for an additional 3-4 minutes.
5. Monitoring Heat: If the quesadillas are browning too quickly, lower the heat slightly. Consistent medium heat ensures the cheese melts without burning the tortilla.
Keeping Quesadillas Warm
If you’re preparing multiple quesadillas, you want to keep them warm while you finish cooking the rest without losing that crispiness.
Methods to Keep Quesadillas Warm
1. Oven Method: Preheat your oven to a low temperature (around 200°F or 93°C). Place the cooked quesadillas on a baking sheet and cover them loosely with aluminum foil to keep them warm without steaming.
2. Towel Method: Alternatively, you can wrap each quesadilla in a clean kitchen towel as you cook the others. This method will help retain heat while allowing moisture to escape, preserving the crispiness.
Serving Suggestions
To enhance your Spicy & Crunchy Hatch Chili Quesadillas, serve them with a variety of garnishes and sides that will complement their flavors.
Ideas for Garnishes and Sides
1. Fresh Cilantro: A sprinkle of chopped cilantro adds freshness and enhances the overall flavor profile.
2. Sour Cream: A dollop of sour cream provides creaminess and balances the heat from the chiles.
3. Salsa: Serve with a side of salsa (fresh pico de gallo or a roasted tomato salsa) to add zest and additional texture.
4. Guacamole: For an avocado twist, offer guacamole as a rich, creamy side.
5. Lime Wedges: A squeeze of fresh lime juice over the quesadillas adds brightness and acidity, elevating the dish further.
Cultural Significance of Quesadillas
Quesadillas are more than just a delicious meal; they hold a significant place in Mexican cuisine and culture. Originating from the Spanish word “queso,” meaning cheese, quesadillas have evolved over centuries to include various fillings and styles.
Historically, quesadillas began as simple tortillas filled with cheese, cooked over an open flame. As they spread throughout Mexico, different regions began to incorporate local ingredients, such as meats, vegetables, and spices, leading to the diverse array of quesadillas we enjoy today. They are often considered comfort food, served at family gatherings or festive occasions, reflecting the rich culinary heritage of the country.
Conclusion
The Spicy & Crunchy Hatch Chili Quesadillas offer a delightful blend of flavors and textures that are sure to please any palate. With their simple preparation method and the ability to customize ingredients, these quesadillas are a versatile dish that can be enjoyed on various occasions. By understanding the ingredients and methods involved, you can easily recreate this dish in your own kitchen and share in the joy of a beloved culinary tradition.
Whether for a casual weeknight dinner or a festive gathering, these quesadillas will impress your family and friends with their bold flavors and satisfying crunch. So gather your ingredients, fire up that skillet, and indulge in a delicious taste of Mexico right at home!


