Introduction
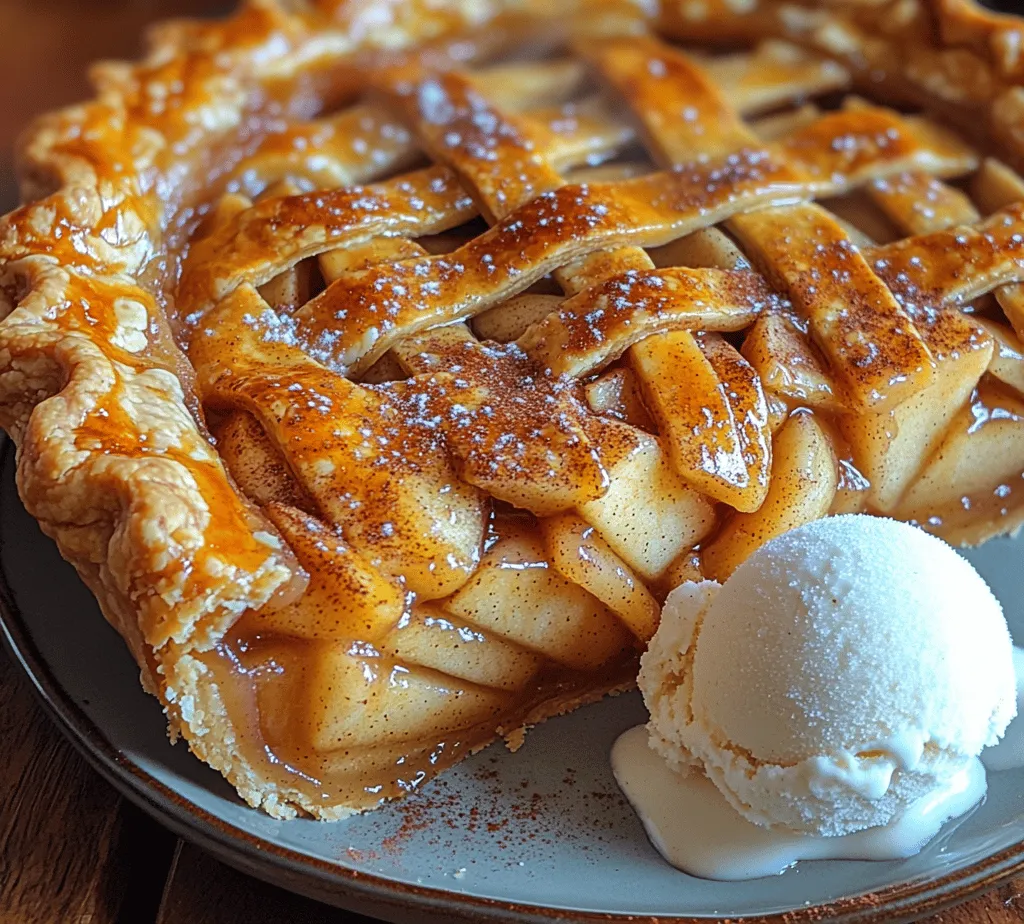
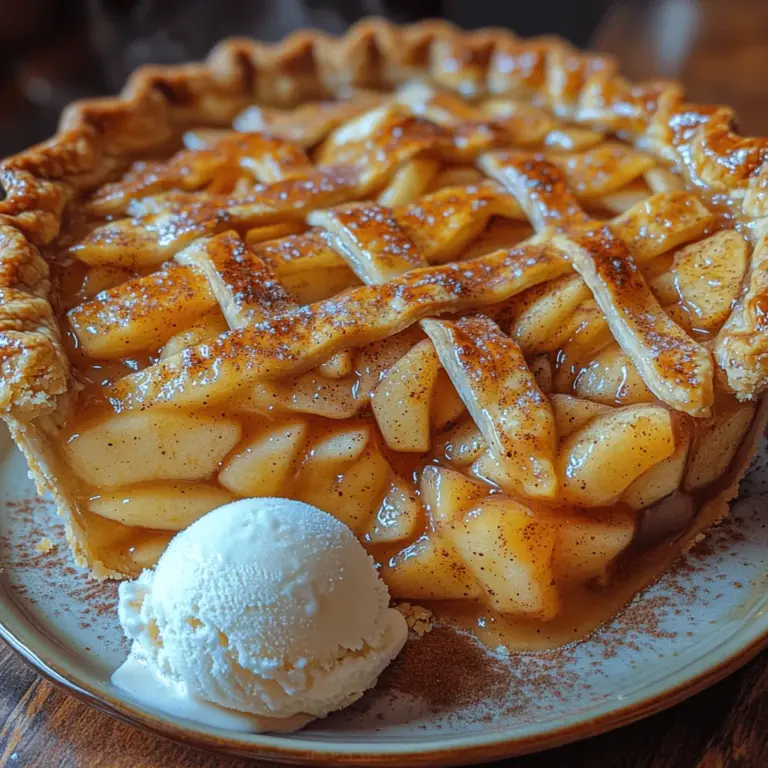
The timeless allure of homemade apple pie lies not only in its comforting flavor but also in its ability to evoke cherished memories and traditions. Few desserts can conjure feelings of nostalgia quite like a slice of freshly baked apple pie, warm from the oven, its golden crust flaking delicately at the touch of a fork. This article will guide you through the process of creating the best apple pie, complete with a flaky, buttery crust and a deliciously spiced apple filling. Whether you’re a seasoned baker or a novice in the kitchen, this recipe will help you achieve a pie that is sure to impress family and friends alike.
As we embark on this culinary journey, it’s essential to understand the key components that make apple pie a beloved dessert. From its rich history to the perfect balance of flavors, this pie is more than just a treat; it’s a symbol of comfort and home. Let’s delve deeper into the essence of apple pie and uncover the secrets to mastering this classic dish.
Understanding the Essence of Apple Pie
The Historical Significance of Apple Pie
The story of apple pie begins centuries ago, with its roots tracing back to ancient civilizations that cultivated apples. The earliest known apple pie recipes date back to the 14th century in England, where it was made with a variety of fruits, spices, and often included a pastry crust. As apple pie recipes spread across the globe, they were adapted to local tastes and traditions, each culture adding its unique flair.
In the United States, apple pie became a symbol of national pride and tradition. The phrase “as American as apple pie” signifies its deep connection to American culture, often associated with family gatherings, holidays, and special occasions. This pie not only represents a delicious dessert but also embodies the spirit of home and togetherness, making it a staple in many households.
Why Apple Pie is a Favorite Dessert
Apple pie’s popularity can be attributed to its perfect blend of flavors and textures. The combination of sweet, tart apples, warm spices, and a flaky crust creates a sensory experience that appeals to all. It’s a dessert that can be enjoyed at any time of the year, whether served warm with a scoop of vanilla ice cream during the summer or as a comforting treat on a chilly autumn evening.
Moreover, apple pie is incredibly versatile. With countless variations and adaptations, it can cater to different dietary preferences or seasonal ingredients. From classic recipes to unique twists, there’s an apple pie for everyone, making it a universally loved dessert.
Key Elements of a Classic Apple Pie
To craft the best apple pie, understanding its key elements is crucial. A classic apple pie consists of three main components: the pie crust, the apple filling, and the spices that bring everything together.
1. Pie Crust: The foundation of any great apple pie starts with a well-made crust. A flaky, buttery crust acts as a vessel for the filling, providing a satisfying texture that complements the soft apples inside.
2. Apple Filling: The filling is the star of the show, and selecting the right combination of apples is vital. Different apple varieties contribute varying levels of sweetness and tartness, creating a balanced flavor profile that makes each bite delightful.
3. Spices and Sweeteners: The addition of spices like cinnamon and nutmeg, along with the right amount of sweeteners, elevates the apple pie to new heights. These ingredients help to enhance the natural flavors of the apples while adding warmth and depth to the dish.
With these essential components in mind, let’s turn our attention to the first step in creating the best apple pie: preparing the perfect pie crust.
The Perfect Pie Crust: Foundation of Your Apple Pie
Importance of a Good Pie Crust
The pie crust is, without a doubt, the backbone of any apple pie. A good crust should be flaky, tender, and flavorful, providing a satisfying contrast to the soft apple filling. The success of your pie largely depends on the quality of the crust, which is why it’s essential to understand the ingredients and techniques involved in making it.
Creating a pie crust may seem intimidating at first, but with the right approach and a little practice, anyone can master this skill. A well-made pie crust not only enhances the overall taste of the pie but also adds to its visual appeal, inviting guests to take a slice.
Ingredients Breakdown for the Pie Crust
To make a classic pie crust, you’ll need just a few simple ingredients. Here’s a breakdown of what you’ll need:
– All-Purpose Flour: Serving as the base of your crust, all-purpose flour provides structure and stability. It’s essential to use the right type of flour to achieve the desired texture.
– Salt and Sugar: A pinch of salt enhances the flavor of the crust, while sugar adds a touch of sweetness. Together, they create a balanced flavor profile that enriches the overall taste of the pie.
– Unsalted Butter: The star ingredient for a flaky crust, unsalted butter is essential for creating that desirable texture. It should be cold and cut into small pieces to ensure it integrates perfectly into the flour.
– Ice Water: This ingredient is critical for bringing the dough together. Ice water helps to keep the butter cold, which is vital for achieving flakiness in the crust.
Step-by-Step Instructions for Making the Pie Crust
Now that we have a clear understanding of the ingredients, let’s dive into the step-by-step process of making the perfect pie crust.
Mixing the Dry Ingredients
1. In a large mixing bowl, combine 2 ½ cups of all-purpose flour, 1 teaspoon of salt, and 1 tablespoon of granulated sugar. Whisk together until well combined. This mixture forms the foundation of your crust.
Incorporating the Butter
2. Next, add 1 cup (2 sticks) of cold unsalted butter, cut into small cubes, to the flour mixture. Using a pastry cutter or your fingertips, work the butter into the flour until the mixture resembles coarse crumbs. Be careful not to overwork the dough; you want to see small flecks of butter throughout.
Forming the Dough
3. Once the butter is incorporated, gradually add ice water, one tablespoon at a time, mixing gently with a fork after each addition. Continue adding water until the dough comes together, but avoid making it too wet or sticky. The dough should hold together when pressed but still have some texture.
4. Turn the dough out onto a lightly floured surface and divide it in half. Shape each half into a disc, wrap them in plastic wrap, and refrigerate for at least 1 hour. Chilling the dough allows the gluten to relax, making it easier to roll out later.
Chilling the Dough: Why It Matters
5. While the dough is chilling, take a moment to appreciate the importance of this step. Chilling not only firms up the butter, ensuring a flaky texture, but it also helps to develop the flavors in the crust. This waiting period is crucial for achieving the best results.
Once your dough has chilled, you’ll be ready to roll it out and assemble your apple pie. In the next section, we will discuss crafting a flavorful apple filling that complements your perfectly baked crust.
Crafting a Flavorful Apple Filling
Selecting the Right Apples for Your Pie
Choosing the right apples is a fundamental step in creating a delicious apple pie. The ideal apple filling should strike a perfect balance between sweet and tart, enhancing the overall flavor of the dessert. Here are two popular apple varieties that work exceptionally well in pie-making:
– Granny Smith: Renowned for their tartness, Granny Smith apples are a favorite among bakers. Their firm texture holds up well during baking, providing a delightful contrast to the sweetness of the filling. The tartness of these apples helps to balance the overall flavor, ensuring that the pie is not overly sweet.
– Honeycrisp: A newer addition to the apple family, Honeycrisp apples are known for their sweet and crisp bite. They add a refreshing contrast to the tartness of Granny Smith apples, creating a well-rounded filling. Their juiciness also contributes to a flavorful pie, making them an excellent choice for any apple pie recipe.
Ingredients Breakdown for the Apple Filling
Now that we’ve selected our apples, let’s take a closer look at the other ingredients that will enhance our apple filling:
– Sweeteners: Both granulated sugar and brown sugar can be used in your apple filling. Granulated sugar provides a clean sweetness, while brown sugar adds depth and a hint of caramel flavor. For a balanced taste, consider using a combination of both.
– Spices: A classic apple pie is incomplete without warm spices. Ground cinnamon is a must, providing that quintessential comfort flavor. Nutmeg, allspice, or ginger can also be added for extra warmth and complexity.
– Lemon Juice: A splash of lemon juice not only enhances the flavor of the apples but also helps to prevent browning. It adds a refreshing brightness to the filling that complements the sweetness of the apples.
– Thickening Agent: To achieve a perfectly saucy filling without being runny, a thickening agent such as cornstarch or flour is essential. This will help to absorb excess moisture and give your pie the right consistency.
With these ingredients in mind, we are ready to prepare the apple filling that will take our pie to the next level. In the next section, we will delve into the step-by-step process of creating a flavorful apple filling that perfectly complements our homemade crust. Stay tuned for more delicious details!

Spices: Cinnamon and Nutmeg for Depth
When it comes to flavoring your apple pie, spices play a crucial role in elevating the taste profile. Cinnamon and nutmeg are classic choices that add warmth and depth to the filling. Cinnamon enhances the sweetness of the apples, while nutmeg introduces a subtle earthiness that rounds out the overall flavor. For a balanced spice mixture, aim for one to two teaspoons of ground cinnamon and a pinch of freshly grated nutmeg. This combination not only complements the natural sweetness of the apples but also evokes memories of cozy autumn days.
The Role of Lemon Juice and Cornstarch
Lemon juice serves a dual purpose in your apple pie filling. First, it adds a bright acidity that balances the sweetness of the apples, preventing the filling from being overly sugary. Second, it helps to keep the apples from browning before they are baked. A tablespoon or two of fresh lemon juice goes a long way in enhancing the flavor.
Cornstarch, on the other hand, is essential for achieving the perfect consistency in your filling. It acts as a thickening agent, allowing the juices released from the apples during baking to create a luscious, not watery, filling. Typically, two to three tablespoons of cornstarch will suffice, depending on the juiciness of your apples.
Step-by-Step Instructions for Preparing the Apple Filling
1. Prepare the Apples: Start by peeling, coring, and slicing your apples. Aim for uniform slices to ensure even cooking. You can use a mix of tart and sweet apples for a more complex flavor. Good choices include Granny Smith for tartness and Honeycrisp for sweetness.
2. Mix the Dry Ingredients: In a large bowl, combine the sliced apples with sugar, cinnamon, nutmeg, lemon juice, and cornstarch. Stir gently to coat the apples evenly with the mixture.
3. Allowing the Apples to Marinate: Let the apple mixture sit for about 15-30 minutes. This step is crucial as it allows the apples to release some of their juices, which will meld with the sugar and spices, creating a flavorful filling. It also gives the cornstarch time to start thickening the mixture, ensuring that your pie won’t be runny.
Assembling Your Apple Pie
Tools and Equipment Needed for Assembly
Before you begin assembling your apple pie, gather the necessary tools. You will need:
– A rolling pin for rolling out the dough
– A 9-inch pie pan, preferably glass or ceramic for even baking
– A sharp knife or pastry cutter for trimming the crust
– A pastry brush for applying the egg wash
– Parchment paper or a silicone baking mat for easy transferring of the rolled dough
Step-by-Step Instructions for Assembling the Pie
1. Rolling Out the Dough: On a lightly floured surface, roll out the first disk of pie dough into a circle approximately 12 inches in diameter. Make sure to rotate the dough occasionally to maintain an even thickness. The dough should be about 1/8 inch thick.
2. Preparing the Pie Pan: Gently transfer the rolled dough into your pie pan by folding it in half and then unfolding it over the pan. Press it down gently to fit the shape of the pan, ensuring there are no air pockets beneath.
3. Filling with Apples and Dotting with Butter: Spoon the marinated apple filling into the prepared pie crust, mounding it slightly in the center. Dot the filling with small pieces of butter (about two tablespoons) to enhance the richness of the pie.
4. Creating the Top Crust: Roll out the second disk of dough in the same manner. You can either cover the entire pie with the top crust or create a lattice design for a more decorative finish. If opting for a full crust, make sure to cut slits for steam to escape. If making a lattice, cut the dough into strips and weave them over the filling.
5. Crimping the Edges: Trim any excess dough hanging over the edges of the pie pan, leaving about an inch. Fold the edges under and crimp them together using your fingers or a fork to create a decorative border.
Baking the Perfect Apple Pie
Preheating the Oven: Why Temperature Matters
Preheat your oven to 425°F (220°C). Starting with a hot oven is essential as it helps to set the crust and create a flaky texture. The high initial temperature will also help to evaporate moisture from the filling, preventing a soggy bottom crust.
Egg Wash: Achieving a Golden Brown Crust
For a beautiful golden-brown finish, brush the top crust with an egg wash before baking. An egg wash is made by whisking together one egg with a tablespoon of water or milk. This step not only adds color but also gives your pie a lovely sheen.
Baking Instructions: Timing and Temperature
Bake your apple pie in the preheated oven for about 15 minutes at 425°F to set the crust. Then, reduce the oven temperature to 350°F (175°C) and continue baking for an additional 35-45 minutes, or until the apples are tender and the crust is golden brown.
Initial High Heat for Crispness
The initial high heat is crucial for ensuring that your crust becomes crisp. It helps to create steam, which pushes the crust upward, creating those desirable flaky layers.
Reducing Heat for Even Cooking
Once you lower the temperature, the apples will have enough time to cook through without burning the crust. Check your pie periodically and cover the edges with foil if they begin to brown too quickly.
Signs of Doneness: Knowing When Your Pie is Ready
Your apple pie is done when the filling is bubbling through the slits or lattice and the crust is golden brown. A good rule of thumb is to look for a bubbling filling; this indicates that the cornstarch has fully activated, providing the ideal texture.
Cooling and Serving Your Apple Pie
The Importance of Cooling Time
Allow your apple pie to cool on a wire rack for at least two hours before slicing. This cooling period is essential as it allows the filling to set, making it easier to slice and serve without spilling over.
Serving Suggestions: Ice Cream and Whipped Cream
When it comes to serving, a slice of warm apple pie is perfect on its own, but a scoop of vanilla ice cream or a dollop of whipped cream elevates the experience to new heights. The creaminess of the ice cream contrasts beautifully with the warm, spiced filling, creating a delightful balance of textures and temperatures.
Storing Leftovers: Best Practices for Freshness
If you have leftover pie, store it covered at room temperature for up to two days. For longer storage, you can refrigerate it for up to a week. To reheat, place slices in a preheated oven at 350°F for about 10-15 minutes until warmed through. This will help restore the crust’s flakiness.
Conclusion
Creating the best apple pie is a rewarding endeavor that blends art and science in the kitchen. From the flaky crust to the spiced apple filling, each step contributes to the final masterpiece. Take the time to enjoy the process, and you’ll not only end up with a delicious dessert but also create lasting memories with each slice shared. With this guide, you are now equipped to bake a pie that captures the essence of comfort and tradition, making it a cherished addition to any gathering. Whether it’s a family holiday or a simple weeknight dessert, your homemade apple pie will surely impress and delight all who have the pleasure of enjoying it.


