Introduction
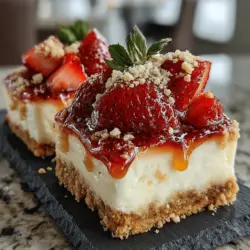
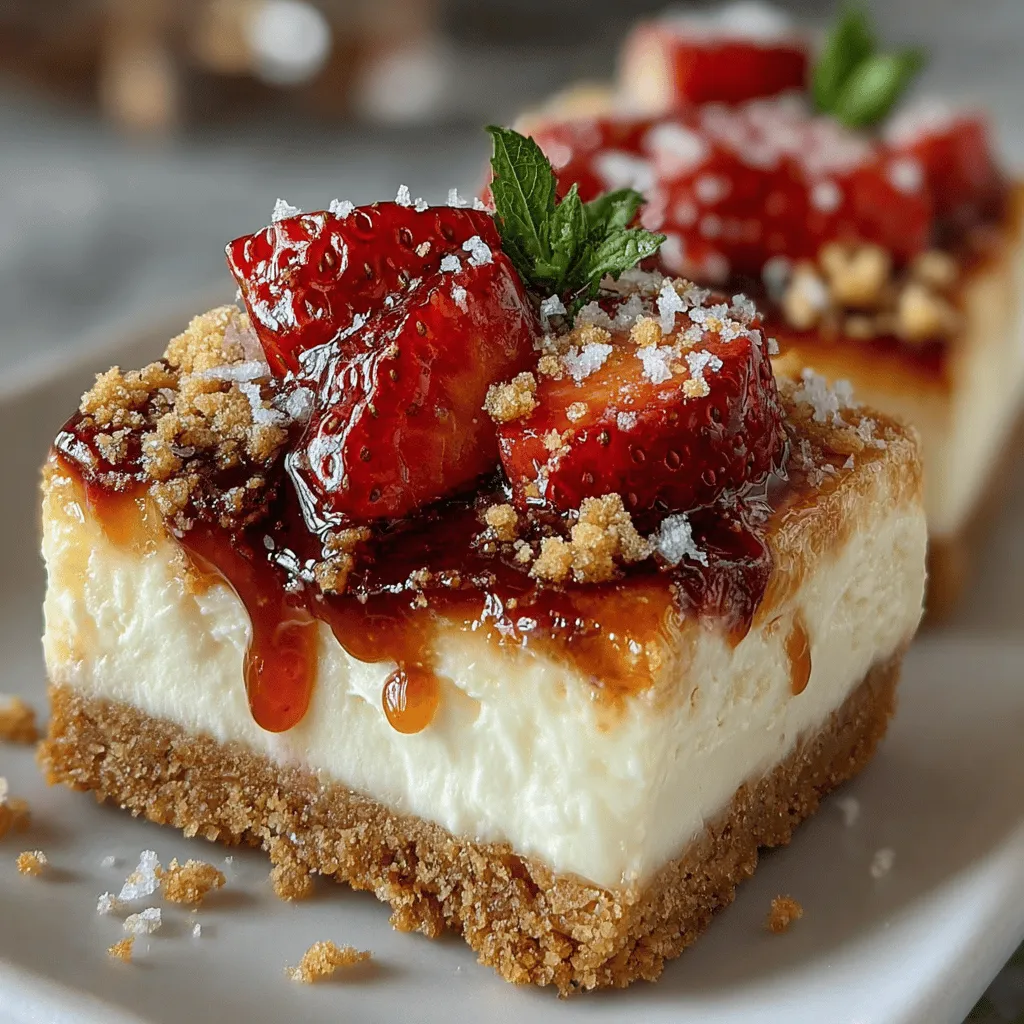
Welcome to the delightful world of no-bake desserts, where simplicity meets indulgence in the form of our Strawberry Bliss No-Bake Cheesecake Bars. This easy-to-follow recipe brings together a buttery graham cracker crust, a silky-smooth cheesecake filling, and a luscious fresh strawberry topping, creating a sweet treat that’s perfect for any occasion. Whether you’re hosting a summer barbecue, celebrating a birthday, or simply wish to satisfy a sweet craving, these cheesecake bars are bound to impress both friends and family.
No-bake desserts, in particular, have gained popularity for their convenience and ease of preparation. They are especially appealing during warmer months when turning on the oven can feel like a chore. With this recipe, you can create a refreshing dessert without the hassle of baking, making it an excellent choice for those hot summer days or busy weeknights.
In the following sections, we will explore the ingredients that make up this delectable dessert, the unique qualities of no-bake cheesecake bars, and guide you step-by-step through the preparation process, starting with how to make the perfect crust.
Understanding No-Bake Cheesecakes
Exploring the Benefits of No-Bake Desserts
No-bake desserts offer a myriad of benefits that can enhance your culinary experience. One of the most significant advantages is their convenience and simplicity. With minimal ingredients and straightforward steps, even novice bakers can whip up these tasty treats in no time. The absence of baking equipment, such as ovens, means fewer tools to clean up afterward, making no-bake desserts an excellent choice for busy individuals or those who prefer a hassle-free cooking experience.
Moreover, the texture of no-bake cheesecakes is undeniably appealing. The chilled, creamy consistency offers a refreshing alternative to traditional baked cheesecakes, which can sometimes be overly dense or dry. With no-bake cheesecakes, you achieve a light and fluffy texture that melts in your mouth, ensuring a delightful experience with every bite.
The Appeal of Cheesecake Bars
Cheesecake bars, in particular, come with their own set of advantages that make them a popular choice for gatherings. One key benefit is the individual serving sizes they provide. Unlike traditional cheesecakes that require slicing and can often lead to uneven portions, cheesecake bars are pre-sliced and ready to serve, making them ideal for parties and events.
Additionally, their shape lends itself to easy cutting and serving. This feature not only adds to the aesthetic presentation but also reduces the mess associated with serving whole cheesecakes. Guests can simply grab a bar and enjoy, making it a practical option for any occasion.
Finally, the versatility of cheesecake bars allows for a wide range of toppings, providing an opportunity for customization. From fresh fruits to chocolate drizzles or even nut toppings, you can easily adapt these bars to suit your preferences or to celebrate the seasonal ingredients available.
Ingredients Breakdown
To create the perfect Strawberry Bliss No-Bake Cheesecake Bars, understanding the role of each ingredient is essential. Let’s break down the components of this delicious dessert to appreciate how they come together to create a harmonious flavor and texture profile.
Creating the Perfect Crust
The crust is the foundation of any cheesecake, and for these bars, we will be using graham cracker crumbs. The importance of graham crackers lies in their ability to provide a sweet and slightly crunchy base that contrasts beautifully with the creamy cheesecake filling. When crushed into fine crumbs, they create a texture that holds together well while providing a satisfying crunch.
Butter plays a crucial role in the crust, contributing to both texture and flavor. It helps bind the crumbs together, ensuring that the crust holds its shape when cut into bars. The richness of melted butter also enhances the overall taste, making each bite delectable.
To achieve the right balance of sweetness, a touch of granulated sugar is added. This not only enhances the flavor of the crust but also complements the natural sweetness of the cheesecake filling and the fresh strawberries on top.
Crafting the Cheesecake Filling
The key to a smooth and creamy cheesecake filling lies in the choice of cream cheese. For the best results, opt for a high-quality cream cheese that is at room temperature. This ensures that it blends seamlessly with the other ingredients, resulting in a silky texture without lumps.
Powdered sugar is another essential ingredient in the filling, providing sweetness while also contributing to the overall stability of the cheesecake. Unlike granulated sugar, powdered sugar dissolves quickly, ensuring a smooth consistency that enhances the mouthfeel of the bars.
To achieve that light and airy texture that no-bake cheesecakes are known for, heavy whipping cream is an indispensable ingredient. When whipped to soft peaks, it incorporates air into the mixture, creating a fluffy filling that contrasts nicely with the denser crust.
Fresh Strawberry Topping
No dessert is complete without a fresh topping, and for our Strawberry Bliss No-Bake Cheesecake Bars, ripe strawberries take center stage. When selecting strawberries, look for those that are bright red, firm, and fragrant. Fresh, in-season strawberries not only provide the best flavor but also add a vibrant color that makes the dessert visually appealing.
To enhance the natural sweetness of the strawberries, a sprinkle of sugar is added, allowing the berries to macerate and release their juices. A squeeze of lemon juice is also recommended, as it brightens the flavor and adds a hint of acidity that balances the sweetness of the dessert.
For those who prefer a thicker sauce consistency, optional cornstarch can be used. By combining sugar, lemon juice, and cornstarch, you can create a delicious strawberry sauce that clings to the cheesecake bars, ensuring every bite is bursting with flavor.
Step-by-Step Preparation
Now that we’ve explored the ingredients that create the Strawberry Bliss No-Bake Cheesecake Bars, it’s time to dive into the preparation process, starting with the crust.
1. Making the Crust: Begin by preheating your kitchen environment to a comfortable working temperature. While you won’t be using an oven, ensuring your ingredients are at room temperature will greatly assist in the mixing process. In a mixing bowl, combine the graham cracker crumbs with granulated sugar. This mixture will serve as the base of your crust. Next, melt the butter and pour it into the crumb mixture. Stir well until all the crumbs are evenly coated; the mixture should resemble wet sand.
2. Pressing the Crust: Transfer the crumb mixture into a lined baking dish, using a spatula or the bottom of a glass to press it firmly into an even layer. This step is crucial for creating a crust that holds together well when sliced into bars. Once pressed, place the dish in the refrigerator to chill while you prepare the cheesecake filling.
3. Preparing the Cheesecake Filling: In a large mixing bowl, beat the cream cheese until smooth and creamy. Gradually add in the powdered sugar, mixing until fully incorporated. In a separate bowl, whip the heavy cream until soft peaks form. Gently fold the whipped cream into the cream cheese mixture, being careful not to deflate the air you’ve just incorporated.
4. Filling the Crust: Once combined, pour the cheesecake filling over the chilled crust, spreading it evenly with a spatula. Smooth out the top to create an even surface, then return the dish to the refrigerator to allow the cheesecake to set. This usually takes about 4-6 hours, but for the best results, consider letting it chill overnight.
Stay tuned as we continue to unveil the delightful steps of creating the perfect Strawberry Bliss No-Bake Cheesecake Bars, including the finishing touches with the fresh strawberry topping.
Detailed Instructions for Mixing and Pressing the Crust
To create the perfect base for your Strawberry Bliss No-Bake Cheesecake Bars, start by combining your crushed graham crackers with melted butter and a touch of sugar. This mixture not only gives flavor but also helps bind the crust together.
1. Mixing the Ingredients: In a mixing bowl, combine 1 ½ cups of finely crushed graham cracker crumbs with ⅓ cup of granulated sugar. Stir until well mixed. Then, pour in ½ cup of melted unsalted butter. Use a spatula or fork to blend everything until the crumbs are fully coated and the mixture resembles wet sand.
2. Pressing the Crust: Line an 8×8-inch baking pan with parchment paper, allowing some overhang for easy removal later. Transfer the crust mixture into the pan and press it firmly into the bottom using the back of a measuring cup or your fingers. Ensure that the crust is even and compact, which is essential for providing a sturdy base for your cheesecake.
Tips for Achieving a Firm and Even Base
– Use a Flat Tool: A flat-bottomed glass or measuring cup works wonders for achieving an even surface. Press down firmly, but be careful not to crush the crumbs too much.
– Chill Before Filling: After pressing the crust into the pan, place it in the refrigerator for about 15-20 minutes. Chilling helps the butter solidify, resulting in a firmer base that will hold together once the cheesecake filling is added.
Importance of Chilling for the Best Results
Chilling is crucial in the no-bake cheesecake process. It not only helps the crust set but also prepares the pan for the cheesecake filling. The cooler temperature aids in keeping the crust crisp while also preventing the filling from making it soggy. A well-chilled crust will provide the perfect foundation for your Strawberry Bliss Cheesecake Bars.
Whipping Up the Cheesecake Filling
The cheesecake filling is the star of the show, and achieving a smooth, creamy texture is essential.
Techniques for Beating Cream Cheese to Avoid Lumps
1. Room Temperature Cream Cheese: Start with 16 ounces of full-fat cream cheese that has been softened at room temperature for at least 30 minutes. This is a vital step; cold cream cheese can lead to lumps in your filling.
2. Mixing: In a large mixing bowl, use an electric mixer on medium speed to beat the cream cheese until smooth and creamy, about 2-3 minutes. Scrape down the sides of the bowl with a spatula to ensure all cream cheese is evenly mixed.
Folding in Whipped Cream Without Deflating It
To achieve the light and airy texture that characterizes a classic cheesecake, you’ll need to fold in whipped cream gently.
1. Whipping the Cream: In another bowl, whisk 1 cup of heavy cream until stiff peaks form. This means that when you lift the whisk, the cream holds its shape.
2. Folding Technique: Using a rubber spatula, add one-third of the whipped cream to the cream cheese mixture and gently fold it in. This lightens the mixture. Then, gradually fold in the remaining whipped cream until no white streaks remain. Be careful not to overmix, as this can deflate the whipped cream.
Achieving the Ideal Creamy Texture
The key to a successful cheesecake filling lies in the balance of ingredients. Once you’ve folded in the whipped cream, add ½ cup of powdered sugar and 1 teaspoon of vanilla extract to the mixture. Mix gently until fully incorporated. The result should be a rich, creamy filling that is smooth and luscious.
Assembling the Cheesecake Bars
Now that your crust and filling are ready, it’s time to assemble the cheesecake bars.
Layering the Cheesecake Filling Over the Crust
Carefully pour the cheesecake filling onto the chilled crust. Use an offset spatula or the back of a spoon to spread the filling evenly across the crust. Smooth the top to ensure a uniform layer.
Optional Garnishes to Enhance Presentation
Consider adding some flair to your cheesecake bars. You can sprinkle fresh mint leaves on top or drizzle with additional melted chocolate or a fruit sauce for color and flavor. Fresh strawberries placed on top before serving can also elevate the presentation.
Importance of Refrigeration for Setting
Once assembled, cover the cheesecake bars with plastic wrap or aluminum foil and refrigerate for at least 4 hours, or preferably overnight. This chilling time allows the filling to set properly, resulting in a slice that holds its shape when cut.
Preparing the Strawberry Topping
The final touch to your Strawberry Bliss No-Bake Cheesecake Bars is the fresh strawberry topping.
Proper Techniques for Slicing and Marinating Strawberries
1. Slicing the Strawberries: Begin by washing and hulling about 2 cups of fresh strawberries. Slice them into quarters or halves, depending on your preference.
2. Marinating: In a small bowl, sprinkle the sliced strawberries with 1-2 tablespoons of granulated sugar. Toss gently to coat and allow them to sit for about 15-20 minutes. This will draw out the juices and create a natural syrup that enhances the strawberries’ flavor.
Tips for Achieving the Desired Sauce Consistency
If you prefer a smoother sauce, you can blend the marinated strawberries until pureed, then strain the mixture to remove seeds. This will give you a strawberry sauce that you can drizzle over the cheesecake bars just before serving.
Timing for Topping to Maintain Freshness
For the best flavor and texture, add the strawberry topping just before serving. This ensures that the strawberries remain fresh and vibrant, enhancing the overall presentation and taste of your cheesecake bars.
Serving Suggestions
Presenting the Cheesecake Bars
When ready to serve, lift the cheesecake bars out of the pan using the parchment paper overhang. Use a sharp knife dipped in hot water to make clean cuts for neat slices.
Ideas for Garnishing and Serving
– Fresh Mint: A sprig of fresh mint on top of each slice adds a pop of color and freshness.
– Chocolate Drizzle: A drizzle of melted dark or white chocolate can create an elegant finish.
– Whipped Cream: Serve with a dollop of whipped cream for extra indulgence.
Pairing Suggestions for Beverages or Additional Desserts
These cheesecake bars pair beautifully with a variety of beverages. Consider serving with:
– Sparkling Water: A refreshing option that complements the sweetness of the cheesecake.
– Herbal Tea: A warm cup of chamomile or mint tea can balance the dessert nicely.
– Coffee: A strong coffee or espresso enhances the flavors of the cheesecake.
Storing Leftovers for Future Enjoyment
If you have any leftover cheesecake bars, store them in an airtight container in the refrigerator for up to 3 days. For longer storage, you can freeze the bars. Wrap them tightly in plastic wrap and then foil, and they can last in the freezer for up to two months. Thaw them in the refrigerator before serving.
Nutritional Information
Caloric Breakdown of Ingredients
While enjoying your Strawberry Bliss No-Bake Cheesecake Bars, it’s helpful to be aware of the nutritional information:
– Serving Size: One slice (1/9 of the recipe)
– Calories: Approximately 250 calories per slice
– Total Fat: 18 grams
– Saturated Fat: 10 grams
– Carbohydrates: 20 grams
– Sugars: 10 grams
– Protein: 3 grams
Understanding Portion Sizes and Servings
This recipe yields about nine generous slices. Adjust portion sizes based on your guests’ preferences, and feel free to slice them smaller for a lighter treat.
Nutritional Benefits of Strawberries and Cream Cheese
Strawberries are not only delicious but also packed with vitamins and antioxidants. They are low in calories and rich in vitamin C, fiber, and folate. Cream cheese, while higher in fat, provides a good source of calcium and contributes to the creamy texture that makes these bars so indulgent.
Balancing Indulgence with Mindful Eating
Enjoying desserts like these cheesecake bars can be part of a balanced diet. Savor each bite, and consider pairing them with fresh fruit or nuts to enhance the nutritional content of your dessert experience.
Conclusion
In conclusion, the Strawberry Bliss No-Bake Cheesecake Bars offer a delightful blend of flavors and textures, making them a standout dessert for any occasion. With their simple preparation and refreshing taste, these bars are not only a treat for your taste buds but also a source of joy in the kitchen. Whether you’re sharing them with friends or enjoying them solo, this recipe will surely become a beloved addition to your dessert repertoire. Embrace the ease and satisfaction of no-bake desserts with this delicious cheesecake that celebrates the sweetness of strawberries.