Introduction
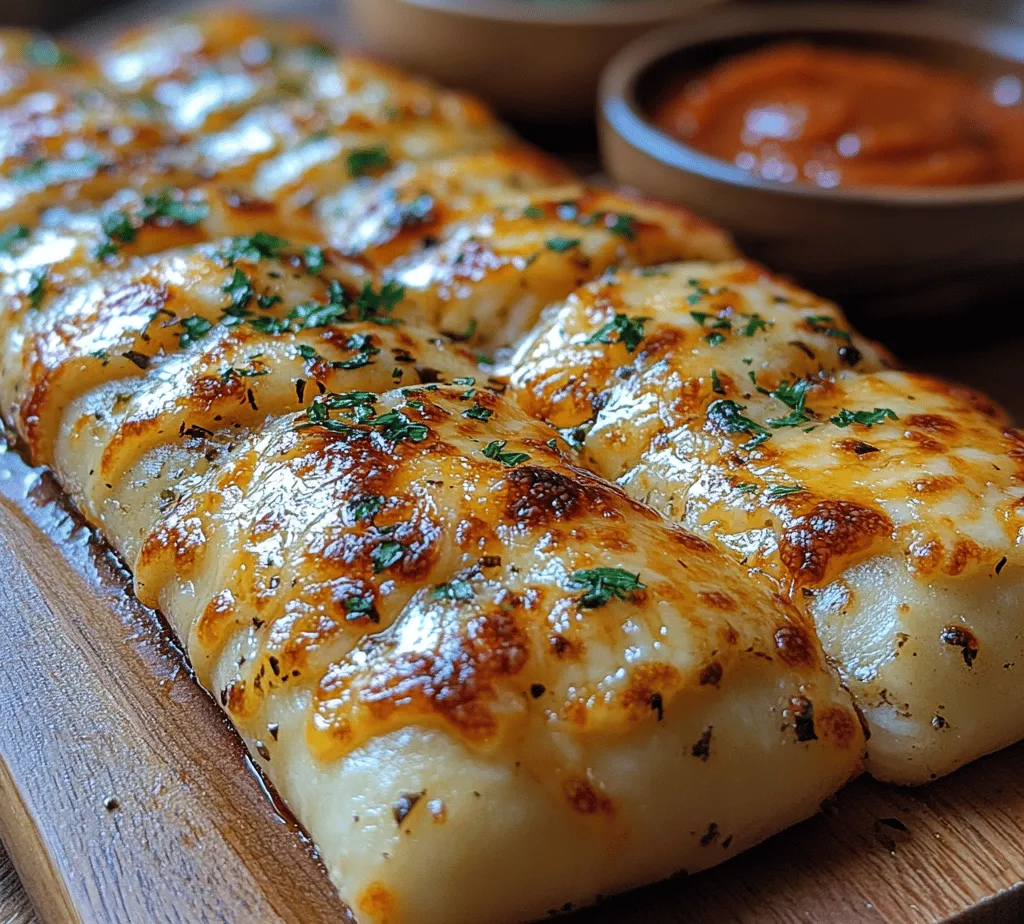
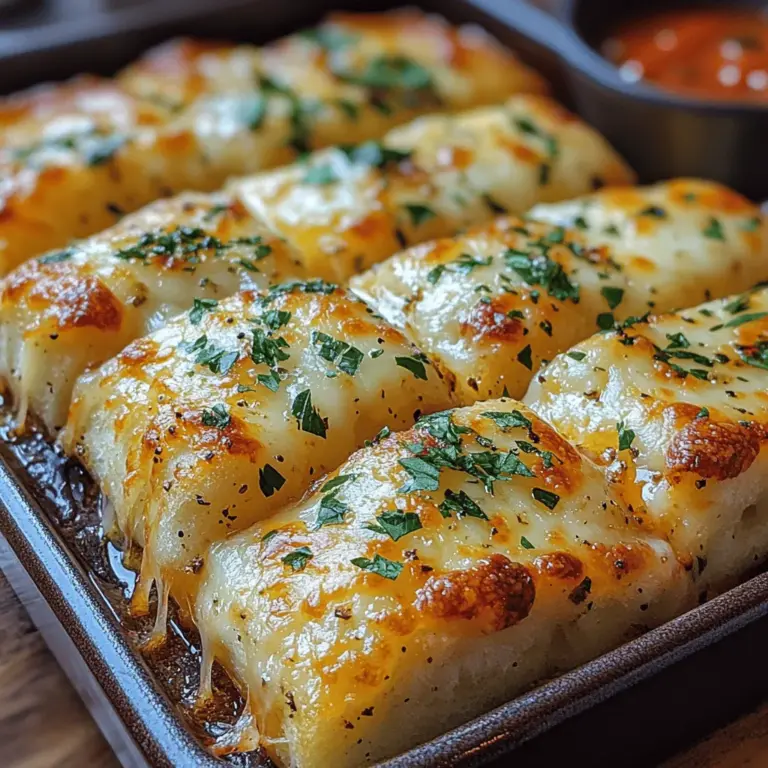
There’s something utterly delightful about the aroma of freshly baked bread wafting through your home. Whether it’s a family gathering, a casual game night, or simply a cozy evening in, homemade breadsticks are a treat that can elevate any occasion. Among the myriad of breadstick recipes, the Baked Cheesy Garlic Breadsticks stand out due to their irresistible combination of garlic, gooey cheese, and a perfectly baked texture that is simply hard to resist.
The beauty of these breadsticks lies in their simplicity and versatility. They can be served as a side dish with pasta, enjoyed as a snack while watching a favorite movie, or even served at parties as finger food that everyone will love. Additionally, making them from scratch allows you to control every ingredient, ensuring that the flavors are just right. With a few basic ingredients and some love, you can whip up a batch that will leave your friends and family asking for more.
Understanding the Basics of Breadstick Making
Before diving into the specifics of our Baked Cheesy Garlic Breadsticks recipe, it’s important to understand the key components of breadstick making. This knowledge not only helps in achieving the best possible outcome but also enhances your overall confidence in the kitchen.
Key Ingredients and Their Roles
Every ingredient in this recipe plays a vital role in the final product. Here’s a quick overview of the essential components:
1. Warm Water: The cornerstone of the dough, warm water is crucial for activating the yeast, allowing it to ferment and produce the carbon dioxide that makes the breadsticks light and fluffy.
2. Sugar: Often overlooked, sugar is not just for sweetness. It acts as food for the yeast, helping it to ferment and rise effectively.
3. Active Dry Yeast: This ingredient is responsible for the leavening effect in the dough. When activated, it ferments the sugars and produces the gases that cause the dough to rise.
4. Olive Oil: Not only does olive oil add a rich flavor to the breadsticks, but it also contributes to the dough’s tenderness by coating the flour proteins.
5. All-Purpose Flour: The backbone of the breadsticks, all-purpose flour provides the structure and stability needed for the dough.
6. Salt: A crucial seasoning, salt enhances the flavor of the breadsticks while also controlling the yeast’s activity, preventing it from fermenting too quickly.
7. Garlic Powder and Italian Seasoning: These ingredients infuse the dough with aromatic flavors, providing a delightful taste that complements the cheese.
8. Shredded Mozzarella and Grated Parmesan Cheese: The star of the show, these cheeses create a melty, gooey texture that is simply irresistible.
9. Unsalted Butter: Brushed on top before serving, unsalted butter adds a rich finish and helps with browning.
10. Fresh Parsley: A sprinkle of fresh parsley not only adds a pop of color but also contributes a fresh flavor to balance the richness of the cheese.
Importance of Yeast Activation
A critical step in making breadsticks is the activation of yeast. This process is essential for achieving the right texture in your dough. When yeast is combined with warm water and sugar, it begins to feed on the sugar, releasing carbon dioxide gas and causing the dough to rise. The ideal temperature for yeast activation is between 100°F to 110°F (37°C to 43°C). Water that is too hot can kill the yeast, while water that is too cold will not activate it effectively.
Understanding the signs of activated yeast is also important; look for a frothy appearance and a slight increase in volume after about 5-10 minutes. This indicates that your yeast is alive and ready to work its magic on your dough.
Balancing Flavors: Garlic, Cheese, and Herbs
The combination of garlic, cheese, and herbs is what truly sets these breadsticks apart. Garlic powder delivers a punch of flavor without the need for chopping fresh garlic, making the process quicker and simpler. Italian seasoning adds a blend of herbs that enhances the overall flavor profile of the breadsticks, creating a deliciously aromatic experience with every bite.
The rich, melty mozzarella provides a creamy texture, while the sharpness of the grated Parmesan adds a contrasting depth of flavor. This balance ensures that every bite of the breadstick is not only cheesy but also packed with savory goodness.
Ingredient Breakdown
Now that we have a solid understanding of the essential components of our Baked Cheesy Garlic Breadsticks, let’s take a closer look at each ingredient and why it’s integral to the recipe.
Warm Water
The foundation of any yeast-based dough, warm water is essential for activating yeast. For best results, aim for a temperature range of 100°F to 110°F. This warm environment encourages yeast growth, resulting in light and airy breadsticks.
Sugar
Sugar serves a dual purpose in this recipe. Not only does it add a hint of sweetness, but it also acts as food for the yeast. This fermentation process produces carbon dioxide, helping the dough to rise and achieve that desirable fluffy texture.
Active Dry Yeast
Active dry yeast is the most common type of yeast used in baking. It works by fermenting the sugars in the dough, producing carbon dioxide gas that causes the dough to rise. If you’re in a pinch, you can also use instant yeast or fresh yeast, but be mindful of the needed adjustments in quantities and activation methods.
Olive Oil
Incorporating olive oil into the dough adds richness and flavor while also helping to keep the breadsticks tender. The fat in the olive oil coats the flour proteins, preventing them from forming too much gluten, which could lead to a tough texture.
All-Purpose Flour
All-purpose flour is the ideal choice for your breadsticks as it offers the right balance of protein content for both structure and tenderness. This versatile flour allows for a soft, chewy breadstick that’s still sturdy enough to hold up to the cheesy topping.
Salt
Salt is a crucial ingredient in any bread-making process. It not only enhances the flavor of the breadsticks but also regulates yeast activity. This ensures that the dough doesn’t rise too quickly, giving you more control over the fermentation process.
Garlic Powder and Italian Seasoning
These two seasonings are the secret weapons in our breadsticks. Garlic powder adds a robust flavor that permeates the dough, creating a deliciously savory experience. Italian seasoning brings a blend of herbs that complements the garlic and cheese perfectly, enhancing the overall flavor profile.
Shredded Mozzarella and Grated Parmesan Cheese
The cheese is the star of the show! Shredded mozzarella melts beautifully, creating that gooey, stretchy texture we all love. Grated Parmesan adds a sharp, nutty flavor that contrasts wonderfully with the mozzarella. Together, they create a delicious cheesy topping that’s hard to resist.
Unsalted Butter
Brushing the breadsticks with unsalted butter before serving adds an extra layer of richness and helps achieve a golden-brown finish. Unsalted butter is preferred here, as it allows you to control the amount of salt in your recipe.
Fresh Parsley
Finally, a sprinkle of fresh parsley adds a pop of color and a refreshing flavor that cuts through the richness of the cheese. It’s a simple yet effective garnish that elevates your breadsticks from ordinary to extraordinary.
Step-by-Step Instructions for Baked Cheesy Garlic Breadsticks
Now that you’re familiar with the ingredients and their roles, let’s dive into the step-by-step instructions for making your Baked Cheesy Garlic Breadsticks. The first crucial step is activating the yeast.
Activating the Yeast
1. Prepare the Warm Water: Start by measuring out ¾ cup of warm water. Ensure that the temperature is between 100°F to 110°F. If you don’t have a kitchen thermometer, you can check the water with your wrist; it should feel warm, not hot.
2. Add the Sugar and Yeast: In a small bowl, combine the warm water with 1 tablespoon of sugar. Stir gently until the sugar is dissolved. Then, sprinkle 2 ¼ teaspoons of active dry yeast over the surface of the water. Allow it to sit for about 5-10 minutes, or until it becomes frothy and bubbly. This indicates that your yeast is activated and ready to use.
3. Mix the Dough: In a large mixing bowl, combine 2 cups of all-purpose flour and 1 teaspoon of salt. Create a well in the center and pour in the activated yeast mixture along with 2 tablespoons of olive oil.
4. Knead the Dough: Using a wooden spoon or spatula, mix the ingredients until a shaggy dough forms. Then, transfer the dough onto a floured surface and knead it for about 5-7 minutes, or until it becomes smooth and elastic. If the dough is too sticky, you can gradually add more flour, one tablespoon at a time, until you reach the desired consistency.
5. Let the Dough Rise: Shape the kneaded dough into a ball and place it in a lightly greased bowl, turning it to coat the surface with oil. Cover the bowl with a clean kitchen towel or plastic wrap and place it in a warm, draft-free area. Allow the dough to rise for about 1 hour, or until it has doubled in size.
As you let the dough rise, the yeast will work its magic, creating a light and airy texture that will make your breadsticks irresistible. Stay tuned for the next steps, where we’ll shape, bake, and enjoy these delicious breadsticks that are perfect for any occasion!

Yeast Activation Process
The first and most crucial step in making baked cheesy garlic breadsticks is activating the yeast. This process is essential because it ensures that your dough will rise properly, resulting in light and airy breadsticks. To start, you’ll need to combine warm water (approximately 110°F or 43°C) with sugar and yeast in a bowl. The sugar acts as food for the yeast, stimulating its growth. After mixing, let this mixture sit for about 5 to 10 minutes. You’ll know the yeast is activated when it becomes frothy and bubbly, indicating that it’s alive and ready to work its magic.
Making the Dough
Once your yeast is activated, it’s time to create the dough. In a large mixing bowl, combine all-purpose flour and salt. Make a well in the center of the flour mixture and pour in your yeast mixture along with a splash of olive oil. Stir the mixture with a wooden spoon or spatula until it begins to come together.
Tips for Mixing and Achieving the Right Consistency
When mixing your dough, it’s important to ensure that all the flour is incorporated without overworking it. If the dough feels too sticky, you can sprinkle in a little more flour, but be cautious not to add too much. The goal is to achieve a soft, pliable dough that’s slightly tacky but not overly sticky. If you’re using a stand mixer with a dough hook, mix on low speed until the dough forms, then increase to medium speed for a few minutes.
Kneading Techniques
Kneading is a vital step in bread-making, as it develops the gluten structure, which gives bread its chewy texture. To knead by hand, turn the dough out onto a lightly floured surface. Press the dough with the heels of your hands, fold it over, and repeat the process. Knead the dough for about 8 to 10 minutes, or until it becomes smooth and elastic. If you’re using a stand mixer, knead on medium speed for about 5 minutes.
Importance of Kneading and Signs of Well-Kneaded Dough
Properly kneaded dough should be smooth and elastic. A simple test to check if your dough is ready is the “windowpane test.” Take a small piece of dough and stretch it gently; if it forms a thin, translucent membrane without tearing, it’s well-kneaded. On the contrary, if it breaks easily, it needs more kneading.
The First Rise
After kneading, place the dough in a lightly oiled bowl, cover it with a damp cloth or plastic wrap, and let it rise in a warm, draft-free area. The ideal temperature for the first rise is around 75°F to 80°F (24°C to 27°C). It typically takes about 1 to 2 hours for the dough to double in size.
Ideal Conditions for Dough Rising and How to Tell When It’s Ready
For optimal rising conditions, consider preheating your oven to its lowest setting for a few minutes, then turning it off. Place the dough inside the oven with the door slightly ajar. You’ll know the dough is ready when it has approximately doubled in size and feels light to the touch.
Shaping the Breadsticks
Once the dough has risen, it’s time to shape your breadsticks. Turn the dough out onto a floured surface and gently punch it down to release the air. Divide the dough into equal portions, depending on how thick or thin you want your breadsticks. Roll each piece into a long strip, about 1/2 inch thick.
Techniques for Rolling and Cutting Dough into Strips
To roll your dough evenly, use a rolling pin and apply gentle, even pressure. You can also use your hands to stretch the dough. If you prefer a more rustic look, you can simply cut the strips with a sharp knife or a pizza cutter instead of rolling them.
Adding Cheese
Now comes the fun part: adding cheese! For a delectable cheesy experience, sprinkle a generous amount of grated mozzarella cheese over the rolled dough. Be sure to distribute the cheese evenly to ensure that every bite is packed with flavor. For an added flavor boost, consider mixing in some garlic powder or Italian herbs with the cheese before sprinkling it on.
Best Practices for Cheese Application to Ensure Even Melting
To ensure even melting, consider gently pressing the cheese into the dough before the second rise. This helps the cheese adhere better and reduces the likelihood of it sliding off during baking.
The Second Rise
After shaping and adding cheese, the breadsticks need a second rise. Cover them again with a damp cloth and let them rest for about 30 minutes. This step is crucial for achieving a light and airy texture in the final product.
Importance of This Step for Texture and Lightness
The second rise allows the gluten to relax and gives the yeast more time to create air pockets within the dough. Skipping this step can result in denser breadsticks that lack the desired fluffiness.
Baking Process
Now it’s time to bake your cheesy garlic breadsticks! Preheat your oven to 400°F (200°C). Place the risen breadsticks on a parchment-lined baking sheet, ensuring there’s enough space between them for expansion. Bake for 15 to 20 minutes or until they are golden brown and the cheese is bubbly.
Tips for Achieving the Perfect Golden Crust and Bubbly Cheese
To achieve a perfect golden crust, consider brushing the breadsticks with melted butter or an olive oil-garlic mixture before baking. This not only adds flavor but also enhances the crust’s color. If you want an extra cheesy topping, sprinkle more cheese on top during the last few minutes of baking.
Garnishing and Serving
Once baked, remove the breadsticks from the oven and let them cool for a few minutes. For added flavor, you can sprinkle freshly chopped parsley or a mix of Italian herbs on top. Serve the breadsticks warm with a side of marinara sauce for dipping. They make a delightful appetizer or a perfect accompaniment to pasta dishes.
Common Mistakes When Making Breadsticks and How to Avoid Them
While making baked cheesy garlic breadsticks is relatively straightforward, there are common pitfalls you can encounter.
– Yeast Activation Issues: If your yeast doesn’t bubble during activation, it may be expired or the water temperature was too hot or too cold. Always check the expiration date and use warm water between 100°F and 110°F.
– Dough Texture Problems: If your dough is too sticky, it may need more flour, but avoid adding too much as it can make the breadsticks tough. If the dough is too dry, adding a little water can help.
– Overbaking or Underbaking: Keep a close eye on your breadsticks in the oven. Every oven is different, so check them a few minutes before the recommended baking time to prevent overbaking, which can lead to dry breadsticks.
Nutritional Information and Variations
Each serving of baked cheesy garlic breadsticks contains approximately 200 calories, with 8 grams of protein, 8 grams of fat, and 28 grams of carbohydrates. For those looking to spice things up, consider adding herbs like rosemary or thyme to the dough for an herb-infused variation. You can also make spicy breadsticks by incorporating crushed red pepper flakes into the cheese topping.
Creative Dipping Sauces Beyond Marinara
While marinara sauce is a classic pairing, you can also serve these breadsticks with a variety of dipping sauces. Consider garlic butter, ranch dressing, or a spicy sriracha mayo for a different flavor profile.
Cultural Significance of Breadsticks
Breadsticks have a long history in various cuisines, especially in Italian dining. Known as “grissini,” these thin, crunchy breadsticks are often served as an appetizer or snack. They symbolize hospitality and are an essential part of Italian culinary traditions. Beyond Italy, breadsticks have found their way into American dining, often served alongside pasta dishes or as a standalone snack.
Conclusion
Homemade baked cheesy garlic breadsticks are not just easy to make; they are a comforting treat that brings joy to any meal. The simplicity of the ingredients combined with the delightful aroma of garlic and cheese makes this recipe a favorite among family and friends. Embrace the joy of baking, share these delicious breadsticks with your loved ones, and enjoy the process of cooking at home. Don’t hesitate to try this recipe and explore all the variations it has to offer. Your taste buds will thank you!


