Introduction
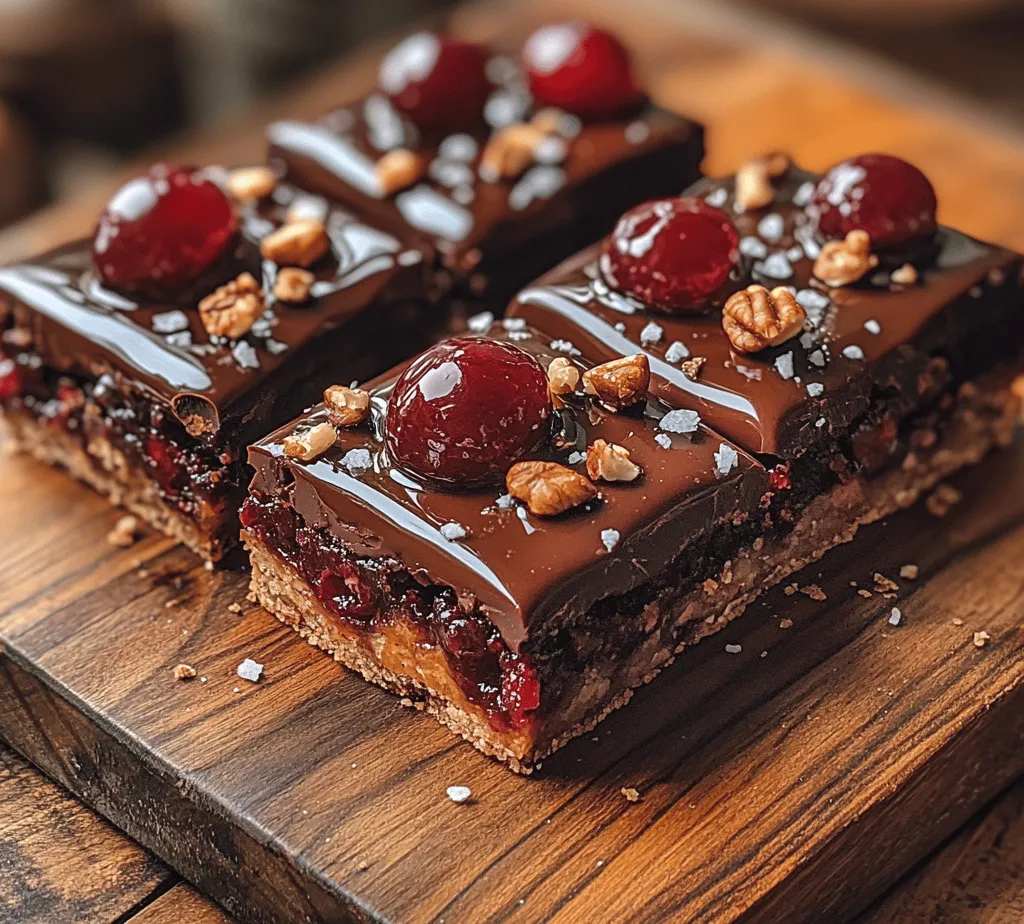
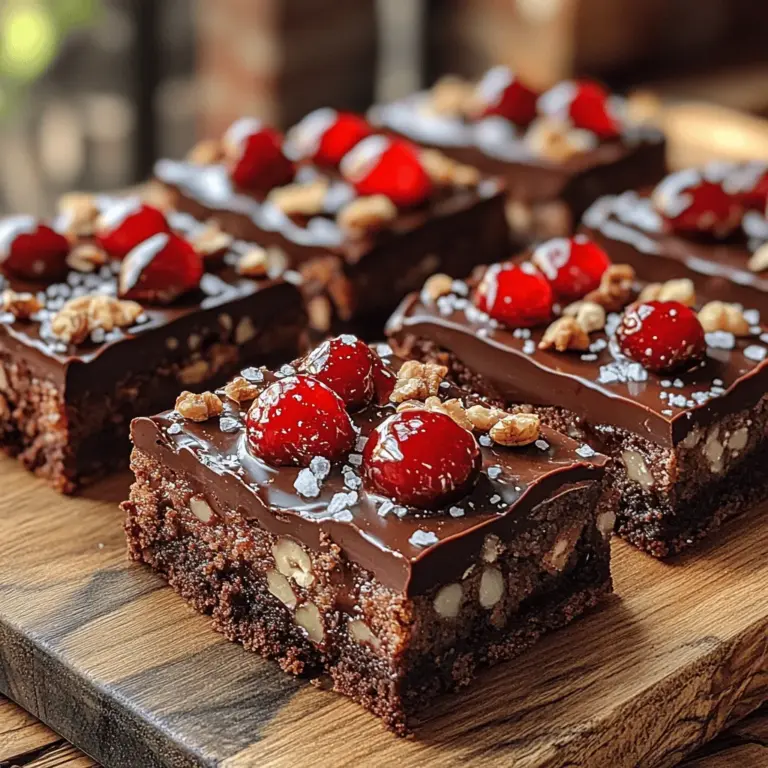
Indulging in a dessert that beautifully marries the richness of chocolate with the tartness of cherries is an experience unlike any other. Enter the Chocolate Covered Cherry Magic Bars—a delectable treat that captures the essence of this delightful combination. With layers of flavor and contrasting textures, these bars are sure to tantalize your taste buds and leave you craving more. Their charm lies not only in their luscious taste but also in their versatility, making them the perfect addition to any gathering, from family reunions to festive holiday celebrations.
The allure of these magic bars is not just in their ingredients; it’s in the memories they create. Picture a warm afternoon spent with loved ones, laughter filling the air as everyone reaches for another piece of these mouthwatering bars. The juxtaposition of the creamy chocolate and the sweet, juicy cherries creates a harmonious blend that appeals to both chocolate lovers and those who appreciate fruity desserts. This recipe invites you to create a dessert that is not only visually appealing but also bursting with flavor, ensuring that it will be a hit on any dessert table.
The Allure of Magic Bars
Magic bars have long been a beloved dessert in many homes, known for their easy preparation and delightful layers. Their origins can be traced back to the 1960s in the United States, where they quickly gained popularity for their decadent taste and the magic that unfolds within each bite. The term “magic” refers to the enchanting combination of ingredients that transform into layers of flavor during baking, creating a dessert that feels special without requiring hours of preparation.
A traditional magic bar typically includes a base layer made from graham cracker crumbs, followed by layers of chocolate, nuts, and sweetened condensed milk. This recipe takes the classic magic bar concept and elevates it by incorporating cherries, which add a burst of flavor and a pop of color. The versatility of magic bars is one of their most appealing traits; they can be customized to suit your preferences. Whether you choose to swap the nuts for additional fruit, experiment with different types of chocolate, or add a dash of spice, the possibilities are endless.
Ingredients Breakdown
Creating the perfect Chocolate Covered Cherry Magic Bars requires a thoughtful selection of ingredients, each playing a vital role in achieving the desired flavor and texture. Let’s dive into the key components that come together to make this dessert a standout.
Graham Cracker Crumbs
Graham cracker crumbs form the foundation of the magic bars, providing a sweet and crunchy crust that holds everything together. Their subtle sweetness and slight nuttiness create a perfect base that balances the richness of the chocolate and the tartness of the cherries. The crumbs are easily made by crushing whole graham crackers into fine pieces, or you can purchase pre-made crumbs for convenience.
Unsweetened Cocoa Powder
To enhance the chocolatey flavor of the crust, unsweetened cocoa powder is added. This ingredient brings depth and complexity to the bars, contributing a rich chocolate taste without the added sweetness. It’s important to use unsweetened cocoa powder, as it allows for better control over the overall sweetness of the dessert.
Unsalted Butter
Butter is a key ingredient in binding the crust together, adding richness and moisture. The use of unsalted butter is recommended, as it allows you to control the salt content in your dessert. When melted and mixed with the graham cracker crumbs and cocoa powder, the butter helps create a cohesive crust that holds up beautifully when baked.
Granulated Sugar
Granulated sugar adds the necessary sweetness to the crust and complements the other flavors in the bars. It not only sweetens the dessert but also contributes to the overall texture, helping to create a slightly crisp crust that contrasts with the creamy filling above.
Sweetened Condensed Milk
One of the star ingredients in our magic bars is sweetened condensed milk. This rich and creamy component acts as a binder for the layers, providing a luscious texture that melts in your mouth. As it bakes, the sweetened condensed milk caramelizes slightly, creating a gooey, irresistible filling that brings the entire dessert together.
Semi-Sweet Chocolate Chips
For the chocolate layer, semi-sweet chocolate chips are the ideal choice. They melt beautifully and offer a balanced sweetness that complements the tart cherries. The chocolate chips create a rich layer that, when combined with the sweetened condensed milk, results in a decadent treat that satisfies even the most discerning chocolate lover.
Maraschino Cherries
Maraschino cherries are the secret weapon in this recipe, adding a burst of sweetness and a pop of color. Their glossy finish and juicy texture elevate the bars, making them visually appealing and delicious. These cherries not only enhance the flavor profile but also provide a delightful contrast to the rich chocolate and creamy filling.
Chopped Nuts
Chopped nuts add an essential crunch to the magic bars, providing texture that balances the softness of the chocolate and the creaminess of the filling. Whether you choose walnuts, pecans, or almonds, the nuts contribute a nutty flavor that complements the other ingredients beautifully.
Vanilla Extract and Sea Salt
Finally, a splash of vanilla extract elevates the overall flavor of the bars, adding warmth and complexity. A sprinkle of sea salt is also crucial; it enhances the sweetness of the chocolate and cherries while providing a subtle contrast that brings out the best in each ingredient. The combination of these elements ensures that every bite of your chocolate-covered cherry magic bars is a harmonious experience.
Step-by-Step Instructions
Now that we’ve covered the ingredients, let’s dive into the preparation of these Chocolate Covered Cherry Magic Bars. Follow these step-by-step instructions for a delightful baking experience.
Step 1: Preheat the Oven
Begin by preheating your oven to 350°F (175°C). Preheating ensures that your bars bake evenly, resulting in a perfectly set filling and a beautifully crisp crust.
Step 2: Prepare the Baking Pan
Next, line a 9×9-inch baking pan with parchment paper, leaving some overhang on the sides for easy removal later. This step is crucial for preventing the bars from sticking to the pan and makes for easy slicing.
Step 3: Make the Crust
In a mixing bowl, combine the graham cracker crumbs, unsweetened cocoa powder, granulated sugar, and melted unsalted butter. Stir until the mixture is well combined and resembles wet sand. Press the mixture firmly into the bottom of the prepared baking pan to form an even layer.
Step 4: Bake the Crust
Place the crust in the preheated oven and bake for about 10 minutes, or until it is set and begins to darken slightly along the edges. This step ensures that the crust is firm enough to hold up under the weight of the layers above.
Step 5: Add the Filling
Once the crust is baked, remove it from the oven and let it cool for a few minutes. Pour the sweetened condensed milk evenly over the crust, spreading it out to cover the entire surface. Then, sprinkle the semi-sweet chocolate chips over the top, followed by the chopped nuts and maraschino cherries. Make sure to distribute the cherries evenly for the best flavor in every bite.
Step 6: Bake Again
Return the baking pan to the oven and bake the bars for an additional 25-30 minutes, or until the filling is bubbly and the chocolate chips are melted. Keep an eye on the bars to prevent over-baking, as you want the filling to remain soft and gooey.
Step 7: Cool and Slice
Once baked, remove the pan from the oven and allow the bars to cool in the pan for at least 30 minutes. This cooling period helps the bars set up properly. After they have cooled, use the parchment paper overhang to lift the bars out of the pan, and place them on a cutting board. Slice into squares or rectangles, depending on your preferred serving size.
By following these detailed steps, you will create a batch of Chocolate Covered Cherry Magic Bars that are sure to impress. Each layer is crafted with care, ensuring that every bite is a delightful experience. Enjoy sharing these scrumptious treats with family and friends, or savor them all for yourself!

Preheating the Oven: The Importance of Proper Temperature
Before diving into the process of creating your Chocolate Covered Cherry Magic Bars, it’s crucial to preheat your oven to the correct temperature—350°F (175°C). Preheating ensures that your bars bake evenly and rise properly, resulting in a perfectly textured treat. An oven that isn’t heated to the right temperature can lead to undercooked or overcooked bars, which can compromise the overall taste and texture. While you prepare the crust, let the oven warm up so that it’s ready to go when it’s time to bake.
Preparing the Crust
The crust is the foundation of your Chocolate Covered Cherry Magic Bars, and getting it right is essential for a delicious end product. To prepare the crust, start with 1 ½ cups of graham cracker crumbs, which provide a sweet, crunchy base. In a mixing bowl, combine the graham cracker crumbs with ½ cup of melted butter and ¼ cup of granulated sugar.
Using a fork or your fingers, mix until the crumbs are fully moistened and resemble wet sand. The melted butter is what binds the crust together, so make sure all the crumbs are coated.
Next, press this mixture firmly into the bottom of a greased 9×13 inch baking pan. Use the back of a measuring cup or your hands to ensure the crust is evenly distributed and compacted. This step is vital, as a well-compressed crust will hold together when baked, allowing you to cut the bars neatly later.
Layering the Ingredients
Once your crust is prepared, it’s time to build the layers of flavor that will make your magic bars truly magical. Begin by pouring one 14-ounce can of sweetened condensed milk evenly over the crust. This creamy layer acts as an adhesive, holding all the ingredients together and adding sweetness.
Next, sprinkle 1 cup of semi-sweet chocolate chips over the condensed milk. The chocolate will melt and create a gooey, rich layer that pairs beautifully with the cherries. Following the chocolate chips, add 1 cup of drained and chopped maraschino cherries. These cherries provide bursts of flavor and a beautiful pop of color.
For added texture and flavor, sprinkle ½ cup of chopped nuts over the cherries. Walnuts or pecans work wonderfully, but feel free to use your favorite nuts. Finally, drizzle a bit more sweetened condensed milk over the top to give the bars an extra layer of sweetness and moisture.
Baking
Once your layers are built, it’s time to bake. Place the pan in the preheated oven and bake for 25 to 30 minutes, or until the edges are golden brown. Keep an eye on the bars towards the end of the baking time. You want to see the center set but still slightly soft—this indicates that the bars will be chewy and delicious once cooled.
After baking, allow the bars to cool in the pan for about 10 to 15 minutes before transferring them to a wire rack. This cooling time helps the bars firm up a bit, making them easier to cut later.
Cooling and Cutting
Cooling your Chocolate Covered Cherry Magic Bars is a crucial step that should not be rushed. Allow the bars to cool completely in the pan, which may take about an hour. Once they are cool, use a sharp knife to cut them into squares or rectangles. For cleaner cuts, run the knife under hot water and dry it off before slicing—this will help prevent the chocolate from smudging.
Serving Suggestions
Presentation can elevate your dessert experience. For a delightful serving suggestion, consider drizzling melted chocolate over the top of the bars once they are cut. This not only enhances the visual appeal but also adds an extra layer of chocolatey goodness. Serve the bars on a decorative platter, and consider pairing them with a scoop of vanilla ice cream or a dollop of whipped cream. A sprinkle of fresh cherries on top could also add a touch of elegance.
Nutritional Information
When indulging in Chocolate Covered Cherry Magic Bars, it’s good to be aware of the nutritional content. Each serving (assuming you cut the bars into 24 pieces) contains approximately:
– Calories: 200
– Fat: 10g
– Carbohydrates: 30g
– Protein: 2g
These bars are rich and satisfying, so moderation is key. For those with dietary considerations, it’s worth noting that you can make these bars gluten-free by using gluten-free graham crackers. Additionally, if you’re looking for a lower-sugar option, consider using unsweetened chocolate and reducing the amount of sweetened condensed milk or opting for a low-sugar alternative.
Tips for Perfecting Your Magic Bars
Creating the perfect Chocolate Covered Cherry Magic Bars might take a little practice, but here are some tips to help you avoid common pitfalls:
1. Overmixing the Crust: When preparing the crust, be careful not to overmix. This can lead to a tough texture. Just mix until the crumbs are moistened.
2. Choosing Quality Ingredients: Use high-quality chocolate chips and fresh cherries. The quality of your ingredients can significantly affect the overall taste of the bars.
3. Don’t Rush the Cooling Process: Allow the bars to cool completely before cutting. This helps them set, making it easier to achieve clean cuts and maintain their shape.
4. Ingredient Substitutions: For a vegan version, use dairy-free chocolate chips and coconut cream as a substitute for sweetened condensed milk. You can also substitute the butter with coconut oil.
5. Creative Variations: Experiment with different fruits such as raspberries or strawberries, or add shredded coconut for an extra layer of flavor.
Celebrating Occasions with Chocolate Covered Cherry Magic Bars
These Chocolate Covered Cherry Magic Bars are not just a treat; they are perfect for various celebrations:
– Holidays: Their festive look and rich flavor make them a delightful addition to holiday gatherings or parties. They can easily be themed with seasonal toppings or decorations.
– Birthday Parties: These bars are a hit among kids and adults alike, making them an excellent dessert option for birthday parties. They can be cut into fun shapes or served alongside ice cream for a celebratory dessert.
– Picnics and Potlucks: Their portability makes them ideal for picnics and potlucks. They can be made ahead of time and stored easily, allowing for convenient sharing among friends and family.
– Everyday Indulgence: Finally, there’s no need to wait for a special occasion to enjoy these bars. They are perfect for an everyday treat, offering a sweet escape any day of the week.
Conclusion
Making and sharing Chocolate Covered Cherry Magic Bars is a delightful experience that can brighten any occasion. The combination of rich chocolate, sweet cherries, and crunchy nuts creates a symphony of flavors and textures that is hard to resist. These bars are not just a dessert; they embody moments of joy, laughter, and togetherness. So gather your ingredients, invite your loved ones into the kitchen, and create something magical that everyone will cherish. Whether it’s a holiday gathering, a birthday celebration, or just a regular Tuesday, these bars are sure to make the day a little sweeter.


