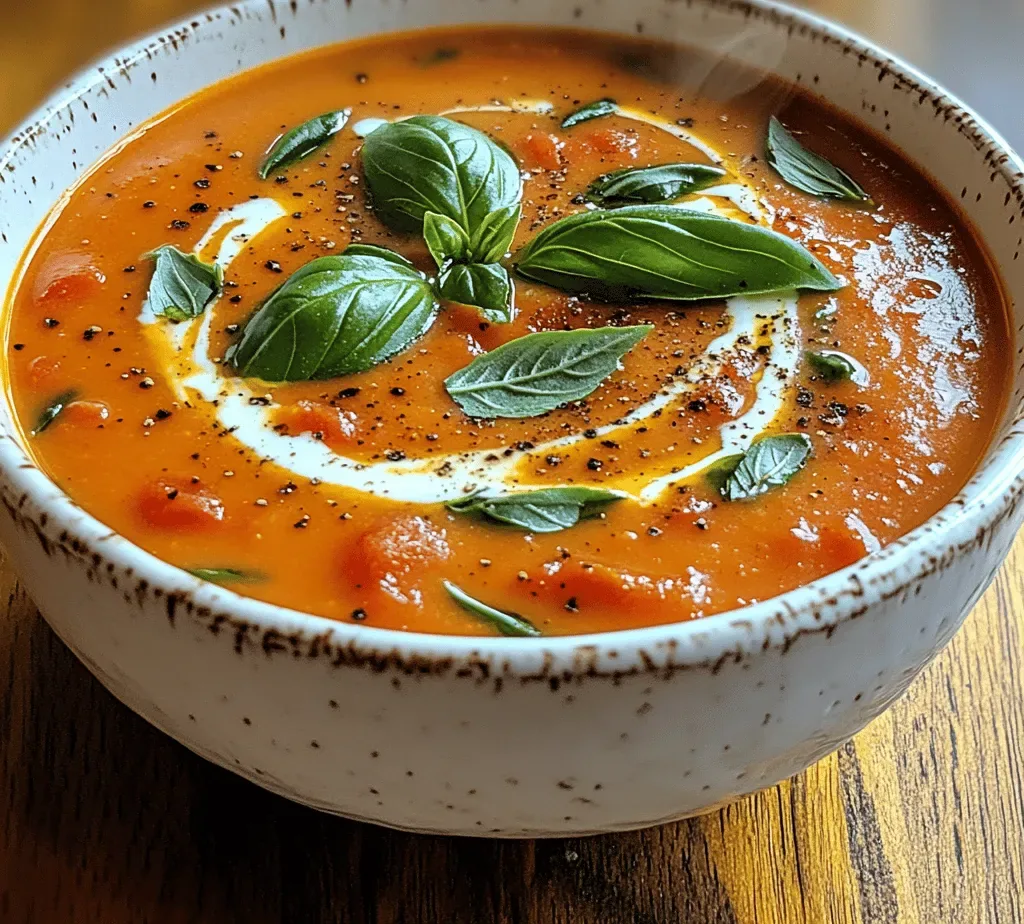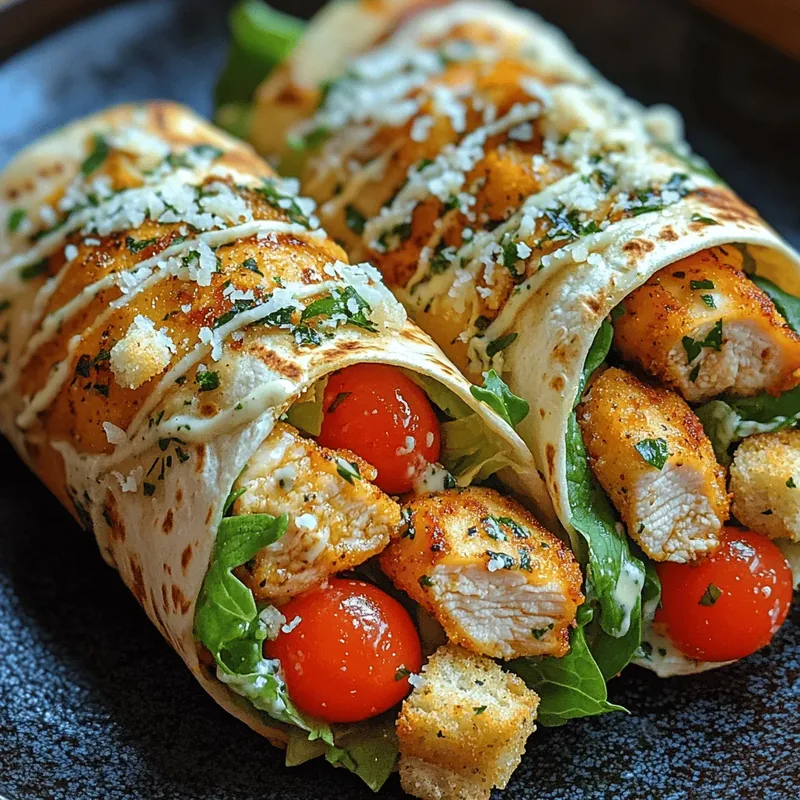
Imagine the classic Caesar salad, with its tangy anchovy‑kissed dressing and crunchy croutons, transformed into a handheld breakfast masterpiece. The Crispy Chicken Caesar Wrap delivers that beloved flavor in a warm, golden tortilla, perfect for a lazy weekend brunch or a quick weekday lift‑off.
What makes this wrap special is the double‑crisp technique: chicken is first pan‑seared, then finished in the oven for a buttery crunch, while the homemade Caesar dressing stays silky enough to coat every bite without sogging the wrap.
Family members who adore classic salads, busy professionals craving a portable protein boost, and brunch lovers looking for a new twist will all fall for this dish. It shines equally at a casual brunch table or as a grab‑and‑go breakfast.
The process is straightforward: season and sear the chicken, whip up a light Caesar‑yogurt sauce, toss in crisp romaine and shaved Parmesan, then wrap everything in a toasted tortilla. In under an hour you’ll have a satisfying, flavor‑packed wrap.
Why You'll Love This Recipe
Bold, Familiar Flavors: The creamy Caesar dressing, salty Parmesan, and peppery romaine give you that beloved salad taste in a warm, comforting wrap that feels both classic and novel.
Crunchy Chicken Every Time: By searing then finishing the chicken, you get a crisp exterior while keeping the interior juicy, creating a textural contrast that elevates the whole bite.
Quick Brunch Solution: With only 20 minutes of prep and 25 minutes of cooking, this wrap fits perfectly into a busy morning schedule without sacrificing flavor or nutrition.
Portable & Mess‑Free: Wrapped in a lightly toasted tortilla, the ingredients stay together, making it easy to eat at the table, on the patio, or on the go.
Ingredients
For a wrap that sings, start with the freshest components you can find. Tender chicken breasts provide the protein backbone, while crisp romaine adds a refreshing crunch. The Caesar dressing is built on Greek yogurt for lightness, anchovies for umami, and lemon juice for brightness. A warm flour tortilla holds everything together, and a handful of shaved Parmesan finishes the flavor profile with salty richness. Each element is chosen to balance texture, taste, and nutrition, creating a harmonious bite every time.
Main Ingredients
- 4 boneless, skinless chicken breasts (about 1½ lbs)
- 2 tablespoons olive oil
- 1 large head romaine lettuce, chopped
- 4 large flour tortillas (10‑inch)
Caesar Dressing (Light)
- ½ cup plain Greek yogurt
- 2 anchovy fillets, minced (or 1 tsp anchovy paste)
- 1 tablespoon Dijon mustard
- 1 tablespoon freshly squeezed lemon juice
- ¼ cup grated Parmesan cheese
- 1 garlic clove, minced
Seasonings & Garnishes
- Salt and freshly ground black pepper, to taste
-
The synergy of these ingredients creates a wrap that’s both hearty and light. The olive oil helps the chicken develop a golden crust, while the Greek‑yogurt dressing keeps the calories in check without sacrificing creaminess. Anchovies and Parmesan deliver that signature umami punch, and the fresh lemon juice lifts the whole mixture, preventing heaviness. Together, they produce a balanced bite that feels indulgent yet wholesome, perfect for a brunch that satisfies without weighing you down.
Step-by-Step Instructions
Preparing the Chicken
Pat the chicken breasts dry, then slice each breast horizontally to create two thinner cutlets. Sprinkle both sides generously with salt and black pepper. Let the seasoned meat rest for 10 minutes at room temperature; this helps the seasoning penetrate and promotes even cooking.
Making the Light Caesar Dressing
In a medium bowl, whisk together Greek yogurt, minced anchovies, Dijon mustard, lemon juice, garlic, and Parmesan. Season with a pinch of salt and a grind of black pepper. The mixture should be smooth, tangy, and slightly thick—perfect for coating the wrap without making it soggy.
Cooking the Chicken
- Heat the Skillet. Place a large cast‑iron skillet over medium‑high heat and add olive oil. Allow the oil to shimmer (about 2 minutes); this temperature is ideal for a quick sear that locks in juices.
- Sear the Cutlets. Lay the chicken pieces in a single layer, being careful not to crowd the pan. Cook for 3‑4 minutes without moving them, until a deep golden crust forms. Flip and sear the other side for another 3‑4 minutes.
- Finish in the Oven. Transfer the skillet to a preheated 375°F (190°C) oven. Bake for 8‑10 minutes, or until the internal temperature reaches 165°F (74°C). This step ensures the interior stays moist while the exterior remains crisp.
- Rest the Chicken. Remove from the oven and let the cutlets rest on a cutting board for 5 minutes. Resting allows the juices to redistribute, preventing a dry bite when sliced.
- Slice Thinly. Using a sharp knife, slice each cutlet against the grain into thin strips. Thin strips fold easily into the tortilla and provide a satisfying bite‑size texture.
Assembling the Wraps
Warm each tortilla on a clean skillet for 30 seconds per side—this makes them pliable and adds a subtle toasted flavor. Spread a generous spoonful of the Caesar dressing across the center, then layer chopped romaine, sliced chicken, and a sprinkle of shaved Parmesan. Fold the sides in, then roll tightly, pressing gently to seal. Slice in half and serve immediately for the best texture.
Tips & Tricks
Perfecting the Recipe
Uniform Cutlets: Pound the chicken to an even ½‑inch thickness. Uniform pieces cook evenly, giving you consistent crispness across every strip.
Dry the Surface: Pat the chicken dry before seasoning. Moisture creates steam, which prevents the desired golden crust.
Use a Meat Thermometer: Insert the probe into the thickest part; 165°F guarantees safety without overcooking.
Warm the Tortilla: A quick toast prevents tearing and adds a subtle nutty flavor that complements the dressing.
Flavor Enhancements
Add a drizzle of extra‑virgin olive oil infused with garlic just before serving for a glossy finish. A pinch of smoked paprika in the seasoning blend gives a gentle smoky depth, while a few capers tossed into the lettuce add briny brightness.
Common Mistakes to Avoid
Skipping the resting step makes the chicken release its juices onto the wrap, resulting in sogginess. Also, avoid over‑mixing the yogurt dressing; too much agitation can cause it to separate, leading to a watery coating.
Pro Tips
Batch‑Prep the Dressing: Store the Caesar yogurt sauce in a sealed jar for up to 3 days. It actually deepens in flavor after a night in the fridge.
High‑Heat Sear: Let the skillet reach a steady medium‑high heat before adding oil; this ensures an instant sizzle that locks in moisture.
Finish with Fresh Herbs: A sprinkle of chopped chives or parsley right before rolling adds a pop of color and fresh aroma.
Wrap Tightly: Press the rolled wrap gently with a clean kitchen towel; this helps the ingredients stay together and makes slicing easier.
Variations
Ingredient Swaps
Replace chicken with grilled shrimp or thinly sliced turkey breast for a different protein profile. Swap romaine for kale or mixed baby greens if you prefer a heartier bite. For a sweet‑savory twist, add thin apple slices or dried cranberries to the lettuce layer.
Dietary Adjustments
Choose gluten‑free tortillas or large lettuce leaves for a low‑carb wrap. Use dairy‑free Parmesan or nutritional yeast for a vegan version, and substitute anchovy paste with capers for those avoiding fish. The Greek‑yogurt base can be swapped for a plant‑based yogurt without losing creaminess.
Serving Suggestions
Pair the wraps with a bright citrus fruit salad, a side of roasted sweet potato wedges, or a simple quinoa pilaf. A chilled glass of sparkling water with a splash of grapefruit juice complements the tangy Caesar notes beautifully.
Storage Info
Leftover Storage
Allow any leftover wraps to cool completely, then wrap each tightly in parchment and place in an airtight container. Store in the refrigerator for up to 3 days. If you prefer to freeze, separate the components (chicken, lettuce, dressing) and freeze in zip‑top bags for up to 2 months; reassemble after thawing.
Reheating Instructions
For best texture, reheat chicken strips in a 350°F oven for 8‑10 minutes, uncovered, until warmed through. Warm the tortilla briefly on a skillet, then assemble with fresh lettuce and a spoonful of dressing. Microwaving is acceptable for a quick fix—heat for 45 seconds, then add fresh greens to keep them crisp.
Frequently Asked Questions
This Crispy Chicken Caesar Wrap brings the beloved flavors of a classic salad into a handheld, breakfast‑ready format that’s both satisfying and easy to make. By following the step‑by‑step guide, using fresh ingredients, and applying the pro tips, you’ll achieve a perfectly crisp bite every time. Feel free to swap proteins, adjust seasonings, or add your favorite veggies—cooking is your canvas. Enjoy the delicious blend of crunch, creaminess, and zest, and share it with anyone who loves a good twist on a timeless favorite!