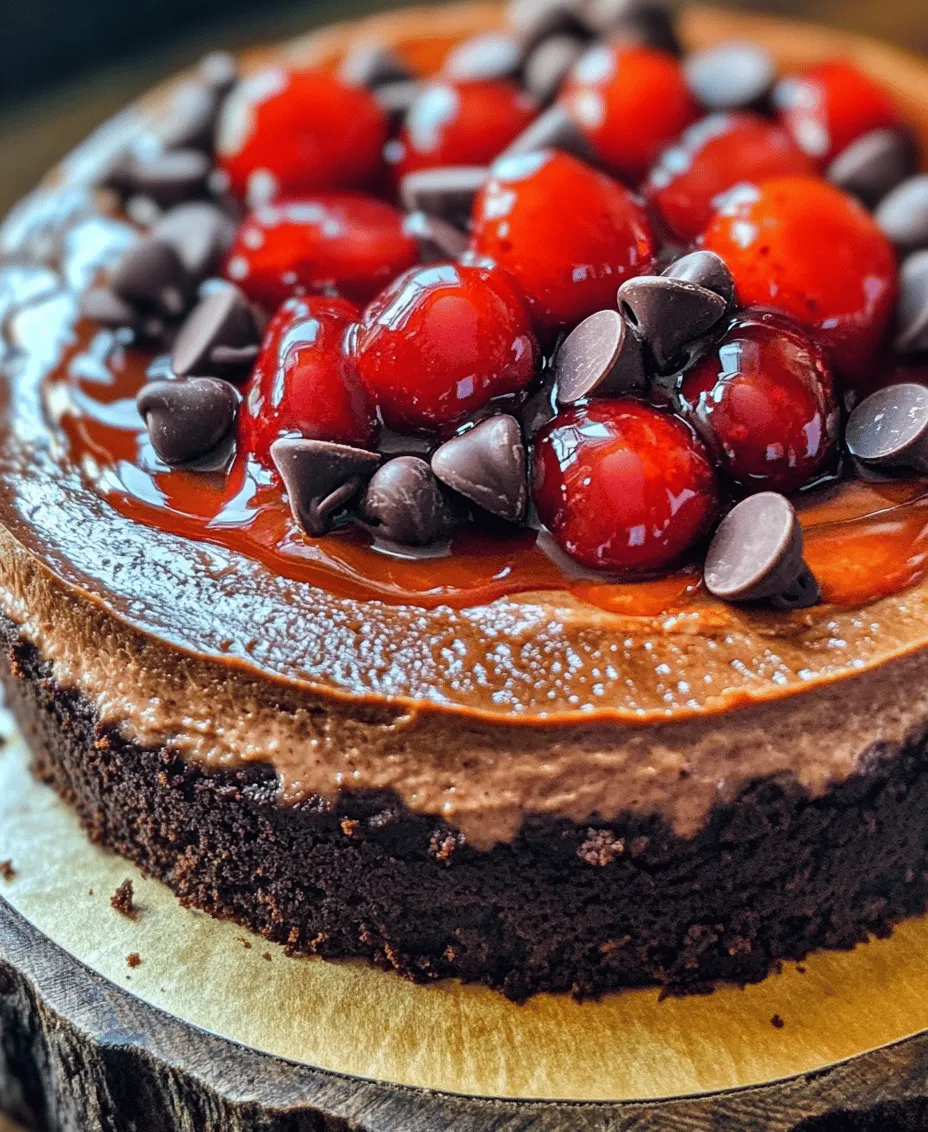
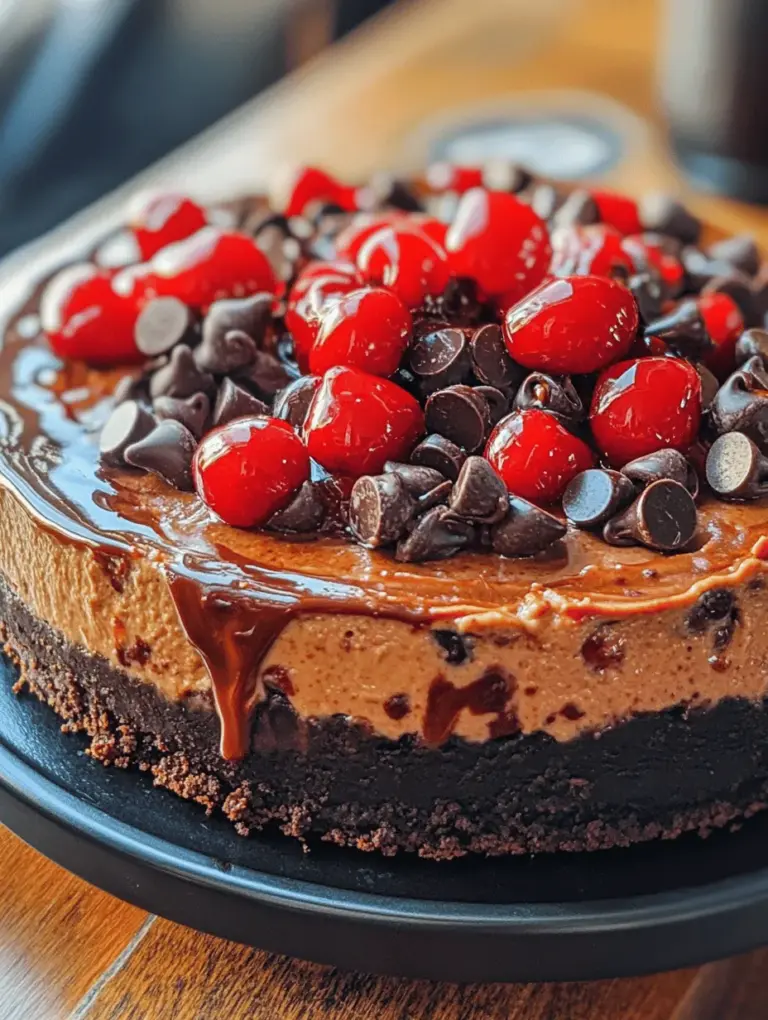
When it comes to desserts that combine rich flavors and creamy textures, few can rival the indulgence of a chocolate cherry cheesecake with chocolate chips. This decadent treat marries the boldness of chocolate with the tartness of fresh cherries, creating a delightful harmony that is sure to please both chocolate lovers and cheesecake aficionados alike. With its luscious filling, buttery crust, and vibrant cherry topping, this dessert is not only a feast for the taste buds but also a visual delight that can elevate any occasion, be it a holiday gathering, a birthday celebration, or a simple family dinner.
The beauty of this chocolate cherry cheesecake lies in its versatility. It can be served as a show-stopping centerpiece for a special event or as a comforting dessert to enjoy after a weeknight meal. What’s more, the preparation is surprisingly easy, making it accessible for novice bakers and seasoned chefs alike. Whether you’re looking to impress guests or treat yourself, this cheesecake promises satisfaction in every slice. Get ready to dive into a step-by-step guide that will unveil the secrets to creating this exquisite dessert from scratch.
Understanding the Ingredients
To craft the perfect chocolate cherry cheesecake, it’s essential to understand the key components that come together to create its irresistible flavor and texture. Let’s break down the ingredients used in this recipe, starting with the crust, followed by the rich filling and the delectable cherry topping.
The Crust
The foundation of any cheesecake is its crust, and for this decadent creation, we opt for chocolate cookie crumbs. The choice of cookie is crucial, as it imparts a deep chocolate flavor that complements the creamy filling above. Typically, chocolate sandwich cookies or chocolate graham crackers are used, and they are finely crushed to create a uniform texture.
To bind the crumbs, melted butter is added, which not only helps to hold the crust together but also adds a rich, buttery flavor. A touch of granulated sugar enhances the sweetness of the crust, balancing the overall flavor profile of the cheesecake. The crust is then pressed firmly into the bottom of a springform pan, ensuring it holds its shape during baking and provides a perfect base for the creamy filling.
The Cheesecake Filling
The star of this dessert is undoubtedly the cheesecake filling, which is built on a base of softened cream cheese. Cream cheese is pivotal in achieving that signature creamy texture and rich flavor that cheesecakes are known for. It is essential to allow the cream cheese to come to room temperature before mixing, as this ensures a smooth and lump-free batter.
Granulated sugar is added to the cream cheese, which not only sweetens the filling but also contributes to the overall texture by helping to create a silky consistency. Eggs are then incorporated one at a time, providing structure to the cheesecake as they bake. The addition of pure vanilla extract enhances the flavor, adding a warm and aromatic note that elevates the overall taste of the cheesecake.
Another key ingredient is sour cream, which introduces an additional layer of creaminess and a subtle tanginess that perfectly balances the sweetness of the filling. This combination of cream cheese and sour cream results in a luscious texture that melts in your mouth.
To intensify the flavor experience, we fold in fresh cherries and chocolate chips. The fresh cherries not only add vibrant color but also provide pops of tartness that cut through the richness of the cheesecake. When it comes to chocolate chips, they offer bursts of decadent chocolate flavor in every bite, further enriching the overall taste profile.
The Cherry Topping
No chocolate cherry cheesecake would be complete without a luscious cherry topping. The topping is prepared using fresh cherries, which bring a delightful sweetness and acidity, balancing the richness of the cheesecake.
To create the topping, cherries are combined with sugar, cornstarch, and a splash of lemon juice. The sugar enhances the natural sweetness of the cherries, while the cornstarch acts as a thickening agent, ensuring the topping has the right consistency. The lemon juice adds a refreshing brightness, enhancing the overall flavor and making the cherry topping a perfect complement to the cheesecake below.
Step-by-Step Instructions
Now that we’ve explored the essential ingredients, it’s time to dive into the detailed step-by-step instructions for preparing this decadent chocolate cherry cheesecake. Follow along carefully to ensure that each component comes together seamlessly for a truly delightful dessert.
Preparing the Crust
1. Preheat the Oven: Begin by preheating your oven to 350°F (175°C). This ensures that your crust will bake evenly and achieve that perfect crispness.
2. Combine Ingredients: In a medium-sized mixing bowl, combine 1 ½ cups of chocolate cookie crumbs with ½ cup of melted butter and ¼ cup of granulated sugar. Use a fork or a spatula to mix the ingredients until they are well combined and the crumbs are evenly moistened.
3. Press into the Pan: Take a 9-inch springform pan and carefully press the crumb mixture into the bottom, using the back of a measuring cup or your hands to form an even layer. Be sure to pack it tightly to create a firm crust that will hold its shape during baking.
4. Bake: Place the springform pan in the preheated oven and bake for about 10 minutes, or until the crust is set and slightly firm to the touch. Once done, remove it from the oven and allow it to cool while you prepare the cheesecake filling.
Making the Cheesecake Filling
1. Beat the Cream Cheese: In a large mixing bowl, add 24 ounces (3 packages) of softened cream cheese. Using an electric mixer, beat the cream cheese on medium speed until it is smooth and creamy, free of lumps.
2. Add Sugar: Gradually add 1 cup of granulated sugar to the cream cheese, continuing to beat until the mixture is well combined and fluffy.
3. Incorporate Eggs: Add 3 large eggs, one at a time, mixing on low speed after each addition. Be careful not to overmix at this stage; just blend until the eggs are fully incorporated.
4. Mix in Vanilla and Sour Cream: Add 1 teaspoon of pure vanilla extract and 1 cup of sour cream to the mixture, beating until everything is well combined and smooth.
5. Fold in Cherries and Chocolate Chips: Gently fold in 1 cup of pitted and chopped fresh cherries and 1 cup of semi-sweet chocolate chips. Use a spatula to carefully combine these ingredients without breaking up the cherries or chocolate chips too much.
With the crust cooled and the filling prepared, you are now ready to assemble and bake your decadent chocolate cherry cheesecake. This initial preparation sets the stage for a delightful dessert that will impress anyone who takes a bite. Stay tuned for the next steps, where we will guide you through the baking process and the creation of the cherry topping.

Assembling and Baking the Cheesecake
Once you have prepared your crust and filling, it’s time to assemble the decadent chocolate cherry cheesecake. Begin by pouring the luscious cheesecake filling over the chilled crust. To avoid air bubbles, which can lead to unsightly cracks, gently tap the pan on the countertop a few times after pouring the filling. This will help release any trapped air bubbles that may have formed.
Next, smooth the top of the cheesecake with a spatula or the back of a spoon, ensuring an even surface. Preheat your oven to 325°F (160°C) and prepare a water bath. This method helps regulate the temperature around the cheesecake, leading to a creamy texture without cracks.
To create a water bath, wrap the outside of your springform pan with aluminum foil to prevent leaks, then place the pan in a larger roasting pan. Fill the roasting pan with hot water until it reaches halfway up the sides of the springform pan. This will create steam in the oven, which is vital for keeping the cheesecake moist.
Bake the cheesecake for 55 to 70 minutes, or until the edges are set but the center still has a slight jiggle. Keep an eye on it during the last few minutes to avoid overbaking. If the cheesecake begins to puff up or crack, it may be a sign that it has been in the oven too long. The perfect cheesecake will be firm around the edges and just set in the middle.
Once baked, turn off the oven and crack the door open, allowing the cheesecake to cool gradually for about an hour. This step is crucial in preventing cracks, as a rapid temperature change can cause the cheesecake to split. After an hour, remove the cheesecake from the oven and let it cool to room temperature before transferring it to the refrigerator.
Creating the Cherry Topping
While your cheesecake cools, it’s time to prepare the cherry topping. In a medium saucepan, combine fresh or frozen cherries, sugar, and a splash of lemon juice. Heat the mixture over medium heat until the cherries begin to release their juices and start to break down, about 5-7 minutes.
For an added depth of flavor, consider incorporating a teaspoon of vanilla extract or almond extract during this step. Stir frequently to prevent burning. Once the mixture is bubbling, reduce the heat and allow it to simmer for an additional 5-10 minutes until it thickens slightly. You will know the topping is ready when it coats the back of a spoon and has a syrupy consistency.
Remove the saucepan from the heat and let the cherry topping cool down before spreading it over the cheesecake. This will ensure that you don’t melt the creaminess of the cheesecake when you apply the topping.
Chilling and Serving
Patience is key when it comes to chilling your cheesecake. After you have completed baking and cooled the cheesecake to room temperature, cover it with plastic wrap or a lid and place it in the refrigerator to chill for at least 4 hours, although overnight is ideal. This chilling time allows the flavors to meld and the texture to firm up, making for a slice that holds its shape beautifully.
When ready to serve, carefully remove the cheesecake from the springform pan. Use a sharp knife to gently run around the edges before releasing the sides. For a clean cut, dip your knife in hot water and wipe it dry before slicing into the cheesecake. This will help prevent sticking and ensure smooth slices.
Tips for Perfecting Your Cheesecake
Achieving the perfect cheesecake can be a challenge, but with a few insider tips, you can avoid common pitfalls.
Common Pitfalls: One of the most frequent issues bakers face is cracking. To prevent this, ensure that you cool the cheesecake gradually as discussed earlier. Additionally, baking your cheesecake in a water bath can significantly reduce the chances of cracking by providing a gentle, moist environment.
Suggested Variations: Don’t hesitate to experiment with your cheesecake! While the chocolate cherry combination is undeniably delicious, consider alternative toppings such as fresh strawberries, blueberries, or even a drizzle of caramel or chocolate ganache. You can also infuse the cheesecake batter with different flavored extracts like orange or mint for a unique twist.
Nutritional Information and Serving Suggestions
Each slice of your decadent chocolate cherry cheesecake offers a delightful balance of flavors and textures. While specific nutritional values may vary based on the ingredients used, a standard serving (1/12 of the cheesecake) provides approximately:
– Calories: 350
– Total Fat: 22g
– Saturated Fat: 11g
– Cholesterol: 80mg
– Sodium: 250mg
– Total Carbohydrates: 28g
– Dietary Fiber: 1g
– Sugars: 18g
– Protein: 6g
This decadent dessert pairs wonderfully with a cup of coffee, tea, or even dessert wines, making it a versatile choice for any occasion. Whether you’re celebrating a birthday, holiday, or simply indulging on a cozy evening at home, this cheesecake is sure to impress.
Conclusion
Creating this decadent chocolate cherry cheesecake is more than just a baking endeavor; it’s a journey into the realms of rich flavors and delightful textures. The harmonious blend of creamy cheesecake, tart cherries, and rich chocolate chips creates a dessert experience that is both indulgent and satisfying.
This cheesecake is not only a feast for the taste buds but also a stunning centerpiece for any gathering. By following this recipe, you’ll not only impress your family and friends but also create lasting memories around the table. So roll up your sleeves, gather your ingredients, and embark on this delightful baking adventure. You won’t regret the joy this cheesecake will bring to your next special occasion!


