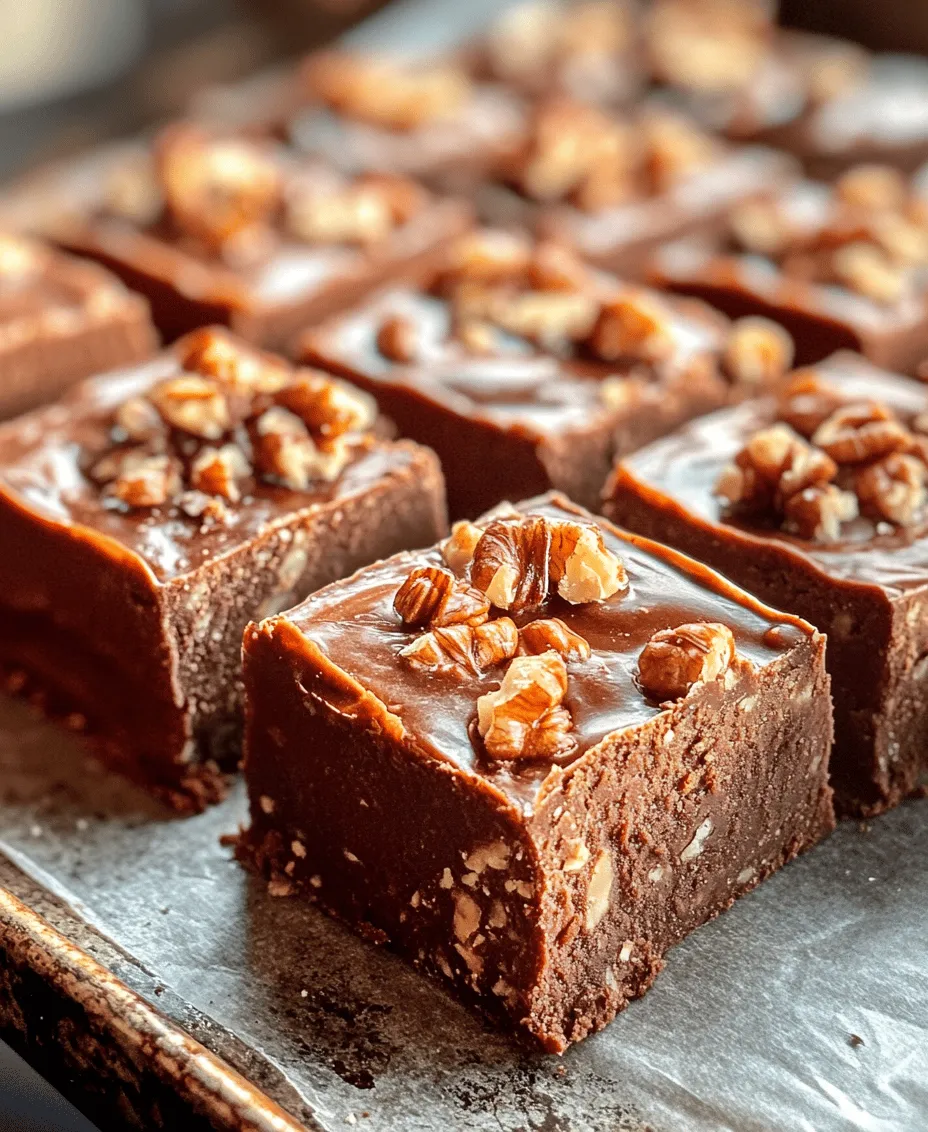
Introduction
There’s something undeniably nostalgic about old-fashioned chocolate fudge. This rich, creamy treat evokes memories of family gatherings, holiday celebrations, and cozy evenings spent enjoying sweet delights. In a world where fast-paced living often takes precedence, the importance of homemade treats cannot be overstated. They offer a personal touch that store-bought sweets simply cannot replicate. Whether it’s a gift for a loved one or a comforting indulgence for yourself, chocolate fudge remains a timeless dessert that brings joy and warmth to any occasion.
Chocolate fudge is not just a dessert; it’s a celebration of tradition and love. Its allure lies in its simplicity and the joy it brings. As you prepare to embark on the journey of creating your very own decadent chocolate fudge, you’ll discover the magic that happens when quality ingredients come together in perfect harmony. This article will guide you through the history of fudge, the essential ingredients needed, and the step-by-step instructions to create this delightful treat.
The History of Chocolate Fudge
The origins of chocolate fudge can be traced back to the late 19th century, with its first known appearance in the United States around the 1880s. It is believed that fudge was born from a happy accident when a batch of caramels failed to set properly, resulting in a creamy confection that quickly gained popularity. The delightful taste and smooth texture of fudge led to its spread across the country, making it a beloved dessert among many.
Over the decades, fudge has evolved significantly. It has transitioned from a simple homemade treat to a gourmet delicacy found in specialty shops. In the early 20th century, fudge became a staple at fairs and carnivals, where it was sold as a sweet indulgence for attendees. In various regions, fudge holds cultural significance, with different variations and flavors emerging, reflecting local tastes and traditions. For example, in Maryland, the famous “Maryland-style” fudge is known for its rich, buttery flavor, while in New England, maple fudge is a seasonal favorite.
Fudge has also become synonymous with holiday gift-giving. Across the United States, it is common to see boxes of fudge exchanged during festive occasions, especially during Christmas. Homemade fudge has a personal touch that makes it a cherished gift, often passed down through generations. With its rich history and cultural significance, chocolate fudge remains a beloved treat that connects us to our past while delighting our taste buds in the present.
Understanding the Ingredients
To create a truly decadent old-fashioned chocolate fudge, understanding the ingredients is essential. Each component plays a crucial role in developing the flavor and texture of this delightful treat. Here’s a closer look at the key ingredients you’ll need for this recipe:
Granulated Sugar
The backbone of any fudge recipe, granulated sugar serves two primary purposes: it provides sweetness and contributes to the fudge’s smooth texture. When heated, sugar undergoes a process called crystallization, which is crucial for achieving the perfect consistency. For best results, opt for pure granulated sugar, as it dissolves easily and creates a silky-smooth fudge.
Unsweetened Cocoa Powder
Quality cocoa powder is vital for achieving a rich chocolate flavor in your fudge. Unsweetened cocoa powder, which is made from roasted cocoa beans, provides the deep chocolate taste that makes fudge irresistible. Look for high-quality cocoa powder with a rich, dark color, as this indicates a robust flavor profile. Brands such as Valrhona or Ghirardelli are excellent choices for chocolate lovers.
Whole Milk
Whole milk is essential for achieving the creamy texture that characterizes old-fashioned fudge. It adds moisture and richness, ensuring that the fudge is soft and melt-in-your-mouth delicious. While you can experiment with lower-fat milk, whole milk will yield the best results, providing a luxurious mouthfeel that is hard to replicate.
Unsalted Butter
When it comes to butter, using unsalted is highly recommended. Unsalted butter allows you to control the saltiness of your fudge, ensuring a perfectly balanced flavor. Butter contributes to the creamy texture and adds richness, making it a crucial component of the recipe. When selecting butter, look for high-quality options with a higher fat content for the best flavor.
Vanilla Extract
Vanilla extract enhances the overall flavor complexity of your chocolate fudge. A splash of pure vanilla extract adds warmth and depth, elevating the chocolate experience. Always choose pure vanilla extract over imitation vanilla for the most authentic flavor; the difference is noticeable and well worth it.
Chopped Nuts
While optional, chopped nuts add an enjoyable textural contrast to the smooth fudge. Walnuts, pecans, or almonds are popular choices that complement the chocolate flavor beautifully. If you or your guests have nut allergies, feel free to leave them out for a nut-free treat.
Pinch of Salt
A pinch of salt may seem minor, but it plays a vital role in balancing the sweetness of the fudge. Salt enhances the chocolate flavor, making it more pronounced and decadent. It’s a small addition that can make a significant difference in the overall taste.
Ingredient Substitutes
For those with dietary restrictions or preferences, there are several substitutes you can consider:
– Dairy-Free Option: Substitute whole milk with almond milk, coconut milk, or any non-dairy milk of your choice. Use vegan butter in place of unsalted butter.
– Sugar-Free Option: For a sugar-free version, consider using sugar substitutes like erythritol or stevia, but be aware that this may alter the texture slightly.
– Gluten-Free Option: The ingredients listed are naturally gluten-free, so you can enjoy this fudge without concern.
Understanding these ingredients is crucial for making the best chocolate fudge possible. With quality components and attention to detail, your homemade fudge will be a delightful treat that everyone will love.
Step-by-Step Instructions for Making Chocolate Fudge
Now that you’ve gathered your ingredients and learned a bit about their significance, it’s time to roll up your sleeves and get started on making your decadent old-fashioned chocolate fudge. Follow these detailed preparation steps to ensure your fudge turns out perfectly:
1. Prepare Your Baking Pan
Start by preparing your baking pan. Choose an 8-inch square baking dish for your fudge. You can either grease the pan lightly with butter or line it with parchment paper for easier removal later. If you choose to use parchment paper, leave overhang on the sides to create “handles” for lifting the fudge out once it’s set. This will make cutting the fudge into squares much easier.
2. Combine Sugar, Cocoa Powder, and Milk
In a medium-sized saucepan, combine 2 cups of granulated sugar and 1 cup of unsweetened cocoa powder. Whisk these dry ingredients together to break up any clumps and ensure even distribution. Next, add 1/2 cup of whole milk to the dry mixture. Stir well to combine all the ingredients; the mixture will appear thick at this stage.
3. Heat the Mixture
Place the saucepan over medium heat and bring the mixture to a gentle boil. Stir continuously to prevent the sugar from sticking to the bottom of the pan, which can lead to burning. Once the mixture begins to boil, allow it to boil without stirring for about 5 minutes. This is crucial for achieving the right texture, as the syrup needs to reach the proper temperature to set correctly.
4. Add Butter and Vanilla
After boiling for 5 minutes, remove the saucepan from the heat. Immediately add 1/2 cup of unsalted butter and 1 teaspoon of pure vanilla extract to the hot mixture. Stir until the butter is completely melted and incorporated into the fudge. The heat from the mixture will help meld the flavors together.
5. Optional: Add Chopped Nuts
If you’re using chopped nuts, this is the time to fold them into the fudge mixture. Stir gently to distribute the nuts evenly throughout the fudge, ensuring that every bite is packed with flavor and texture.
6. Pour and Set
Carefully pour the fudge mixture into the prepared baking pan. Use a spatula to smooth the top for an even finish. Allow the fudge to cool at room temperature for a few hours until it is completely set. If you’re in a hurry, you can place it in the refrigerator for about 30 minutes to speed up the cooling process.
By following these initial steps, you’re well on your way to creating a batch of decadent old-fashioned chocolate fudge that will surely impress friends and family alike. Stay tuned for the next part of this article, where we will cover the final steps, tips for achieving the best results, and answers to common questions about chocolate fudge.

Combining Dry Ingredients in the Saucepan
To begin crafting your decadent old-fashioned chocolate fudge, start by combining your dry ingredients in a heavy-bottomed saucepan. This is an essential step that sets the foundation for your fudge. Start by measuring out granulated sugar, unsweetened cocoa powder, and a pinch of salt. The sugar provides sweetness while the cocoa powder infuses that rich chocolate flavor. The salt, although small in quantity, enhances the overall taste, balancing the sweetness and intensifying the chocolate. Mix these dry ingredients thoroughly with a whisk to ensure there are no clumps and the cocoa powder is evenly distributed.
Adding Wet Ingredients and the Significance of Stirring
Once your dry ingredients are well combined, it’s time to incorporate the wet ingredients. Pour in whole milk and add unsalted butter to the saucepan. These components are crucial as they create the creamy texture that fudge is known for. As you add the wet ingredients, stir consistently with a wooden spoon or heat-resistant spatula. This stirring helps dissolve the sugar and cocoa powder, ensuring a smooth, lump-free mixture.
The significance of stirring cannot be overstated; it not only combines the ingredients but also prevents them from sticking to the bottom of the pan, which can lead to scorching. Stir until the mixture comes together and starts to simmer gently on medium heat.
Importance of Boiling and Temperature Monitoring
Now comes the most critical part of making fudge: boiling and monitoring the temperature. Increase the heat to medium-high until the mixture begins to boil. It’s essential to bring the fudge to a rolling boil, which typically takes about 5-7 minutes. Use a candy thermometer to monitor the temperature; you’re aiming for the soft-ball stage at 234°F to 240°F (112°C to 115°C). This temperature range is where the sugar dissolves completely and reaches the right consistency for fudging.
Keep in mind that boiling is not just about reaching the right temperature; it’s also about timing. Too little time can leave your fudge too soft, while too much can make it crumbly. Stir occasionally to prevent burning, but avoid stirring too much, as this can cause sugar crystals to form.
The Significance of Beating the Fudge for the Right Texture
After reaching the desired temperature, remove the saucepan from the heat and let it sit for about 5 minutes without stirring. This resting period allows the bubbles to settle. Once cooled slightly, it’s time to beat the fudge. Using a wooden spoon, stir vigorously for 5-10 minutes. This step is crucial as it introduces air into the mixture, giving the fudge its signature texture.
The fudge should start to thicken and lose its glossy sheen as you beat it. Proper beating is what transforms your mixture into that luscious, smooth fudge consistency we all crave. If you stop beating too soon, your fudge may end up grainy or too soft.
Notes on Timing and Technique for Optimal Results
Timing and technique are key elements in fudge making. Ensure you have all your ingredients prepped and ready before you start cooking, as the process moves quickly once you begin boiling. Pay close attention to the temperature, and don’t rush the boiling stage.
Additionally, practice makes perfect. If this is your first time making fudge, don’t be discouraged if it doesn’t turn out perfectly the first time. Each batch is a learning experience, and over time, you’ll develop a feel for the right texture and consistency.
Tips for Perfecting Your Fudge
Common Pitfalls When Making Fudge and How to Avoid Them
Making fudge may seem straightforward, but there are common pitfalls to be aware of. One of the most prevalent issues is not reaching the right temperature, which can lead to fudge that is either too soft or too hard. Always use a reliable candy thermometer to avoid this problem.
Another frequent mistake is not allowing the fudge to cool properly before beating. If you start beating too soon, you’ll have a grainy texture rather than the smooth, velvety fudge you desire.
The Role of Candy Thermometers in Achieving Perfect Consistency
A candy thermometer is an invaluable tool when making fudge. It ensures that your sugar mixture reaches the correct temperature without guesswork. If you don’t have a candy thermometer, you can test the mixture by dropping a small amount in cold water; if it forms a soft ball, you’re at the right stage. However, investing in a candy thermometer can save you from inconsistencies and elevate your fudge-making skills.
Adjusting Fudge Texture: How to Make it Softer or Firmer
If you prefer softer fudge, aim for a lower temperature, around 230°F (110°C). For firmer fudge, go slightly higher, around 240°F (115°C). You can also adjust the amount of milk or butter slightly, as these ingredients contribute to the overall texture.
Keep in mind that the environment can also affect your fudge. High humidity can make it softer, while drier conditions can make it firmer. It’s essential to adapt your technique based on your kitchen conditions.
Enhancing Flavor: Ideas for Variations and Add-Ins
One of the best parts of making fudge is the endless possibilities for flavor variations. Consider adding a teaspoon of vanilla extract for a classic touch or a pinch of espresso powder to deepen the chocolate flavor.
For those who enjoy textures, you can mix in chopped nuts, like walnuts or pecans, during the beating stage. Dried fruit, like cranberries or cherries, can also add a delightful twist. If you’re feeling adventurous, try swirling in peanut butter, caramel, or even a layer of marshmallow fluff for a gourmet touch.
Serving and Storing Your Chocolate Fudge
Suggestions for Presentation and Serving Ideas
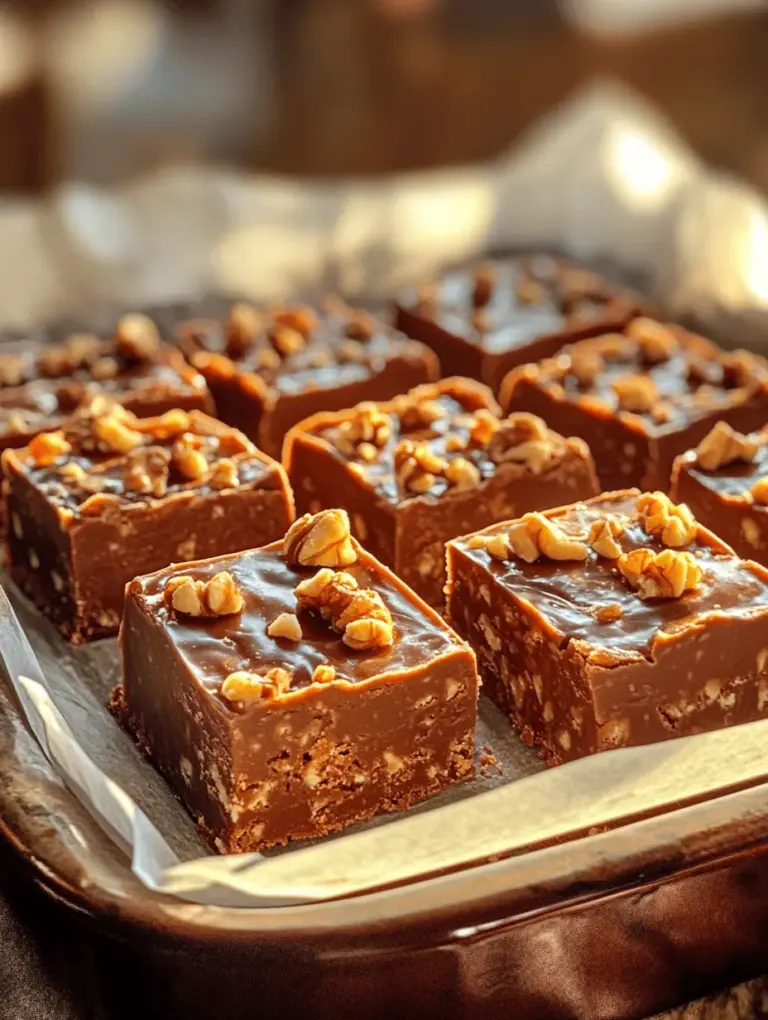
Once your fudge has set, it’s time to present it! Cut the fudge into bite-sized squares for easy serving. Arrange them on a decorative platter or tiered stand for a beautiful display at gatherings. You can also dust the top with powdered sugar or cocoa powder to add an elegant touch.
Consider pairing your fudge with complementary flavors like fresh berries or a scoop of vanilla ice cream. Serving fudge with a side of warm chocolate sauce can elevate the experience, making it a truly indulgent treat.
Best Practices for Storage to Maintain Freshness
To maintain the freshness of your chocolate fudge, store it in an airtight container at room temperature. If you live in a particularly humid area, refrigeration may be necessary, but this can alter the texture slightly. If refrigerating, allow the fudge to come to room temperature before serving for the best flavor and consistency.
For long-term storage, freeze the fudge in a well-sealed container or freezer bag. When you’re ready to enjoy, simply thaw it in the refrigerator overnight or at room temperature for a few hours.
Creative Packaging Ideas for Gifting Fudge
Homemade fudge makes a thoughtful gift, especially around holidays or special occasions. Consider wrapping your fudge in decorative wax paper, then placing it in a cute tin or box. You can enhance the presentation with ribbons or personalized labels. This not only adds a special touch but also creates a memorable experience for the recipient.
The Joy of Sharing Homemade Fudge
The Emotional Impact of Sharing Homemade Treats with Family and Friends
Sharing homemade treats like chocolate fudge goes beyond just giving a gift; it’s about creating memories and building connections. Whether it’s a birthday celebration, a holiday gathering, or simply a casual get-together, the act of sharing your homemade fudge brings joy to both the giver and the receiver.
How Homemade Fudge Can Be a Heartfelt Gift for Any Occasion
Fudge is versatile and can be gifted for any occasion, from holidays to thank-you gifts. It’s a universal treat that appeals to many, making it an excellent choice for potlucks, office parties, or simply as a sweet surprise for someone special. The time and effort you put into making fudge signal a heartfelt gesture that’s sure to be appreciated.
Encouragement to Explore Other Recipes and Flavors
Once you’ve mastered the art of chocolate fudge, don’t hesitate to explore other flavors and variations. From peppermint fudge during the holidays to seasonal flavors like pumpkin spice or chai, the possibilities are endless. Each new recipe can bring its own set of joys and surprises, expanding your culinary repertoire.
Conclusion
Making and sharing homemade chocolate fudge is not just about the delicious treat itself; it’s about the joy it brings to both the maker and the recipients. The process of crafting this timeless confection can evoke cherished memories and create new ones with loved ones.
As you indulge in your homemade fudge, take a moment to appreciate the love and effort that went into it. Each bite is a reminder of the warmth and happiness that homemade treats can bring. So gather your ingredients, invite family and friends, and experience the satisfaction of creating a treat that has stood the test of time. Whether enjoyed alone or shared with others, your decadent old-fashioned chocolate fudge is sure to bring smiles and sweet memories for years to come.


