Introduction
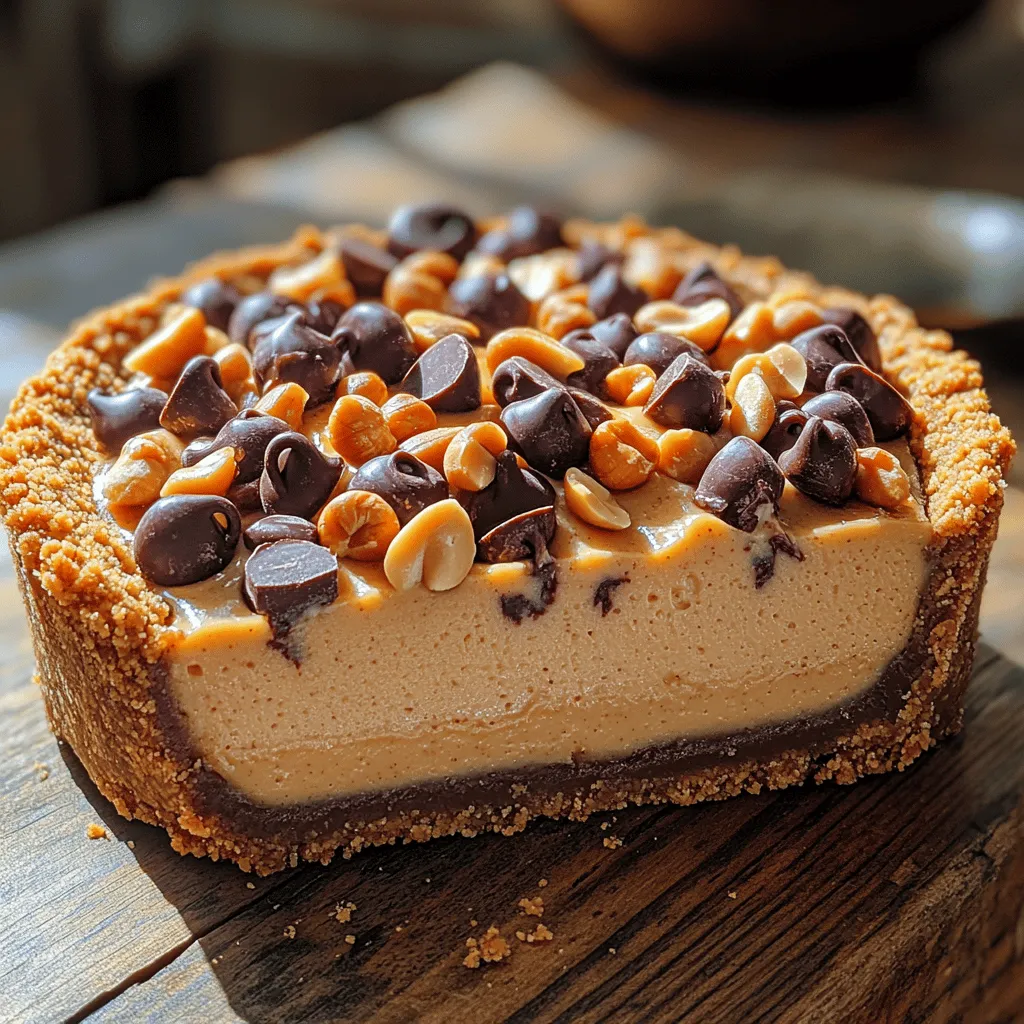
If you’re searching for a dessert that promises to be both decadent and convenient, look no further than the Delightful No-Bake Cream Cheese Peanut Butter Pie. This luscious dessert is a dream come true for peanut butter enthusiasts, combining the rich, creamy textures of cream cheese and peanut butter into a delightful filling. As the name suggests, this pie requires no baking, making it an ideal choice for gatherings, summer picnics, or simply satisfying your sweet tooth without spending hours in the kitchen.
The charm of this pie lies not just in its flavor but also in its simplicity. With just a handful of ingredients and minimal preparation time, you can create a dessert that looks and tastes like it came from a gourmet bakery. The no-bake aspect is particularly appealing for those who may feel intimidated by traditional baking techniques or for anyone wanting to save oven space during busy cooking times.
In this article, we will delve deeper into the allure of no-bake desserts, explore the essential ingredients that make this pie a standout, and provide you with a step-by-step guide to crafting the perfect No-Bake Cream Cheese Peanut Butter Pie.
The Allure of No-Bake Desserts
No-bake desserts have surged in popularity for various reasons, making them a staple in many kitchens. One of the primary benefits of no-bake recipes is their ability to save time and effort. With no need to preheat the oven or monitor baking times, these desserts can be prepared quickly, allowing you to focus on other aspects of meal preparation or simply enjoy some leisure time. This convenience is especially valued during the warmer months when the thought of turning on the oven can be unbearable.
Beyond saving time, no-bake desserts are incredibly versatile. They allow for endless creativity, letting home cooks experiment with flavors, textures, and presentations. From cheesecakes to mousse and pies, the possibilities are limited only by one’s imagination. Whether you prefer fruity, chocolaty, or nutty flavors, you can easily adapt a no-bake recipe to suit your preferences or dietary needs.
Moreover, no-bake desserts often have a lighter texture compared to their baked counterparts, making them a refreshing choice. The creamy nature of many no-bake recipes, like our featured pie, can be particularly appealing after a heavy meal. This versatility and ease of preparation make no-bake desserts a favorite among both novice and experienced bakers alike.
Ingredients Breakdown
Creating the Delightful No-Bake Cream Cheese Peanut Butter Pie requires a few key ingredients, each playing a significant role in achieving the desired flavor and texture. Let’s break down these ingredients:
1. **Graham Crackers**
Graham crackers serve as the base for our pie crust, providing a subtle sweetness and a hint of nuttiness. They are finely crushed to create the ideal crumb texture, which holds together when combined with melted butter. For those looking for a gluten-free option, gluten-free graham crackers are widely available and can provide the same delightful flavor.
2. **Unsalted Butter**
Unsalted butter is essential for binding the graham cracker crumbs together and adding richness to the crust. Using unsalted butter allows you to control the saltiness of your dessert, ensuring that the flavors of the peanut butter and cream cheese shine through without being overshadowed.
3. **Cream Cheese**
The star of the filling, cream cheese, brings a creamy and tangy flavor to the pie. It provides a smooth texture that balances the richness of the peanut butter. For those looking for a lighter version, you can opt for reduced-fat cream cheese, though it may alter the overall texture slightly.
4. **Peanut Butter**
Peanut butter is the heart of this pie, contributing a deeply satisfying flavor and creamy texture. Whether you choose creamy or crunchy peanut butter will depend on your personal preference; however, creamy peanut butter is recommended for a smoother filling. For those with dietary restrictions, nut butter alternatives can be used to achieve a similar flavor profile.
5. **Powdered Sugar**
Powdered sugar sweetens the filling and helps achieve the desired smooth consistency. Its fine texture allows it to blend seamlessly with the cream cheese and peanut butter, ensuring a lump-free filling. If you’re looking for a healthier option, you can substitute with a natural sweetener, though it may require some adjustments to achieve the same level of sweetness.
6. **Heavy Whipping Cream**
Heavy whipping cream is whipped to soft peaks and folded into the filling to create a light, airy texture. This step is crucial for achieving that melt-in-your-mouth quality that makes this pie so irresistible. For a dairy-free alternative, coconut cream can be used, providing a unique flavor while still delivering creaminess.
7. **Vanilla Extract**
A splash of vanilla extract enhances the overall flavor of the pie, adding depth to the sweet and nutty notes of the filling. Always opt for pure vanilla extract for the best flavor, but imitation vanilla can work in a pinch if you’re on a budget.
By utilizing high-quality ingredients, you ensure that your Delightful No-Bake Cream Cheese Peanut Butter Pie is a showstopper. Additionally, understanding the potential for substitutions allows you to adapt the recipe to accommodate various dietary needs without compromising on taste.
Step-by-Step Instructions
Now that we’ve covered the ingredients, let’s dive into the step-by-step instructions to create this delightful pie. Follow along, and soon you’ll have a creamy, rich dessert ready to impress friends and family.
Preparing the Crust
1. Crush the Graham Crackers: Begin by placing the graham crackers in a food processor and pulse until they resemble fine crumbs. If you don’t have a food processor, you can place the crackers in a zip-top bag and crush them with a rolling pin. Aim for a texture similar to sand.
2. Combine with Butter: In a medium mixing bowl, combine the crushed graham crackers with melted unsalted butter. Stir until the crumbs are fully coated and have a consistency similar to wet sand.
3. Press into Pie Dish: Transfer the graham cracker mixture into a 9-inch pie dish. Using the back of a measuring cup or your fingers, firmly press the mixture into the bottom and up the sides of the dish to create an even layer. This step is vital for maintaining the structure of your pie.
4. Chill the Crust: Once you’ve formed the crust, place it in the refrigerator for at least 30 minutes. Chilling the crust helps it firm up, ensuring it holds together well when filled and sliced.
Crafting the Creamy Filling
1. Mix the Cream Cheese: In a large mixing bowl, beat the softened cream cheese with an electric mixer until smooth and creamy. This step ensures there are no lumps, which can detract from the pie’s texture.
2. Add the Peanut Butter: Gradually add the peanut butter to the cream cheese, mixing until fully incorporated. This combination creates the rich, nutty base of your filling.
3. Incorporate Powdered Sugar: Slowly add the powdered sugar, mixing on low speed until well combined. Taste the mixture and adjust the sweetness if necessary, depending on your personal preference.
4. Whip the Cream: In a separate bowl, pour in the heavy whipping cream and beat it with an electric mixer until soft peaks form. Be careful not to overmix, as you want the cream to remain airy and light.
5. Fold Together: Gently fold the whipped cream into the peanut butter mixture using a spatula. This folding technique helps maintain the lightness of the whipped cream while fully incorporating it into the filling. Aim for a smooth and creamy consistency without deflating the whipped cream.
With the crust chilling and the filling ready, you’re just a few simple steps away from assembling your pie. Stay tuned for the next section, where we’ll guide you through the final assembly and provide tips for achieving the best results in your Delightful No-Bake Cream Cheese Peanut Butter Pie.

Whipping Heavy Cream to Stiff Peaks
To achieve the perfect light texture for your No-Bake Cream Cheese Peanut Butter Pie, whipping the heavy cream to stiff peaks is a crucial step. Begin by ensuring that your mixing bowl and beaters are cold; this helps the cream to whip up faster and more efficiently. Pour the heavy cream into the bowl and start mixing on low speed. Gradually increase the speed to medium-high as the cream begins to thicken.
It’s important to watch the cream closely; this process should take about 2-3 minutes. You will know it’s ready when it starts to hold its shape and forms peaks that stand upright without drooping. Be careful not to overbeat, as this can turn your cream into butter. Once you reach stiff peaks, set the whipped cream aside while you prepare the peanut butter mixture.
Incorporating the Whipped Cream
The next step is to gently fold the whipped cream into the peanut butter mixture. This is where you’ll want to be particularly gentle to avoid deflating the air you’ve just whipped into the cream. Start by taking a small amount of the whipped cream and adding it to the peanut butter mixture. Use a spatula to stir gently, combining the two components without over-mixing.
Once this initial amount is incorporated, you can gradually add the rest of the whipped cream in batches, folding it in with a gentle, sweeping motion. This technique will help maintain the light and airy texture of the filling, which is essential for the pie’s final result. Be patient during this step; the goal is to achieve a uniform mixture that is fluffy and creamy without any lumps of whipped cream remaining.
Assembling the Pie
With your filling ready, it’s time to assemble the pie. Carefully pour the fluffy peanut butter filling into your chilled crust. Using a spatula, gently spread the filling evenly across the crust, taking care to smooth out the top. This step is essential not only for presentation but also for achieving an even texture throughout the pie.
When pouring the filling, start from the center and work your way outwards, allowing the filling to naturally settle into the edges of the crust. A well-distributed filling will ensure that each slice of pie has a similar texture and taste. Take your time to make sure the filling is level and smooth, as this will enhance the visual appeal when you serve it.
Chilling for Perfection
After assembling your pie, it’s critical to let it chill in the refrigerator. Allowing the pie to set for several hours or ideally overnight is essential for a few reasons. First, this chilling process allows the filling to firm up, making it easier to slice and serve. If you try to cut the pie too soon, you may end up with a messy, unstructured slice.
Moreover, the chilling time enhances the flavor profile of the pie. The ingredients meld together beautifully, creating a more cohesive taste. The creamy texture of the filling will become even more pronounced, and the flavors will deepen as they develop in the cool environment of the fridge. Aim for at least 4-6 hours of chilling time, but overnight is best for that perfect slice.
Garnishing the Pie
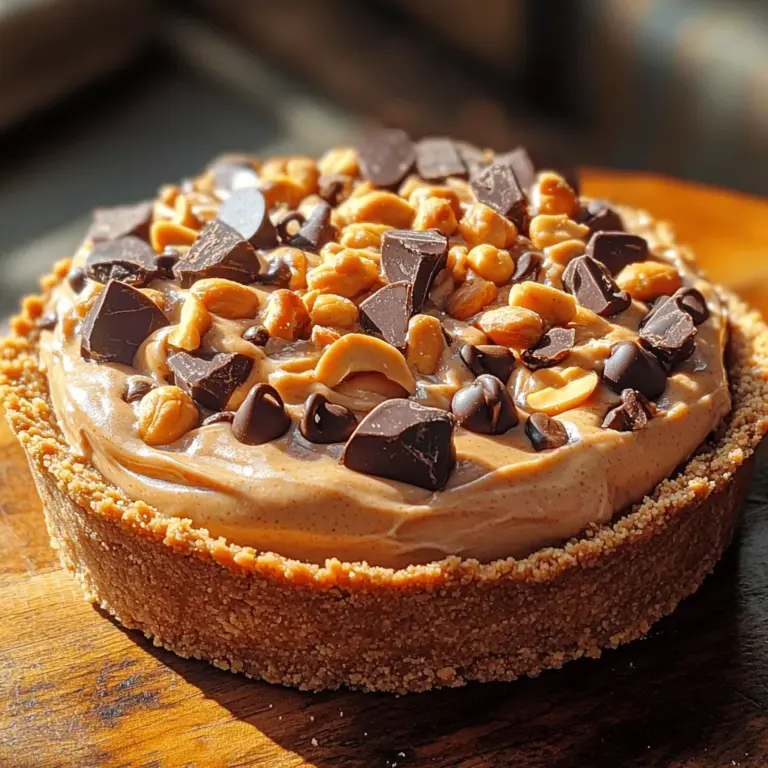
Now that your pie has set, it’s time to add some finishing touches with garnishes. There are various options you can choose from to elevate both the presentation and flavor of your No-Bake Cream Cheese Peanut Butter Pie. A simple yet effective garnish is a sprinkle of chocolate chips on top, which complements the creamy peanut butter flavor with a touch of sweetness and texture.
Chopped peanuts are another fantastic option; they add a delightful crunch and enhance the nutty flavor of the pie. You might also consider drizzling some melted chocolate or caramel sauce over the top for an extra indulgent touch. Whipped cream dollops can also be added around the edges for a more decorative look.
Remember, garnishing not only improves the pie’s appearance but also provides contrasting textures that make each bite enjoyable. Choose your garnishes based on your preferences and create a visual masterpiece that will impress your guests.
Serving Suggestions
When it comes to serving your No-Bake Cream Cheese Peanut Butter Pie, there are endless possibilities. This dessert is versatile enough to suit various occasions, whether it’s a casual gathering with friends or a festive celebration. One delightful pairing is to serve the pie with a hot cup of coffee, as the rich flavors of the pie complement the bitterness of the coffee beautifully.
For a more decadent experience, consider adding a scoop of vanilla or chocolate ice cream on the side. The cold creaminess of the ice cream pairs wonderfully with the pie’s texture and enhances the overall flavor experience. Additionally, a drizzle of chocolate or caramel sauce over the ice cream can take your dessert to the next level.
This pie is also perfect for summer barbecues or potlucks, as it can be made ahead of time and stored in the fridge until it’s ready to serve. It’s a crowd-pleaser that appeals to both children and adults alike, making it an excellent choice for any gathering.
Nutritional Information
As you indulge in this delicious No-Bake Cream Cheese Peanut Butter Pie, it’s important to be mindful of its nutritional aspects. A standard slice of this pie contains approximately 350-400 calories, depending on portion size and specific ingredients used. It’s rich in protein thanks to the cream cheese and peanut butter, while also providing a satisfying dose of fats and carbohydrates.
However, due to its richness, moderation is key. Consider enjoying a smaller slice if you’re watching your calorie intake or serving it alongside fresh fruit to balance out the dessert experience. Additionally, be aware of potential allergens; this pie contains dairy and peanuts, so it may not be suitable for those with allergies to these ingredients.
In the context of a balanced diet, this pie can be an occasional treat. By savoring it in moderation and enjoying it with friends and family, you can indulge without compromising your health goals.
Conclusion
In summary, the No-Bake Cream Cheese Peanut Butter Pie is not only easy to prepare but also a delightful addition to any dessert table. Its creamy texture, rich flavor, and no-bake convenience make it an ideal choice for both novice and experienced bakers alike.
By following the detailed steps for whipping cream, assembling, chilling, and garnishing, you can create a pie that is sure to impress. Don’t hesitate to experiment with your own variations, whether it’s adding different toppings or incorporating flavors like chocolate or vanilla.
This pie is a testament to the joys of simple yet satisfying desserts that bring people together. So gather your ingredients, invite some friends over, and enjoy the process of making and sharing this delightful treat.


