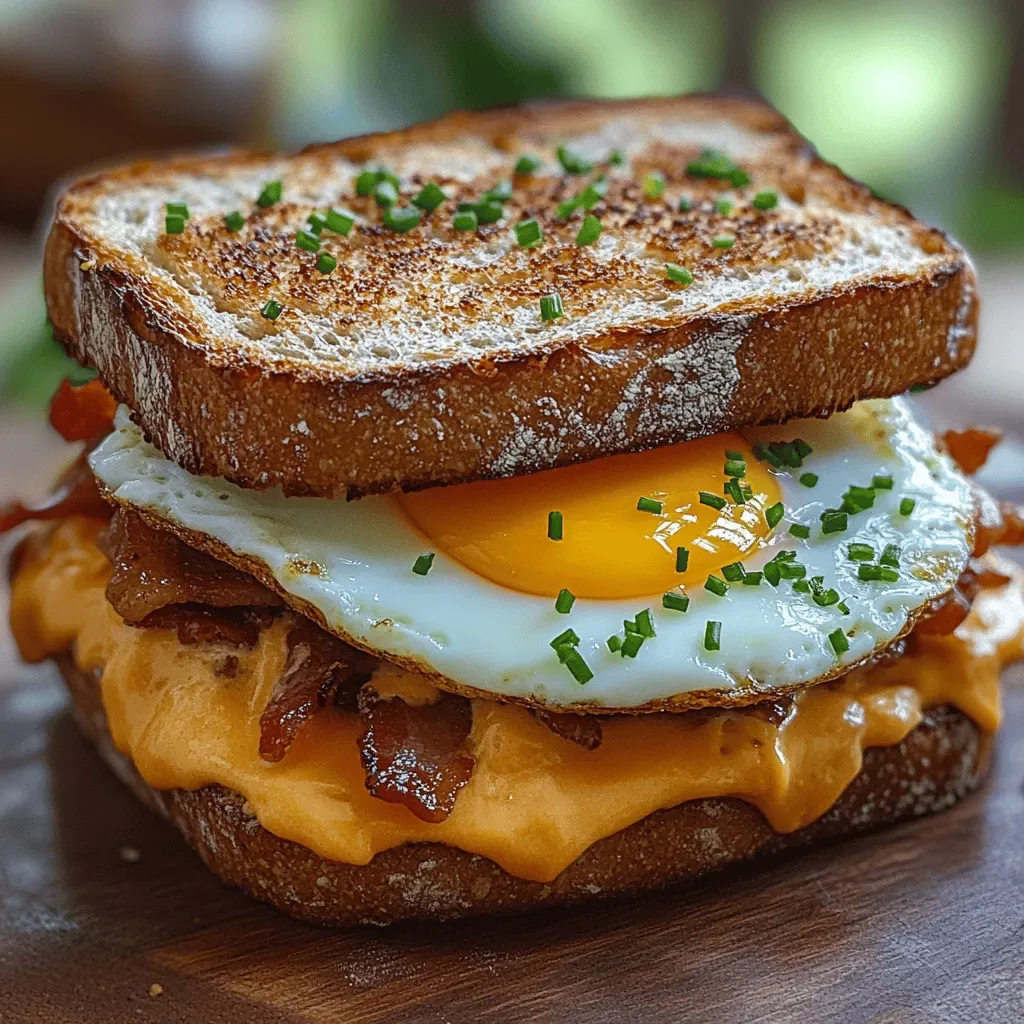
Easy Homemade Pizza Dough – No Fail Recipe

WANT TO SAVE THIS RECIPE?

Introduction

There’s a certain joy that comes with crafting your own homemade pizza, an experience that transcends the mere act of cooking. From selecting your favorite toppings to creating a masterpiece that reflects your unique flavor preferences, making pizza at home can be both fun and rewarding. However, the foundation of this culinary delight lies in the pizza dough. A great pizza begins with a good dough—soft yet chewy, with a perfectly crispy crust that holds all those delicious toppings in place.

This easy homemade pizza dough recipe is designed to be foolproof, perfect for both novice cooks and seasoned chefs looking to whip up a quick batch of dough. With a few simple ingredients and straightforward steps, you’ll find that making pizza dough at home is not only achievable but also incredibly satisfying. In this article, we will delve into the basics of pizza dough, explore the essential ingredients, and walk you through the step-by-step process to ensure your dough turns out perfect every time.

Understanding Pizza Dough

At its core, pizza dough is a simple mixture of flour, water, yeast, salt, and sometimes a bit of sugar and olive oil. When these ingredients come together, they create a dough that can be stretched, shaped, and topped to create the ultimate pizza experience.

The Role of Yeast in Dough Fermentation and Rise

Yeast is a crucial component of pizza dough, acting as a leavening agent that ferments and causes the dough to rise. When mixed with warm water and sugar, yeast begins to feed on the sugars and produces carbon dioxide gas. This gas forms bubbles in the dough, resulting in a light and airy texture once baked. The fermentation process not only contributes to the rise but also enhances the flavor of the dough, giving it a distinct taste that is characteristic of traditional pizza crusts.

Importance of Using the Right Flour for Texture and Flavor

The type of flour you use for your pizza dough can significantly influence its texture and flavor. All-purpose flour is the most commonly used flour for pizza dough, providing a good balance of protein content that helps create a chewy crust. However, for those seeking an even more authentic Neapolitan-style pizza, bread flour can be used due to its higher protein content, which leads to a stronger gluten structure. This results in a dough that is even more elastic and capable of achieving that desired chewy texture.

Ingredients Breakdown

Now that we understand the significance of pizza dough and its fundamental components, let’s break down the ingredients that will go into our easy homemade pizza dough.

Active Dry Yeast

Active dry yeast is a key ingredient in pizza dough, responsible for the fermentation process that allows the dough to rise. When using active dry yeast, it’s important to activate it by mixing it with warm water (not hot) and a pinch of sugar. This process wakes up the dormant yeast, ensuring it’s ready to work its magic in the dough.

Warm Water

The temperature of the water used in the dough is crucial for yeast activation. Ideally, the water should be between 100°F to 110°F (37°C to 43°C). Water that is too hot can kill the yeast, while water that is too cold may slow down the fermentation process. Using warm water helps to create a conducive environment for the yeast to thrive.

All-Purpose Flour

All-purpose flour is the backbone of our pizza dough. It provides the necessary structure and texture while allowing for flexibility in the dough. Different brands of all-purpose flour may yield slightly different results, so if you have the option, look for a high-protein flour that can help achieve that perfect crust.

Olive Oil

Adding olive oil to your pizza dough not only enhances its flavor but also contributes to its moisture content. Olive oil helps to create a tender dough that won’t dry out during baking, resulting in a flavorful crust that complements the toppings beautifully.

Sugar

Sugar plays a twofold role in pizza dough. First, it acts as food for the yeast, helping to kickstart the fermentation process. Second, sugar contributes to the overall flavor of the dough, adding a subtle sweetness that balances the saltiness of the other ingredients.

Salt

Salt is an essential ingredient in pizza dough that serves to enhance flavors and control yeast activity. While it’s important for flavor, salt also strengthens gluten, which is vital for achieving the right texture in your crust. Be careful not to add too much salt, as it can inhibit yeast activity and prevent the dough from rising properly.

Cornmeal

While not always included in the dough itself, cornmeal is often used as a dusting agent when rolling out the dough. It helps to prevent sticking and adds a pleasant texture to the bottom of the pizza crust, giving it a slightly crispy finish when baked.

Step-by-Step Instructions

Now that we’ve covered the essential ingredients that make up our easy homemade pizza dough, let’s dive into the step-by-step instructions to create your perfect dough. Follow these guidelines closely to ensure success and flavor in your final pizza creation.

Activating the Yeast

1. Start by measuring out 1 packet (2 1/4 teaspoons) of active dry yeast. In a small bowl, combine the yeast with 1 teaspoon of sugar and 1/2 cup of warm water. Stir gently to combine and let it sit for about 5 to 10 minutes until it becomes frothy. This is a sign that your yeast is alive and ready to work.

Mixing and Forming the Dough

2. In a large mixing bowl, combine 2 1/2 cups of all-purpose flour and 1 teaspoon of salt. Make a well in the center of the flour mixture. Once the yeast has activated (you should see bubbles forming), pour the yeast mixture into the well, along with 1 tablespoon of olive oil and an additional 1/2 cup of warm water.

3. Using a wooden spoon or your hands, mix the ingredients together until they start to form a shaggy dough. The dough should be somewhat sticky but manageable. If it feels too wet, you can add a little more flour, a tablespoon at a time, until it reaches the desired consistency.

Kneading

4. Once the dough has come together, transfer it to a lightly floured surface. Begin kneading the dough by folding it over itself and pressing down with the heel of your hand. Rotate the dough a quarter turn and repeat this process. Kneading is essential for developing gluten, which gives the dough its elasticity. Continue kneading for about 8 to 10 minutes until the dough is smooth and elastic.

5. After kneading, shape the dough into a ball and place it in a lightly greased bowl, turning it to coat all sides with oil. Cover the bowl with a clean kitchen towel or plastic wrap and let it rise in a warm, draft-free area for about 1 to 2 hours, or until it has doubled in size.

With these initial steps, you are well on your way to creating your very own homemade pizza dough. Stay tuned for the next part of this recipe, where we will explore shaping the dough, tips for perfecting your crust, and some delicious topping suggestions to make your pizza a true masterpiece.

There’s a certain joy that comes with crafting your own homemade pizza, an experience that transcends the mere act of cooking. From selecting your favorite toppings to creating a masterpiece that reflects your unique flavor preferences, making pizza at home can be both fun and rewarding. However, the foundation of this culinary delight lies in the pizza dough. A great pizza begins with a good dough—soft yet chewy, with a perfectly crispy crust that holds all those delicious toppings in place.

First Rise: Ideal Conditions and Signs of Readiness

Once you’ve mixed your pizza dough, it’s time for the first rise, a crucial step in developing flavor and texture. To create the ideal conditions for your dough to rise, place it in a warm, draft-free area. The perfect temperature for yeast activity hovers around 75°F to 80°F (24°C to 27°C). If your kitchen is chilly, you can turn on your oven to the lowest setting for a few minutes, then turn it off and place the dough inside, covered with a damp cloth.

During this rise, which typically takes about 1 to 1.5 hours, you’ll want to look for several telltale signs that your dough is ready. The dough should double in size, feel airy and puffy, and if you poke it with a finger, it should spring back slowly, leaving a small indentation. If it springs back too quickly, it may need a bit more time.

Shaping and Rolling: Techniques to Achieve Desired Thickness

After the first rise, it’s time to shape and roll out your dough. Start by gently punching down the dough to release any large air bubbles, which will help create a more even crust. Transfer the dough to a lightly floured surface. You can use a rolling pin to achieve your desired thickness, typically ranging from 1/4-inch for a thin crust to 1/2-inch for a thicker crust.

To shape your pizza, you can also use your hands. Start from the center and gently stretch the dough outward, rotating it as you go. If the dough is resistant, let it rest for a few minutes to relax the gluten before continuing to stretch. This approach allows you to maintain a consistent thickness without tearing the dough.

Pre-Baking (Optional): Benefits for Different Crust Types

Pre-baking your pizza crust, also known as “blind baking,” can offer several benefits, particularly if you enjoy a crispy crust. This technique is beneficial for thicker crusts or if you plan to use toppings with high moisture content, such as fresh tomatoes or vegetables that release water during baking.

To pre-bake your crust, roll it out and place it on a pizza stone or a baking sheet lined with parchment paper. Poke several holes in the surface with a fork to prevent bubbling. Bake in a preheated oven at 475°F (245°C) for about 5-7 minutes or until the dough looks slightly golden. Once pre-baked, remove it from the oven, add your desired toppings, and return it to the oven for the final bake.

Topping and Baking: Suggestions for Achieving the Perfect Bake

When it comes to toppings, the sky’s the limit! Start with a layer of sauce, whether it’s a classic marinara, a white garlic sauce, or a simple olive oil and garlic blend. Follow with a generous sprinkle of cheese, such as mozzarella, provolone, or a dairy-free alternative if needed. Layer on your favorite toppings, but be mindful not to overload the pizza, as too many toppings can lead to a soggy crust.

For the perfect bake, place your pizza in a preheated oven at 475°F (245°C). If using a pizza stone, ensure it has been heated for at least 30 minutes prior to baking. Bake for 10-15 minutes, or until the crust is golden and the cheese is bubbling and slightly browned. Keep an eye on the pizza towards the end of the baking time to prevent burning.

The Science Behind Pizza Dough

Understanding the science behind pizza dough can significantly enhance your culinary skills. Fermentation plays a pivotal role in developing both flavor and texture. During the fermentation process, yeast consumes sugars and produces carbon dioxide, which not only makes the dough rise but also contributes complex flavors as it ferments.

Kneading is another critical aspect, as it develops gluten—a network of proteins that gives dough its structure. The more you knead, the stronger the gluten network becomes, leading to a chewier texture in your crust. Conversely, under-kneaded dough may result in a dense crust that lacks the desired chewiness.

Temperature is also a key player in the rising process. Warmer temperatures accelerate yeast activity, while cooler conditions slow it down. This means that if your dough isn’t rising adequately, you might need to check the warmth of your environment and adjust accordingly.

Customizing Your Pizza Dough

Don’t hesitate to get creative with your pizza dough! There are numerous ways to customize the base to suit your taste preferences or dietary needs. For instance, you can incorporate herbs like oregano, basil, or garlic powder directly into the dough for added flavor. Alternatively, try substituting a portion of all-purpose flour with whole wheat flour for a heartier crust.

If you need a gluten-free option, consider using a gluten-free flour blend, which is typically designed specifically for baking. You may need to adjust the liquid content slightly, as gluten-free flours can absorb moisture differently.

Leftover dough? Don’t let it go to waste! You can roll it into small balls and freeze them for later use, or use any excess to make breadsticks or mini pizzas as a fun appetizer.

Troubleshooting Common Issues

Even the best recipes can encounter hiccups in the kitchen. Here are some common issues you might face when making pizza dough and their solutions:

Sticky Dough: If your dough is too sticky to handle, it may be due to excessive moisture or not enough flour. Dust your work surface and hands with flour to help manage the stickiness. Alternatively, let the dough rest for a few minutes, then knead in a little more flour.

Dough Not Rising: If your dough isn’t rising, check if the yeast is active. It should be bubbly and frothy after being mixed with warm water and sugar. If the yeast is old, it may not activate properly. Additionally, ensure the dough is in a warm environment; if it’s too cold, it may stall.

Over-Kneaded Dough: Signs of over-kneaded dough include a tough texture and difficulty in stretching. If you suspect this has happened, try letting the dough rest for 20-30 minutes before shaping it, which can help relax the gluten.

Serving and Enjoying Your Homemade Pizza

Once your pizza is out of the oven, it’s time to enjoy the fruits of your labor! Consider pairing your pizza with a variety of sauces, such as a zesty marinara, a creamy ranch, or a spicy sriracha for dipping. This not only enhances the flavor but also adds an interactive element to your meal.

For side dishes, think about serving a fresh garden salad, garlic knots, or roasted veggies. These complement the pizza beautifully and add a healthy balance to your meal. When it comes to beverages, a cold beer or a glass of red wine can elevate the dining experience, making it feel even more special.

Most importantly, share the joy of your homemade pizza with friends and family. There’s something uniquely satisfying about gathering around a table filled with delicious, homemade food, allowing everyone to choose their favorite toppings and create personalized pizzas.

Conclusion

Making homemade pizza dough is not just an easy and rewarding culinary endeavor but also an opportunity for creativity and experimentation. From the initial mixing to the final bake, each step offers a chance to infuse your personality and tastes into the dish.

With a bit of practice, you’ll find that this no-fail recipe yields a consistently delicious crust that serves as the perfect base for your favorite toppings. Don’t hesitate to explore new flavors, textures, and combinations—after all, the beauty of homemade pizza lies in its versatility.

So roll up your sleeves, gather your favorite ingredients, and dive into the delightful world of pizza-making. Whether you’re preparing a simple Margherita or a gourmet creation, the satisfaction of enjoying your homemade pizza is truly unmatched. Enjoy the process and the delicious results!

There’s a certain joy that comes with crafting your own homemade pizza, an experience that transcends the mere act of cooking. From selecting your favorite toppings to creating a masterpiece that reflects your unique flavor preferences, making pizza at home can be both fun and rewarding. However, the foundation of this culinary delight lies in the pizza dough. A great pizza begins with a good dough—soft yet chewy, with a perfectly crispy crust that holds all those delicious toppings in place.

Easy Homemade Pizza Dough – No Fail Recipe!

Unlock the joy of homemade pizza with this easy, no-fail pizza dough recipe! Perfect for beginners and experienced chefs alike, this guide simplifies the process of creating a soft, chewy crust with a crispy finish. Discover how yeast, flour, and a few simple ingredients come together to make your pizza dreams come true. Follow our step-by-step instructions and tips for kneading, rising, and baking your way to the ultimate pizza experience at home. Enjoy endless topping possibilities and the satisfaction of sharing your creation with loved ones!

Ingredients
  

2 ¼ teaspoons active dry yeast (1 packet)

1 ½ cups warm water (about 110°F/43°C)

3 ½ to 4 cups all-purpose flour

2 tablespoons olive oil

1 teaspoon sugar

1 teaspoon salt

Cornmeal (for dusting)

Instructions
 

Activate the Yeast: In a small bowl, combine the warm water and sugar. Sprinkle the yeast over the top and let it sit for about 5-10 minutes until it becomes foamy.

    Mixing the Dough: In a large mixing bowl, combine 3 ½ cups of flour and salt. Make a well in the center and add the activated yeast mixture and olive oil.

      Form the Dough: Using a wooden spoon or your hands, mix the ingredients until they start to come together. If the dough is sticky, gradually add more flour until it forms a rough ball.

        Kneading: Turn the dough out onto a lightly floured surface and knead it for about 5-7 minutes until it is smooth and elastic. If it’s too sticky, add a little more flour as needed.

          First Rise: Place the kneaded dough in a lightly oiled bowl. Cover it with a damp cloth or plastic wrap and let it rise in a warm place for about 1 to 1.5 hours, or until it has doubled in size.

            Shape the Dough: Once risen, punch down the dough to release the air. Turn it out onto a floured surface and divide it into two portions if making two pizzas, or keep it whole for one large pizza.

              Prepping for Baking: Roll out the dough to your desired thickness, about ¼ inch for thicker crusts or thinner for a crispier texture. Transfer the rolled out dough onto a pizza stone or baking sheet dusted with cornmeal to prevent sticking.

                Pre-Bake (Optional): For a crispier crust, pre-bake the dough at 475°F (245°C) for about 5 minutes before adding your favorite toppings.

                  Top and Bake: Add your favorite sauce, cheese, and toppings, then bake in the preheated oven for an additional 10-15 minutes or until the cheese is bubbly and the crust is golden.

                    Cool and Serve: Let the pizza cool for a few minutes before slicing. Enjoy your fresh homemade pizza!

                      Prep Time, Total Time, Servings: 15 minutes | 2 hours (including rise time) | 2 pizzas ⏱️

                        WANT TO SAVE THIS RECIPE?

                        Leave a Comment

                        Recipe Rating