Introduction
Onion rings are a classic snack and side dish that have captured the hearts and taste buds of many. Whether served alongside a juicy burger or enjoyed on their own with a delicious dipping sauce, these crispy rings are a staple in American cuisine and beyond. The allure of onion rings lies in their satisfying crunch and the burst of flavor that comes with each bite. While you can easily find them on menus across the country, there’s something special about making them at home. Homemade onion rings allow you to control the ingredients, ensuring a fresher taste and a crunch that far surpasses store-bought versions.
This recipe for Extra Crispy Homemade Onion Rings takes your love for this crispy delight to the next level. The secret? A unique double coating technique combined with the use of panko breadcrumbs, which provide an unparalleled crunch. Whether you are serving them at a party, enjoying them as a side dish, or indulging in a late-night snack, these onion rings are sure to impress. In this article, we will delve into the history of onion rings, explore why homemade versions are superior, break down the essential ingredients, and provide a detailed step-by-step guide for preparation.
Understanding Onion Rings
History and Popularity of Onion Rings
The history of onion rings can be traced back to the early 20th century in the United States. While there are claims of similar dishes existing in other cultures, such as the British “battered onion rings” or the French “beignets d’oignons,” it was in America that onion rings truly gained popularity. The modern version of onion rings began to appear in the 1920s, with the first published recipe appearing in a New York City newspaper in 1933. This delicious dish quickly became a favorite among fast-food outlets and diners, solidifying its place in American cuisine.
Onion rings have since evolved, with various regional adaptations and flavors. From beer-battered versions to spicy Cajun variations, the humble onion ring has taken on many forms. Their cultural significance is evident in their continued presence on menus, where they are often featured as a side or appetizer. In fact, they have become a beloved comfort food, evoking nostalgia and the joy of sharing a plate with friends and family.
Why Homemade is Better
While you can easily grab a basket of onion rings from your favorite restaurant, nothing compares to homemade versions. One of the primary advantages of making onion rings at home is the ability to control the ingredients. Store-bought onion rings often contain preservatives, artificial flavors, and unhealthy oils that can detract from the overall taste and quality. When you make onion rings yourself, you can choose fresh ingredients, ensuring that every bite is bursting with flavor.
Moreover, homemade onion rings allow for customization in terms of seasoning and texture. You can experiment with different spices, choose your preferred type of onion, and adjust the level of crunch to your liking. This level of control not only enhances the flavor but also ensures that you can cater to dietary preferences and restrictions. Whether you want to make them gluten-free or dairy-free, the beauty of homemade onion rings is that you can adapt the recipe to fit your needs.
Ingredient Breakdown
Key Ingredients and Their Roles
Understanding the role of each ingredient in your onion rings recipe is crucial for achieving the perfect crunch and flavor.
– Yellow Onions: The star of the dish, yellow onions are ideal for frying due to their balanced sweetness and mild flavor. They provide the classic onion taste that pairs beautifully with the crispy coating. When selecting onions, look for firm bulbs with a dry, papery skin.
– All-Purpose Flour: This ingredient serves as the base for the batter. It helps create a cohesive coating that adheres well to the onions. The starch in the flour also contributes to the crispy texture once fried.
– Panko Breadcrumbs: Unlike regular breadcrumbs, panko breadcrumbs are coarser and lighter, resulting in a crunchier texture when fried. They absorb less oil, which means your onion rings will be crispy without being greasy. This is the secret ingredient that elevates your homemade onion rings to a whole new level.
– Buttermilk: Soaking the onion rings in buttermilk before coating them adds moisture and tenderness. The acidity in buttermilk helps to break down the onion’s fibers, resulting in a softer interior while the outside becomes perfectly crispy when fried.
– Seasonings: No onion ring is complete without a blend of seasonings. Paprika, garlic powder, onion powder, and cayenne pepper enhance the flavor profile, adding a subtle kick and depth to the overall taste. Adjust the quantities based on your preference for spice and flavor intensity.
Optional Ingredients and Variations
One of the great things about homemade onion rings is the opportunity for creativity. Here are some optional ingredients and variations you can consider:
– Different Types of Onions: While yellow onions are the standard choice, you can experiment with red onions for a sweeter flavor or white onions for a sharper taste. Each type of onion will provide a unique twist on the classic recipe.
– Spices and Herbs: Feel free to add your favorite spices or herbs to the batter. Consider incorporating smoked paprika for a deeper flavor, dried oregano for an herby note, or even a touch of Parmesan cheese for added richness.
– Gluten-Free Options: For those with gluten sensitivities, you can substitute all-purpose flour with a gluten-free flour blend. Additionally, look for gluten-free panko breadcrumbs to maintain that signature crunch.
– Dairy-Free Variations: If you want to make these onion rings dairy-free, you can replace buttermilk with a non-dairy milk alternative, such as almond milk or oat milk. Just be sure to add a splash of vinegar or lemon juice to mimic the acidity of buttermilk.
Step-by-Step Preparation Guide
Preparing the Onions
The first step in making your Extra Crispy Homemade Onion Rings is preparing the onions. Start by selecting high-quality yellow onions, as they will provide the best flavor.
1. Peel the Onions: Begin by peeling away the outer layer of the onions, removing any skin and tough parts.
2. Slice the Onions: Carefully slice the onions into approximately 1/4-inch thick rings. A sharp knife will ensure clean cuts and help maintain the integrity of the rings. If you prefer thicker or thinner rings, feel free to adjust the thickness according to your taste.
3. Separate the Rings: Once sliced, gently separate the onion rings from one another. Be cautious not to break them, as you want intact rings for the frying process.
4. Soak in Buttermilk: Place the separated onion rings in a bowl and pour in enough buttermilk to cover them completely. Allow the onions to soak for at least 30 minutes. This step is crucial as it not only infuses flavor but also helps the coating stick better during frying.
With the onions prepared and soaking, you’re ready to move on to the next steps in creating your Extra Crispy Homemade Onion Rings. The combination of careful preparation and quality ingredients will set the stage for a deliciously crunchy snack that is bound to be a hit!
Detailed Instructions for Slicing and Separating Onion Rings
To achieve the perfect onion rings, start with slicing the onions correctly. Select medium to large onions, as they provide the best size for rings. Yellow onions are preferred for their balanced sweetness, but you can experiment with red onions for a sharper taste.
1. Peel the Onions: Begin by removing the outer skin of the onion. Rinse them under cold water to remove any residual dirt.
2. Slice the Onions: Place the onion on a cutting board with the root facing towards you. Using a sharp knife, slice the onion into thick, even rings, about 1/4 to 1/2 inch thick. Thicker rings ensure a satisfying crunch while maintaining a tender inside.
3. Separate the Rings: Gently pull apart the sliced rings from each other. Discard the small inner pieces that do not form rings, or save them for use in another dish.
Tips for Achieving the Perfect Thickness for Optimal Frying
The thickness of your onion rings is crucial for achieving that perfect balance of crunch and tenderness. Rings that are too thin may burn or become overly crispy, while very thick rings can result in undercooked onions. Here are some tips to help you get it just right:
– Consistency is Key: Use a mandoline slicer if available, as it allows for uniform thickness. This ensures that all the rings cook evenly.
– Test a Few: Before frying the entire batch, test fry a couple of rings to determine if the thickness works well for your taste. Adjust as necessary for the remaining rings.
– Consider Cooking Time: Thicker rings will require a longer frying time, so keep this in mind when slicing.
Making the Batter
The batter is what gives your onion rings that delightful crunch. A well-mixed batter ensures an even coating and holds well during frying.
1. Mix Dry Ingredients: In a large mixing bowl, combine 1 cup of all-purpose flour, 1 teaspoon of baking powder, and a pinch of salt. This mixture will create the foundation for your batter.
2. Prepare Wet Ingredients: In another bowl, whisk together 1 egg and 1 cup of buttermilk. The egg serves as a binding agent, while the acidity in the buttermilk enhances flavor and tenderness.
3. Combine Wet and Dry: Gradually add the wet ingredients to the dry mixture, stirring until just combined. Avoid overmixing; a few lumps are acceptable. The goal is to create a smooth batter that will cling to the onion rings.
Coating Techniques for Maximum Crunch
Achieving that extra crispy texture involves employing a double-coating technique that ensures your onion rings are well-protected and crunchy after frying.
1. First Coat: Take each onion ring and dip it into the prepared batter, ensuring it is completely covered. Let any excess batter drip off.
2. Second Coat: After the first coating, immediately dredge the battered onion ring in a bowl of seasoned breadcrumbs or panko. This additional layer adds texture and crunch.
3. Visual Cues: Ensure that the rings are evenly coated. They should not be dripping with batter, nor should they be overly dry. A good visual cue is to see a light, even layer of breadcrumbs covering the batter.
Frying Process
The frying process is where the magic happens. Proper frying techniques will help you achieve perfectly golden brown onion rings.
1. Heat the Oil: In a deep fryer or a heavy-bottomed pot, heat vegetable oil to 350°F (175°C). Use a thermometer to ensure accuracy. If you do not have one, drop a small piece of bread into the oil; if it sizzles and browns in about 60 seconds, the oil is ready.
2. Safety Tips:
– Avoid Overcrowding: Frying too many onion rings at once can lower the oil temperature, leading to soggy results. Fry in small batches to maintain consistent cooking.
– Maintain Oil Temperature: Monitor the oil temperature throughout the frying process, adjusting the heat as necessary to keep it steady.
3. Frying Time: Fry the onion rings for about 2-4 minutes, turning them halfway through for even cooking. They should be golden brown and crispy when done. Use a slotted spoon to remove the rings and place them on a paper towel-lined plate to drain excess oil.
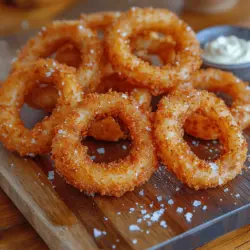
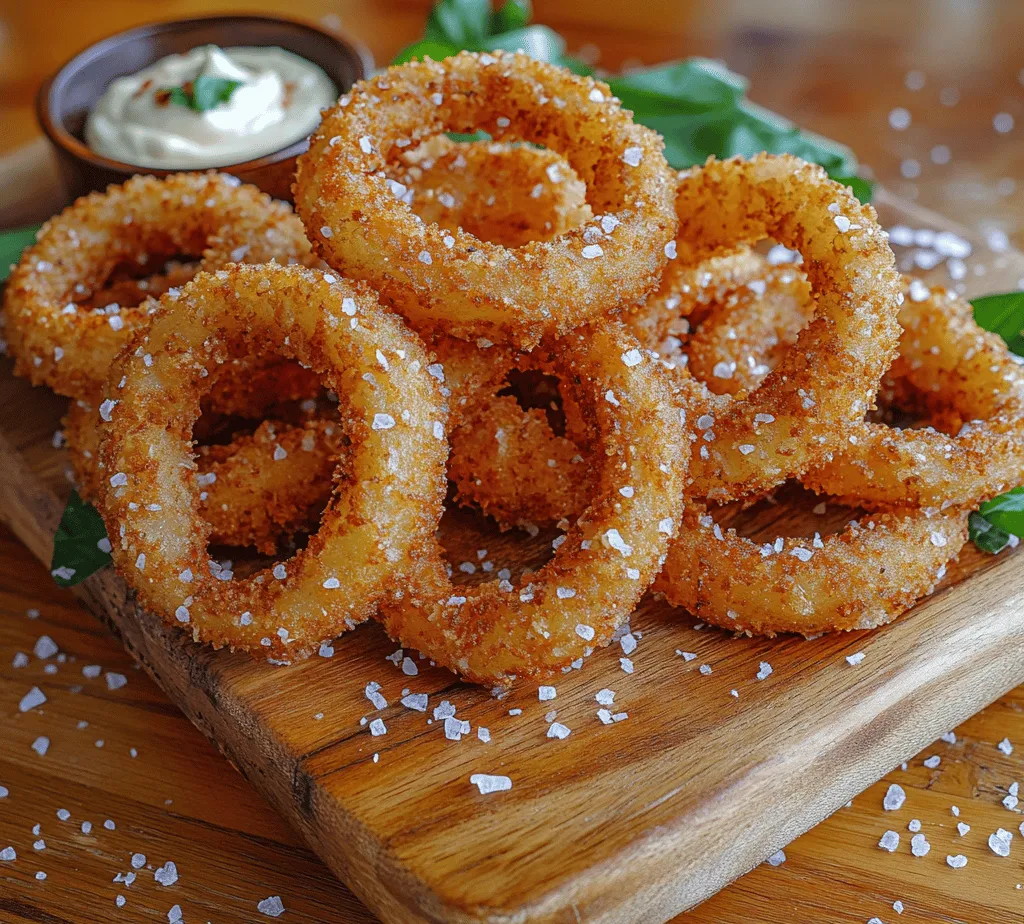
Serving Suggestions
Once your onion rings are perfectly fried, it’s time to serve them up. Here are some delightful ideas:
– Dips and Sauces: Consider serving your onion rings with a variety of dips. Classic choices include ranch dressing, spicy ketchup, or homemade garlic aioli. For a twist, try a zesty chipotle mayo or a tangy BBQ sauce.
– Presentation Tips: For gatherings, stack the onion rings in a tall glass or a cone-shaped holder for a fun presentation. Accompany them with a platter of dips, garnished with fresh herbs for an inviting display.
Nutritional Information
While onion rings are undeniably delicious, it’s important to be mindful of their nutritional value. Here’s a brief overview:
– Serving Size: One serving consists of about 4-6 onion rings, depending on size.
– Calories: Homemade onion rings typically contain about 200-300 calories per serving, depending on the batter and frying method.
– Fat Content: Expect around 10-15 grams of fat, primarily from the frying oil.
Enjoying fried foods like onion rings can be part of a balanced diet, as long as they are consumed in moderation. Pair them with a side salad or a lean protein to create a well-rounded meal.
The Allure of Crunchy Snacks
There’s something universally appealing about crunchy snacks. The sound of a crispy bite can trigger a positive sensory response, making us feel satisfied and even nostalgic. This texture is often associated with freshness and quality, enhancing the overall eating experience.
– Psychological Aspects: Crunchy foods can create a satisfying contrast to softer textures, making them enjoyable on multiple sensory levels. The act of biting into something crispy can evoke feelings of happiness and indulgence.
– Cultural Connections: From fried chicken to potato chips, cultures around the world celebrate crunchy snacks. This shared enjoyment of crispiness connects people and adds to the allure of cooking and sharing food.
Conclusion
Making homemade onion rings is a rewarding culinary adventure that brings the joy of crunchy snacks right to your kitchen. With the perfect batter, double coating technique, and careful frying, you can create a delightful treat that rivals any restaurant version.
Don’t hesitate to experiment with the recipe by adding your favorite spices or trying different dipping sauces. Each batch can be uniquely yours, tailored to your taste preferences.
Embrace the satisfaction that comes with crafting a delicious, crunchy snack at home, and enjoy every crispy bite of your homemade onion rings!