Introduction to Guilt-Free Chocolate Protein Balls
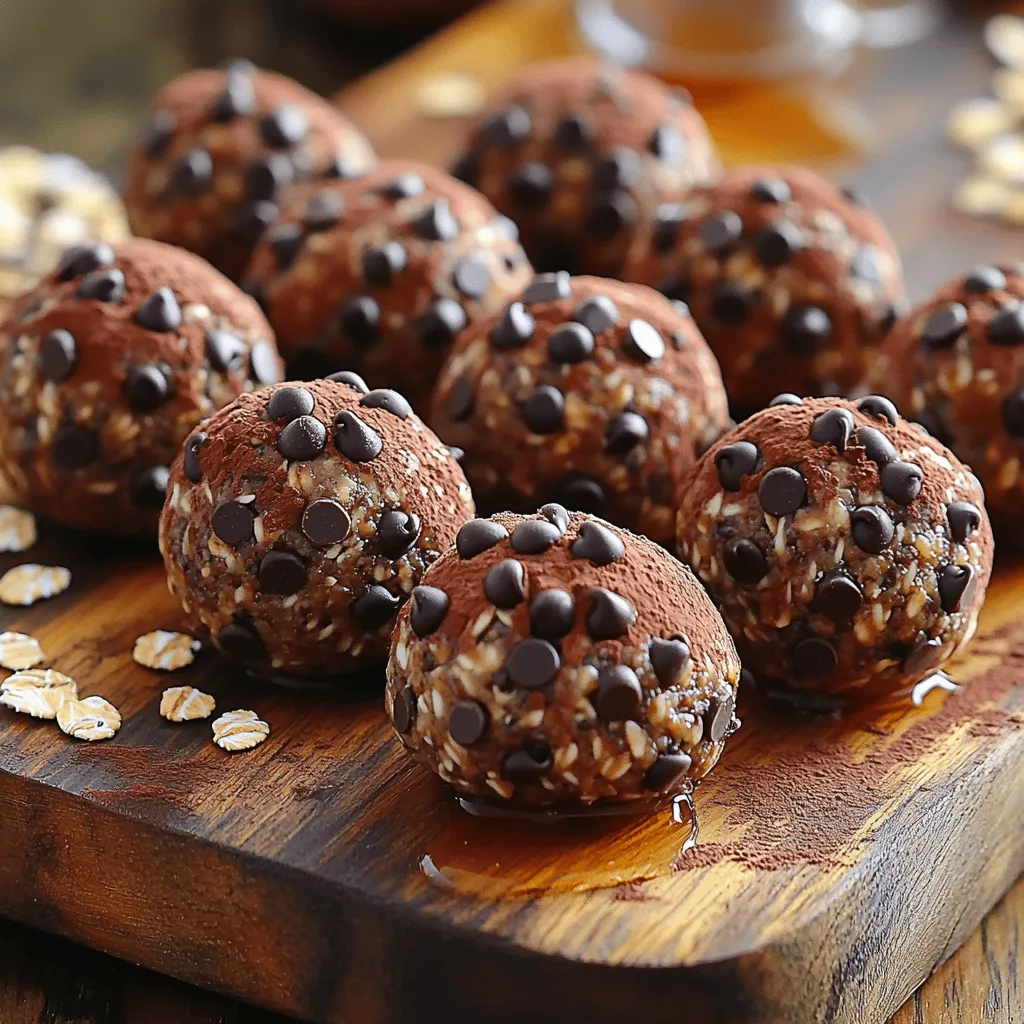
In the ever-evolving world of healthy snacking, Guilt-Free Chocolate Protein Balls stand out as a deliciously satisfying option that aligns perfectly with various dietary preferences. As more people prioritize their health and wellness, the demand for snacks that are not only tasty but also nutritious has skyrocketed. These protein balls have emerged as a popular solution, catering to athletes seeking a post-workout treat and everyday individuals who crave something sweet without the guilt.
The allure of Guilt-Free Chocolate Protein Balls lies in their ability to deliver a burst of flavor while offering a wealth of nutritional benefits. Made from wholesome ingredients, these bite-sized snacks are rich in protein, fiber, and essential nutrients, making them an ideal choice for anyone looking to boost their energy levels or satisfy their sweet tooth. With a balance of healthy fats, natural sweeteners, and plant-based protein, these treats can easily fit into various dietary regimens, including vegan and gluten-free diets.
This article will delve into the nutritional benefits of Guilt-Free Chocolate Protein Balls, providing you with a comprehensive understanding of the key ingredients that make them both delicious and nourishing. We will also guide you through the preparation process step-by-step, ensuring that you can whip up a batch of these delightful treats in no time. Whether you’re preparing for a busy day or need a quick snack after a workout, Guilt-Free Chocolate Protein Balls will become a staple in your healthy snacking repertoire.
Understanding the Nutritional Benefits of Guilt-Free Chocolate Protein Balls
Exploring the Key Ingredients
The foundation of any great recipe lies in its ingredients, and Guilt-Free Chocolate Protein Balls are no exception. Each component plays a vital role in creating a nutritious and satisfying snack. Let’s take a closer look at the primary ingredients that contribute to their health benefits:
– Rolled Oats: Rolled oats are a fantastic source of fiber and energy. They provide a steady release of carbohydrates, helping to sustain your energy levels throughout the day. Additionally, oats are rich in beta-glucans, which can help reduce cholesterol levels and improve heart health. Their chewy texture also gives the protein balls a satisfying bite.
– Almond Butter: This creamy spread is packed with healthy fats and protein, making it an excellent choice for adding richness and creaminess to the recipe. Almond butter is also a great source of vitamin E, magnesium, and antioxidants. The healthy fats found in almond butter can help keep you feeling full and satisfied between meals.
– Honey or Maple Syrup: Both honey and maple syrup serve as natural sweeteners, providing a touch of sweetness without the need for refined sugars. Honey boasts antibacterial properties and is known for its potential to soothe sore throats, while maple syrup is rich in antioxidants and minerals such as zinc and manganese. Choosing either of these options allows you to indulge your sweet cravings healthily.
– Cocoa Powder: Unsweetened cocoa powder is not only the star ingredient that gives these protein balls their rich chocolate flavor, but it also packs a punch of antioxidants. These compounds can help combat oxidative stress in the body and may even promote heart health. Cocoa powder is also low in calories, making it a guilt-free addition to your snack.
– Protein Powder: Incorporating a protein powder of your choice is the key to elevating these bites into a post-workout powerhouse. Whether you prefer whey protein for its rapid absorption or plant-based protein for a dairy-free option, protein powder helps support muscle recovery and growth after exercise.
– Dark Chocolate Chips: Finally, dark chocolate chips provide a delightful burst of sweetness and indulgence. They contain less sugar than milk chocolate and are rich in flavonoids, which have been linked to improved heart health. The combination of chocolate and the other wholesome ingredients makes these protein balls a truly satisfying treat.
The Health Benefits of Protein Balls
Guilt-Free Chocolate Protein Balls are more than just a tasty snack; they offer numerous health benefits that make them an ideal choice for various lifestyles:
– Energy Boost for Active Lifestyles: The combination of complex carbohydrates from rolled oats and protein from almond butter and protein powder provides a sustained energy boost. These protein balls are perfect for fueling your workout or powering through a busy day.
– Satisfying Sweet Cravings Without Refined Sugars: With natural sweeteners like honey or maple syrup, these protein balls satisfy your sweet tooth without the downsides of refined sugars. This makes them a great alternative to traditional sugary snacks.
– Convenient and Portable Snack Option: These protein balls are easy to prepare in advance and can be stored for days, making them a convenient on-the-go snack. Whether you’re heading to the gym, work, or on a road trip, they can be easily packed and enjoyed anytime.
– Supports Muscle Recovery and Overall Health: With a healthy dose of protein and essential nutrients, these protein balls not only aid in muscle recovery after workouts but also contribute to your overall health and wellness.
Gathering Your Ingredients for Success
Before diving into the preparation of Guilt-Free Chocolate Protein Balls, it’s essential to gather all the necessary ingredients. Each ingredient plays a crucial role in the final product, affecting both flavor and texture. Here’s a detailed overview of what you’ll need:
– Rolled Oats: When selecting rolled oats, look for whole grain options for added nutritional benefits. Steel-cut oats can be too coarse for this recipe, so stick to traditional rolled oats. For optimal texture, avoid instant oats, which can lead to a mushy consistency.
– Nut Butters: Almond butter is the star of this recipe, but you can also experiment with other nut butters like peanut or cashew butter. When selecting nut butters, choose options that contain minimal ingredients—ideally just nuts and salt. To maintain freshness, store nut butters in a cool, dark place.
– Sweeteners: Both honey and maple syrup provide natural sweetness to the protein balls. Depending on your personal preference or dietary restrictions, you can choose either. Consider using raw honey for its additional health benefits, and if you opt for maple syrup, look for 100% pure options without additives.
– Protein Powders: With a variety of protein powders available, you have the flexibility to choose one that fits your dietary needs. Whey protein is great for those who consume dairy, while pea, rice, or hemp protein are excellent plant-based alternatives. Check the ingredient list to avoid added sugars or fillers.
– Sea Salt and Vanilla Extract: A pinch of sea salt enhances the flavors of the protein balls, while pure vanilla extract adds depth and richness. These small additions can elevate your snack from ordinary to extraordinary.
Tips for Sourcing High-Quality Ingredients
When it comes to creating delicious Guilt-Free Chocolate Protein Balls, the quality of your ingredients can make all the difference. Here are some tips for sourcing high-quality components:
– Importance of Organic Options: Whenever possible, choose organic ingredients, especially when it comes to oats, nut butters, and sweeteners. Organic options tend to be free from harmful pesticides and chemicals, making them a healthier choice.
– Where to Find Specialty Ingredients: Many health food stores carry a variety of nut butters and protein powders, but you can also find these ingredients online. Look for reputable brands with high-quality products and transparent ingredient lists.
– Sustainability Considerations When Choosing Nut Butters: If you’re concerned about sustainability, consider brands that prioritize ethical sourcing and environmentally friendly practices. This not only benefits your health but also supports responsible farming and production methods.
Step-by-Step Instructions for Making Guilt-Free Chocolate Protein Balls
Now that you’ve gathered all your ingredients, it’s time to dive into the preparation process. Making Guilt-Free Chocolate Protein Balls is simple and requires minimal equipment. Follow these steps to ensure your protein balls turn out perfectly:
Mixing Dry Ingredients
Start by preparing your dry ingredients. In a large mixing bowl, combine the rolled oats, cocoa powder, protein powder, and a pinch of sea salt. It’s essential to mix these dry ingredients thoroughly to ensure an even distribution of flavors and nutrients.
– Importance of Proper Mixing for Texture: Properly mixing the dry ingredients will not only enhance the flavor but also contribute to the right texture of the protein balls. A well-blended mixture will help create a cohesive dough that holds together when rolled into balls.
– Recommended Bowl Sizes and Tools: Use a large mixing bowl to allow enough room for stirring without spillage. A sturdy spatula or wooden spoon works well for mixing, and if you prefer a more hands-on approach, you can use your hands to combine the ingredients later in the process.
Incorporating Wet Ingredients
Once your dry mixture is ready, it’s time to add the wet ingredients. In a separate bowl, combine the almond butter, honey or maple syrup, and vanilla extract. Mix until smooth and well combined.
– Tips for Achieving the Perfect Consistency with Nut Butter: If your almond butter is too thick, consider warming it slightly in the microwave for 10-15 seconds. This will make it easier to mix and help it blend seamlessly with the other wet ingredients. Additionally, if you prefer a sweeter snack, feel free to adjust the amount of honey or maple syrup to taste.
Once the wet ingredients are thoroughly mixed, pour them into the bowl with the dry ingredients. Use a spatula or your hands to combine everything until you achieve a sticky dough-like consistency. If the mixture seems too dry, you can add a splash of water or additional nut butter to help it come together.
By following these steps, you’re well on your way to creating a batch of Guilt-Free Chocolate Protein Balls that are sure to satisfy your cravings and fuel your day. Stay tuned for the next part of the article, where we will discuss the final steps of shaping, storing, and enjoying your delicious snacks.
The Role of Warming Nut Butter for Easier Mixing
When preparing your Guilt-Free Chocolate Protein Balls, warming your nut butter can significantly enhance the mixing process. Nut butter, when at room temperature or slightly warmed, becomes more fluid and easier to incorporate with other dry ingredients. This is especially beneficial when combined with protein powder and oats, as it ensures a smooth and even mixture. Simply place your nut butter in a microwave-safe bowl and heat it for about 10-15 seconds, watching closely to avoid overheating. This small step will make a big difference in achieving a well-blended mixture that forms perfectly shaped protein balls.
Combining Mixtures Effectively
To create a uniform blend, it’s essential to combine your ingredients effectively. Start by mixing your dry ingredients—such as protein powder, oats, and cocoa powder—in a large bowl. In another bowl, combine the warmed nut butter with any liquid sweeteners like honey or maple syrup. Gradually pour the wet ingredients into the dry mixture, stirring continuously. This method not only helps to evenly distribute the flavors but also prevents clumping, resulting in a consistent base for your protein balls.
Signs That the Mixture is Ready for Shaping
Knowing when your mixture is ready for shaping is crucial. The ideal consistency should be sticky yet manageable. When you can form a small ball that holds its shape without crumbling apart, you’re ready to move on. If the mixture feels too dry, it may need a splash of almond milk to help bind the ingredients together. A general rule of thumb is that adding about one tablespoon at a time can help you achieve the desired consistency without making it too wet.
Adjusting Consistency with Almond Milk
If you find that your mixture is too thick or crumbly, don’t hesitate to add a bit of almond milk. This dairy-free option not only helps to bind the ingredients but also adds a subtle nutty flavor. Mix in one tablespoon at a time, ensuring that you don’t oversaturate the mixture. Aim for a texture that is slightly tacky but easy to roll into balls.
Adding Chocolate Chips
To elevate the flavor of your Guilt-Free Chocolate Protein Balls, consider folding in some chocolate chips. Whether you prefer dark, white, or dairy-free chocolate, these additions can provide an indulgent touch while still keeping the snack healthy. For a richer chocolate flavor, opt for dark chocolate chips with a high cocoa content. Mix them in gently after combining your base ingredients, ensuring an even distribution throughout the mixture.
Variations on Chocolate Inclusions
Experimenting with different types of chocolate inclusions can create unique flavor profiles for your protein balls. If you enjoy a sweeter taste, white chocolate chips can add a delightful contrast to the cocoa flavor. For those who prefer a more intense chocolate experience, consider using cacao nibs, which provide a crunchy texture and additional health benefits. By mixing and matching these inclusions, you can customize your protein balls to suit your taste preferences.
How to Evenly Distribute Chocolate Throughout the Mixture
To ensure an even distribution of chocolate throughout your protein ball mixture, it’s best to add the chocolate chips after the base ingredients are well combined. Gently fold them in with a spatula or your hands, being careful not to crush the chips. The goal is to have chocolate pieces scattered uniformly within the mixture, allowing every bite to be a delightful surprise.
Shaping the Protein Balls
Techniques for Uniform Size and Texture
Once your mixture is ready, it’s time to shape your protein balls. To achieve uniform size and texture, consider using a small ice cream scoop or a tablespoon. This method ensures that each ball is consistent, which not only looks appealing but also helps with portion control. If you prefer a rustic approach, you can use your hands; just remember to wet your hands with a little water to prevent the mixture from sticking.
The Best Tools for Shaping (Scoops vs. Hands)
Using scoops to shape your protein balls can save time and create a uniform look. However, shaping by hand allows for a more personal touch and can be therapeutic. If you opt for scoops, a small cookie scoop (about one tablespoon) will work perfectly. If you’re using your hands, aim for a size that fits comfortably in your palm, typically about 1 inch in diameter.
Chilling to Perfection
Importance of Chilling for Firmness
After shaping your protein balls, chilling them in the refrigerator is essential for achieving the right firmness. This step allows the flavors to meld together while helping the balls maintain their shape. Place your protein balls on a parchment-lined baking sheet and refrigerate them for at least 30 minutes. If you’re in a hurry, you can also place them in the freezer for about 15 minutes.
Alternative Methods for Quick Chilling
If you need your protein balls ready in a hurry, consider placing them in the freezer instead of the refrigerator. This method will speed up the chilling process, allowing you to enjoy your healthy snack sooner. Just be sure to keep an eye on them to avoid freezing solid; 15–20 minutes should suffice.
Creative Ways to Enjoy Guilt-Free Chocolate Protein Balls
Pairing with Fruits for a Balanced Snack
Guilt-Free Chocolate Protein Balls can be paired with a variety of fruits to create a balanced snack. Fresh fruits such as bananas, apples, or berries complement the rich chocolate flavor and add a refreshing contrast. Consider slicing an apple and spreading it with almond butter, then enjoying it alongside your protein balls for an energizing snack.
Serving with Nut Milks for a Protein-Packed Breakfast
For a quick and nutritious breakfast, serve your protein balls with a glass of nut milk. Almond milk, cashew milk, or coconut milk not only complements the chocolate flavor but also boosts your protein intake for the day. You can even crumble the protein balls over a bowl of oatmeal or yogurt for added texture and flavor.
Incorporating into Meal Prep for Busy Weeks
These protein balls are perfect for meal prep, making them an ideal snack for busy weeks. Prepare a batch at the beginning of the week, and store them in an airtight container in the refrigerator. This makes for an easy grab-and-go snack that’s both delicious and nutritious, ensuring you stay on track with your health goals.
Ideas for Presentation and Storage
Using decorative containers to store your Guilt-Free Chocolate Protein Balls can elevate their appeal, especially if you’re gifting them to friends or family. Mason jars, small tins, or colorful treat bags can make for attractive presentations. For personal storage, be sure to keep them in an airtight container to maintain freshness.
Best Practices for Keeping Them Fresh
To ensure your protein balls stay fresh, store them in the refrigerator for up to a week. You can also freeze them for longer shelf life—up to three months. Just be sure to separate layers with parchment paper to prevent them from sticking together.
Ideal Serving Sizes for Different Occasions
When serving Guilt-Free Chocolate Protein Balls, consider the occasion. For a post-workout snack, one to two balls should suffice, while for a party platter or gathering, you might want to provide a few more. A good rule of thumb is to aim for 2-3 balls as a satisfying treat without overindulging.
Exploring Variations and Customizations
Adjusting the Recipe for Dietary Needs
If you’re preparing these protein balls for a school or event where nut allergies are a concern, nut-free alternatives can be a lifesaver. Sunflower seed butter or pumpkin seed butter can serve as excellent replacements that maintain a similar texture and flavor.
Vegan Adaptations Using Plant-Based Ingredients
For those following a vegan lifestyle, ensure that all your ingredients are plant-based. Use maple syrup or agave nectar instead of honey, and opt for vegan chocolate chips. This way, everyone can enjoy these delicious treats without compromising their dietary preferences.
Flavor Variations to Consider
Adding Spices Like Cinnamon or Nutmeg
To elevate the flavor profile of your protein balls, consider adding spices such as cinnamon or nutmeg. These spices not only enhance the taste but also offer additional health benefits. A teaspoon of cinnamon can bring warmth and sweetness, while nutmeg adds a unique twist.
Experimenting with Different Nut Butters
Different nut butters can change the flavor and texture of your protein balls. Almond butter, peanut butter, or cashew butter each impart their unique taste. Feel free to experiment with these options to find your favorite combination.
Incorporating Superfoods Like Chia Seeds or Flaxseeds
Add a nutritional boost by incorporating superfoods such as chia seeds or flaxseeds into your mixture. These ingredients are rich in omega-3 fatty acids, fiber, and protein, making your protein balls even more beneficial to your health.
Conclusion: The Delight of Guilt-Free Chocolate Protein Balls
In conclusion, Guilt-Free Chocolate Protein Balls are not just a tasty treat; they are a nutritious addition to any diet. With their simple preparation and adaptable ingredients, they cater to a variety of dietary preferences and can be enjoyed in numerous ways. By understanding the benefits of each component and following the step-by-step guide, you can create a batch of these protein-packed snacks that will satisfy your sweet cravings without compromising your health goals. Enjoy experimenting with different variations, and may these delightful bites bring joy to your snacking routine!