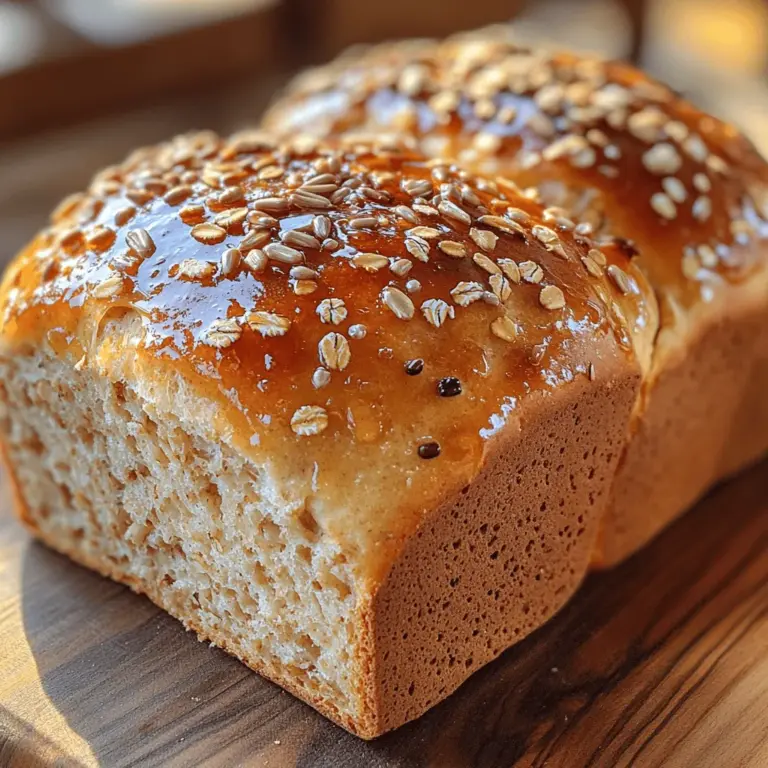
Heavenly Honey Oat Bread: A Wholesome Recipe to Delight Your Senses

WANT TO SAVE THIS RECIPE?

Introduction

Baking bread at home is not just about making a meal; it’s an experience that fills your kitchen with warmth and delightful aromas, transforming your space into a cozy haven. Among the myriad of bread recipes out there, Heavenly Honey Oat Bread stands out as a wholesome and naturally sweetened option. This delightful loaf marries the nutty flavor of whole wheat flour with the comforting essence of honey and oats, creating a nutritious and delicious bread that can elevate any meal or snack time.

Imagine slicing into a warm loaf, revealing its golden crust and soft, fluffy interior, while the sweet scent of honey wafts through the air. Whether you’re an experienced baker or just starting your culinary journey, this guide will provide you with everything you need to know to create this delicious bread from scratch. With clear, step-by-step instructions and helpful insights, you’ll be well on your way to mastering the art of homemade bread.

Understanding the Ingredients

To successfully bake Heavenly Honey Oat Bread, it’s essential to understand the key ingredients that contribute to its unique flavor and texture. Each component plays a crucial role in creating a loaf that is both satisfying and nutritious.

Whole Wheat Flour: The Foundation of Your Bread

Whole wheat flour is the backbone of this bread recipe. Unlike all-purpose flour, which is highly refined, whole wheat flour retains the bran and germ of the wheat kernel, offering a richer nutrient profile and a heartier texture.

Nutritional Benefits: Whole wheat flour is high in dietary fiber, which is essential for digestive health. It also contains vital nutrients such as B vitamins, iron, magnesium, and antioxidants that are often stripped away during the refining process. This makes it a healthier choice for baking, as it not only enhances the flavor of your bread but also adds significant nutritional value.

Differences Between Whole Wheat and All-Purpose Flour: When using whole wheat flour, keep in mind that it absorbs more liquid than all-purpose flour due to its higher fiber content. This means that you may need to adjust the amount of liquid in your recipe slightly. Whole wheat flour also produces a denser loaf, which is why the combination with oats and honey is so perfect in this recipe.

Rolled Oats: Adding Texture and Flavor

Rolled oats are another essential ingredient in Heavenly Honey Oat Bread, adding both texture and flavor to the final loaf.

Health Benefits of Oats in Bread: Oats are a fantastic source of soluble fiber, which can help lower cholesterol levels and stabilize blood sugar. They are also rich in vitamins and minerals, making them an excellent addition to any baked good. When added to bread, oats provide a delightful chewiness and contribute to the overall nutritional profile.

How Oats Contribute to the Texture of the Loaf: The inclusion of rolled oats helps to create a moist and tender crumb. As the bread bakes, the oats absorb some of the moisture, resulting in a loaf that stays fresh longer. They also add a rustic charm, making each slice visually appealing and full of character.

Honey: Nature’s Sweetener

Honey is not just a sweetener; it plays a crucial role in enhancing the flavor and moisture of your bread.

The Role of Honey in Flavor and Moisture: Honey adds a natural sweetness that pairs wonderfully with the nuttiness of whole wheat and the earthiness of oats. It also acts as a humectant, meaning it helps retain moisture in the bread, resulting in a soft, tender texture. The subtle floral notes of honey can elevate the overall flavor profile, making each bite a delightful experience.

Potential Substitutions for Honey: If you’re looking for alternatives, maple syrup or agave nectar can be used as substitutes for honey. Keep in mind that these alternatives may alter the flavor slightly, but they can still provide the necessary sweetness and moisture.

Active Dry Yeast: The Leavening Agent

Yeast is the magical ingredient that makes bread rise, creating that light and airy texture we all love.

How Yeast Works in Bread-Making: Active dry yeast ferments the sugars in the dough, producing carbon dioxide gas that causes the dough to expand. This fermentation process not only helps the bread rise but also develops complex flavors through the formation of organic acids.

Tips for Ensuring Your Yeast is Active: Before adding yeast to your dough, it’s crucial to activate it properly. Use warm water (about 110°F or 43°C) to dissolve the yeast and a pinch of sugar to feed it. Let it sit for about 5-10 minutes until it becomes frothy. If it doesn’t foam, your yeast may be expired, and you’ll need to start over with fresh yeast.

Olive Oil and Applesauce: Enhancing Moisture and Flavor

Both olive oil and applesauce are included in this recipe to enhance moisture and flavor.

The Benefits of Using Olive Oil in Bread: Olive oil not only adds richness to the bread but also contributes to its shelf life. It helps to keep the crumb moist and tender, while also providing a subtle fruity flavor that complements the other ingredients.

The Role of Applesauce as a Natural Sweetener and Moisture Booster: Unsweetened applesauce acts as a natural sweetener while adding moisture without the need for additional sugars. It can also help reduce the fat content of your bread, making it a healthier option without sacrificing flavor or texture.

Optional Ingredients: Sunflower Seeds

For those looking to add a bit of crunch and additional nutrition to their Heavenly Honey Oat Bread, sunflower seeds are an excellent choice.

Nutritional Benefits of Sunflower Seeds: These seeds are packed with healthy fats, protein, and vitamins, particularly vitamin E and B vitamins. They also provide a delightful crunch that contrasts beautifully with the softness of the bread.

Creative Toppings for Added Flavor and Texture: Besides sunflower seeds, you can experiment with other toppings such as pumpkin seeds, sesame seeds, or even a sprinkle of oats on top before baking. These additions not only enhance the flavor but also make your bread visually appealing.

Step-by-Step Baking Process

Now that you understand the essential ingredients that will create your Heavenly Honey Oat Bread, it’s time to dive into the baking process. Each step is crucial to ensure that your bread turns out perfectly.

Activating the Yeast: The First Step to Success

The first step in your bread-making journey is to activate the yeast, which is essential for achieving that light, airy texture.

Importance of Using Warm Water: When activating yeast, it’s vital to use warm water—not too hot, as it can kill the yeast, and not too cold, as it won’t activate it. The ideal temperature is around 110°F (43°C).

How to Check if Your Yeast is Active: After dissolving the yeast in warm water with a little sugar, wait for about 5-10 minutes. You should see a frothy layer on top, which indicates that the yeast is active and ready to be mixed with the other ingredients. If there’s no froth, it’s best to start over with fresh yeast.

Mixing the Dry Ingredients: Creating the Base

Once your yeast is activated, it’s time to prepare the dry ingredients, which form the base of your bread.

The Importance of Whisking Flour and Oats Thoroughly: In a large mixing bowl, combine your whole wheat flour and rolled oats. Whisk these dry ingredients together to ensure they are well mixed and to break up any clumps that may have formed. This step is important as it ensures an even distribution of ingredients throughout the dough.

Tips for Achieving the Right Consistency: When measuring flour, it’s essential to spoon it into your measuring cup and level it off with a knife, rather than scooping directly from the bag. This method prevents packing the flour, which can lead to a dense loaf. The final mixture should be slightly grainy with visible oats, creating a hearty texture for your bread.

Combining Wet Ingredients: Bringing It All Together

With your dry ingredients ready, it’s time to combine them with the wet ingredients to form your dough.

How to Properly Mix the Activated Yeast with Oils and Applesauce: In a separate bowl, mix the activated yeast mixture with olive oil and applesauce. Stir well to combine these ingredients before adding them to the dry mixture. This ensures that the wet ingredients are evenly distributed throughout the dough, leading to a consistent flavor and texture.

Importance of Mixing Well for a Uniform Dough: Once you combine the wet and dry ingredients, use a wooden spoon or spatula to mix until a shaggy dough forms. This dough should not be overly sticky; if it is, you can sprinkle a little more flour until you reach the desired consistency.

Forming the Dough: The Art of Bread-Making

The final step in this part of the process is to form the dough, an essential stage in bread-making that requires a gentle touch.

Techniques for Mixing and Forming a Shaggy Dough: After mixing, turn the dough out onto a lightly floured surface. Use your hands to knead the dough gently, folding and pressing it over itself. You want to develop the gluten without overworking the dough. Knead for about 8-10 minutes until the dough is smooth and elastic. Remember, the more you knead, the better the texture of your bread will be.

At this stage, you should have a shaggy, cohesive dough that feels slightly tacky but not overly sticky. If your dough is too wet, sprinkle a little more flour as needed. Once you have achieved the right consistency, you’re ready to let your dough rise and continue the bread-making journey.

Stay tuned for the next part of this article where we will guide you through the rising, shaping, and baking processes to complete your Heavenly Honey Oat Bread. With patience and practice, you’ll be rewarded with a loaf that’s both delicious and nutritious, perfect for sharing with family and friends or enjoying all on your own.
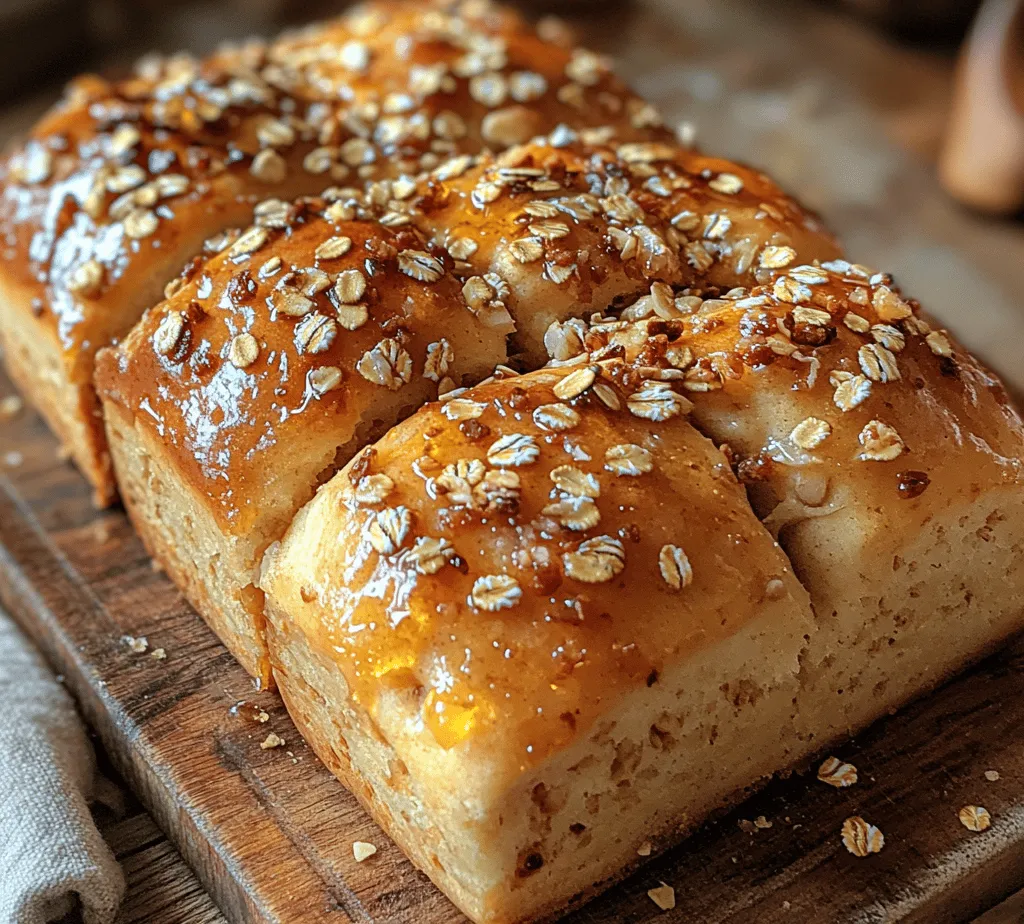
Baking bread at home is not just about making a meal; it’s an experience that fills your kitchen with warmth and delightful aromas, transforming your space into a cozy haven. Among the myriad of bread recipes out there, <strong>Heavenly Honey Oat Bread</strong> stands out as a wholesome and naturally sweetened option. This delightful loaf marries the nutty flavor of whole wheat flour with the comforting essence of honey and oats, creating a nutritious and delicious bread that can elevate any meal or snack time.” /></p>
</p>
<h2>Understanding Dough Consistency and Texture</h2>
</p>
<p>When embarking on the journey to create Heavenly Honey Oat Bread, understanding dough consistency and texture is crucial. The right dough should feel soft and slightly tacky to the touch but not overly sticky. As you mix your ingredients, be mindful of the moisture levels; the oats will absorb some liquid, so adjust by adding a little more water or milk if necessary. The goal is to achieve a dough that is pliable and elastic, which will contribute to a light and airy bread.</p>
</p>
<h3>Kneading the Dough: Developing Gluten</h3>
</p>
<p>Kneading is a fundamental step in bread-making because it develops gluten, the protein that gives bread its structure and chewiness. To knead effectively, turn the dough out onto a clean, floured surface. Using the heel of your hand, push the dough away from you, then fold it back over itself. Rotate the dough a quarter turn and repeat this process. Knead for about 8-10 minutes, or until the dough becomes smooth and elastic.</p>
</p>
<p><strong>Recognizing When Your Dough is Ready</strong></p>
<p>A good indicator that your dough has been kneaded sufficiently is the “windowpane test.” Take a small piece of dough and stretch it between your fingers. If it stretches thin enough to let light pass through without tearing, you’ve developed enough gluten. If it tears easily, keep kneading for a few more minutes.</p>
</p>
<h3>First Rise: Letting the Dough Rest</h3>
</p>
<p>After kneading, it’s time for the first rise. Place your dough in a lightly greased bowl, cover it with a damp cloth or plastic wrap, and allow it to rest. This step is essential as it allows the yeast to ferment, producing carbon dioxide and causing the dough to rise.</p>
</p>
<p><strong>Optimal Conditions for Dough Rising</strong></p>
<p>For the best results, place the bowl in a warm, draft-free area. An ideal temperature for dough rising is between 75°F to 85°F (24°C to 29°C). If your kitchen is cool, consider using the oven with just the light on to create a warm environment.</p>
</p>
<p><strong>How to Know When the Dough Has Doubled in Size</strong></p>
<p>The dough is ready for the next step when it has doubled in size, which may take about 1 to 2 hours. To check, gently poke the dough with your finger; if the indentation remains, it’s a sign that the dough has risen enough.</p>
</p>
<h3>Shaping the Loaf: Crafting Your Bread</h3>
</p>
<p>Shaping the loaf is where your Heavenly Honey Oat Bread starts to take form. After the first rise, gently punch down the dough to release any trapped air. Turn it out onto a floured surface and flatten it into a rectangle.</p>
</p>
<p><strong>Techniques for Shaping Dough into a Loaf</strong></p>
<p>To shape the dough into a loaf, fold the top third down to the center, then fold the bottom third up over it. Roll the dough tightly from one end to the other, pinching the seams to seal. This technique helps create surface tension, which results in a better rise during the baking process.</p>
</p>
<p><strong>Tips for Rolling and Sealing the Dough Properly</strong></p>
<p>Ensure that the edges are sealed well to prevent the loaf from unfolding during the second rise. Use a little water to moisten the edges if necessary, making them stick together. Once shaped, place the loaf seam-side down in a greased loaf pan.</p>
</p>
<h3>Second Rise: Preparing for Baking</h3>
</p>
<p>The second rise is crucial for developing the final texture and flavor of your bread. This rise allows the dough to expand further and achieve that light, airy quality.</p>
</p>
<p><strong>Why a Second Rise is Crucial for Texture</strong></p>
<p>During the second rise, the yeast continues to work, creating more gas bubbles. This process enhances the bread’s structure and texture, leading to a light crumb.</p>
</p>
<p><strong>How to Ensure the Loaf Rises Evenly</strong></p>
<p>Cover the shaped loaf with a cloth and let it rest in a warm place for about 30-45 minutes, or until it has risen about 1 inch above the rim of the pan. If you’re using a glass loaf pan, you can visually check the rise without lifting the cover.</p>
</p>
<h3>Preheating the Oven: Getting Ready to Bake</h3>
</p>
<p>Preheating your oven is essential for achieving the perfect crust and texture in your Heavenly Honey Oat Bread. A hot oven allows the bread to spring back, creating that desirable loft.</p>
</p>
<p><strong>Importance of Preheating and Its Impact on Baking</strong></p>
<p>Preheat your oven to 375°F (190°C) at least 20 minutes before baking. This ensures that the bread begins baking immediately upon entering the oven, which is crucial for achieving the right crust and internal structure.</p>
</p>
<p><strong>Timing Your Oven Preheat with the Second Rise</strong></p>
<p>Start preheating your oven once your loaf has begun its second rise. This timing ensures that your oven reaches the desired temperature right when your dough is ready to bake.</p>
</p>
<h3>Optional Topping: Enhancing Your Loaf</h3>
</p>
<p>To elevate your Heavenly Honey Oat Bread, consider adding an optional topping. A sprinkle of sunflower seeds or oats on top before baking not only enhances the visual appeal but also adds a delightful crunch.</p>
</p>
<p><strong>How to Apply Sunflower Seeds for a Beautiful Finish</strong></p>
<p>Before placing the loaf in the oven, brush the top lightly with water and sprinkle a generous layer of sunflower seeds over it. The water helps the seeds adhere to the surface, creating an attractive crust.</p>
</p>
<p><strong>Other Topping Ideas to Personalize Your Bread</strong></p>
<p>Feel free to get creative! Other toppings could include rolled oats, sesame seeds, or even a light brushing of melted butter and a sprinkle of sea salt for a savory twist.</p>
</p>
<h3>Baking the Bread: The Final Step</h3>
</p>
<p>Now it’s time for the most satisfying part—baking your loaf!</p>
</p>
<p><strong>Ideal Baking Temperatures and Times for Best Results</strong></p>
<p>Place the loaf in your preheated oven and bake for approximately 30-35 minutes, or until the top is golden brown and sounds hollow when tapped.</p>
</p>
<p><strong>Recognizing When the Bread is Perfectly Baked</strong></p>
<p>To ensure your bread is fully baked, check its internal temperature with a kitchen thermometer. It should register around 190°F (88°C) when done. If you don’t have a thermometer, the loaf should be a deep golden color, and the crust should feel firm to the touch.</p>
</p>
<h3>Cooling: The Final Touch</h3>
</p>
<p>Once baked, remove the loaf from the oven and let it cool in the pan for about 10 minutes. Then, carefully transfer it to a wire rack to cool completely before slicing.</p>
</p>
<p><strong>Importance of Cooling on a Wire Rack</strong></p>
<p>Cooling on a wire rack allows air to circulate around the bread, preventing the bottom from becoming soggy. It also helps maintain the crust’s crispiness.</p>
</p>
<p><strong>How to Slice Bread for the Best Texture</strong></p>
<p>For the best texture and presentation, use a serrated knife to slice your Heavenly Honey Oat Bread. This will ensure clean cuts without squishing the soft interior.</p>
</p>
<h2>Nutritional Information and Serving Suggestions</h2>
</p>
<h3>Nutritional Benefits of Heavenly Honey Oat Bread</h3>
</p>
<p>This Heavenly Honey Oat Bread is not only delicious but also packed with nutritional benefits. Each slice offers a healthy dose of whole grains, which are rich in fiber, vitamins, and minerals.</p>
</p>
<p><strong>Breakdown of Calories, Macronutrients, and Fiber Content</strong></p>
<p>On average, a slice of this bread contains around 120 calories, with approximately 4g of protein, 1.5g of fat, and 22g of carbohydrates. The fiber content is about 3g per slice, making it an excellent choice for digestive health.</p>
</p>
<p><strong>Health Benefits of Consuming Whole Grains</strong></p>
<p>Whole grains, such as oats, have been linked to numerous health benefits, including reduced risk of heart disease, improved digestion, and better weight management. Incorporating whole grains into your diet can also help stabilize blood sugar levels.</p>
</p>
<h3>Creative Ways to Enjoy Your Bread</h3>
</p>
<p>The versatility of Heavenly Honey Oat Bread makes it a fantastic addition to any meal. Here are some creative serving ideas:</p>
</p>
<p><strong>Serving Ideas: Toast, Sandwiches, or as a Side</strong></p>
<p>Enjoy a warm slice of this bread toasted with a pat of butter and a drizzle of honey for breakfast. Alternatively, use it as a hearty base for sandwiches, pairing it with your favorite fillings like turkey and avocado or classic peanut butter and jelly.</p>
</p>
<p><strong>Pairing Suggestions with Spreads or Toppings</strong></p>
<p>For a delightful snack, serve the bread with a variety of spreads. Cream cheese, almond butter, or homemade fruit preserves complement the honey flavor beautifully. You can also experiment with savory toppings like hummus or cheese for a unique twist.</p>
</p>
<h2>Conclusion</h2>
</p>
<p>Heavenly Honey Oat Bread is not just a recipe; it’s an invitation to embrace the art of baking and enjoy the wholesome goodness of homemade bread. With its rich flavors and satisfying texture, this bread is perfect for any occasion. By following the steps outlined in this guide, you will gain confidence in your baking skills and create a delicious loaf that your family and friends will love. Enjoy the process, and savor every slice of your homemade creation!</p>
</div>

Baking bread at home is not just about making a meal; it’s an experience that fills your kitchen with warmth and delightful aromas, transforming your space into a cozy haven. Among the myriad of bread recipes out there, Heavenly Honey Oat Bread stands out as a wholesome and naturally sweetened option. This delightful loaf marries the nutty flavor of whole wheat flour with the comforting essence of honey and oats, creating a nutritious and delicious bread that can elevate any meal or snack time.

Best Homemade Bread Recipe

Discover the joy of baking with Heavenly Honey Oat Bread, a wholesome and delicious recipe that fills your kitchen with warmth. This delightful loaf combines whole wheat flour, oats, and honey for a naturally sweetened treat that’s perfect for any meal or snack. With easy-to-follow instructions, even beginner bakers can master the art of homemade bread. Enjoy the nutty flavors and soft texture while nourishing your body with every slice. Experience the comfort of baking and the satisfaction of sharing this healthy bread with loved ones.

Ingredients
  

3 cups whole wheat flour

1 cup rolled oats

1/4 cup honey

1 1/2 teaspoons salt

2 1/4 teaspoons active dry yeast (1 packet)

1 1/4 cups warm water (around 110°F or 43°C)

2 tablespoons olive oil

1 tablespoon unsweetened applesauce

1/4 cup sunflower seeds (optional for topping)

Instructions
 

Activate the Yeast: In a small bowl, combine the warm water and honey. Sprinkle the yeast over the top and let it sit for about 5-10 minutes until frothy.

    Mix Dry Ingredients: In a large mixing bowl, whisk together the whole wheat flour, rolled oats, and salt.

      Combine Wet Ingredients: In another bowl, mix the activated yeast mixture, olive oil, and applesauce until well combined.

        Form the Dough: Gradually add the wet mixture to the dry ingredients. Stir with a wooden spoon or a spatula until a shaggy dough forms.

          Knead the Dough: Transfer the dough onto a floured surface and knead for about 8-10 minutes, until it becomes smooth and elastic. If it’s too sticky, add a little more flour as needed.

            First Rise: Form the dough into a ball and place it in a lightly greased bowl. Cover with a clean kitchen towel or plastic wrap. Let it rise in a warm place for about 1-1.5 hours or until doubled in size.

              Shape the Loaf: Once risen, punch down the dough to release the air. Turn it out onto a floured surface and shape it into a loaf by flattening it into a rectangle and rolling it up tightly.

                Second Rise: Place the shaped loaf into a greased 9x5-inch loaf pan. Cover and let it rise for another 30-45 minutes, or until it rises just above the pan.

                  Preheat the Oven: Preheat your oven to 375°F (190°C) during the last 15 minutes of the second rise.

                    Optional Topping: If desired, sprinkle sunflower seeds on top of the loaf before baking.

                      Bake the Bread: Bake in the preheated oven for 30-35 minutes, or until the top is golden brown and the loaf sounds hollow when tapped. If the top browns too quickly, tent it with foil.

                        Cool: Once baked, remove the bread from the oven and allow it to cool in the pan for about 10 minutes. Then transfer to a wire rack to cool completely before slicing.

                          Prep Time, Total Time, Servings:

                            30 mins | 2 hours 15 mins | 1 loaf (12 servings)

                              WANT TO SAVE THIS RECIPE?

                              Leave a Comment

                              Recipe Rating