Introduction
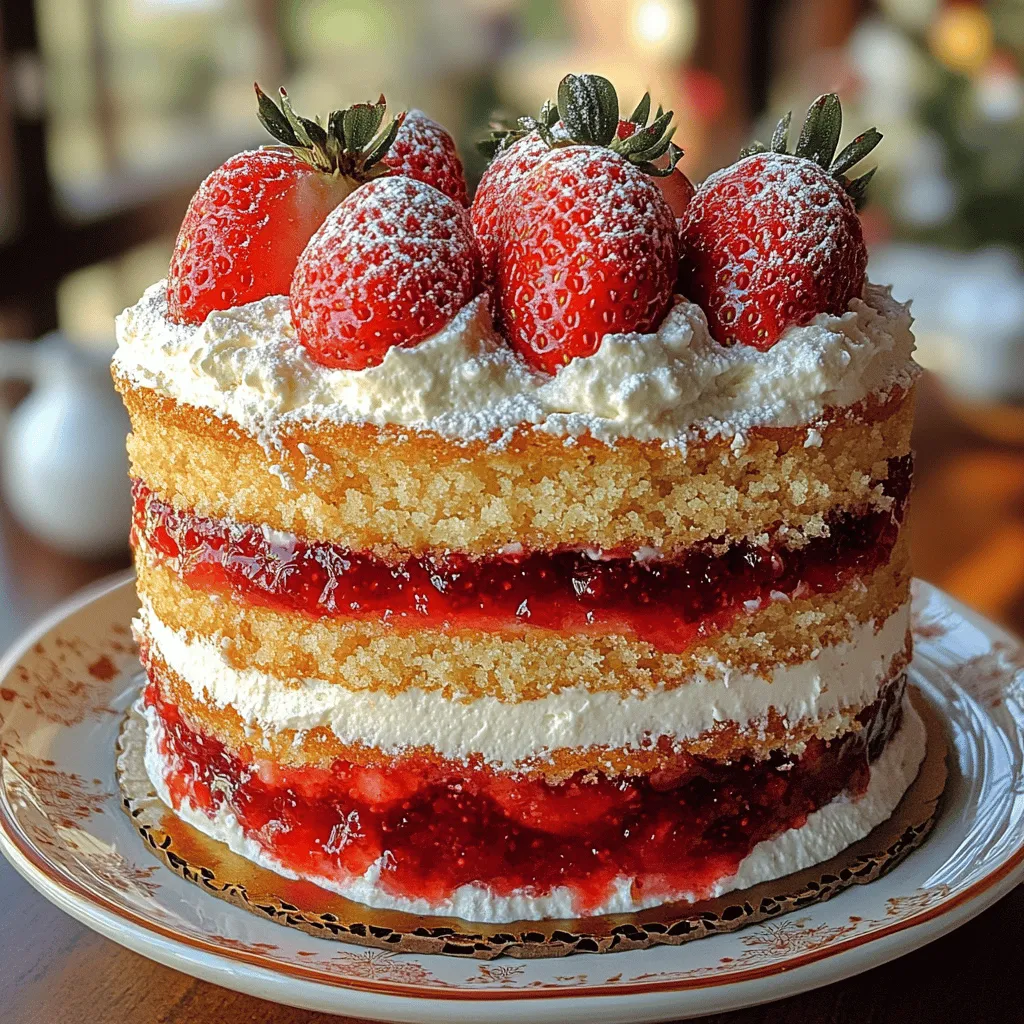
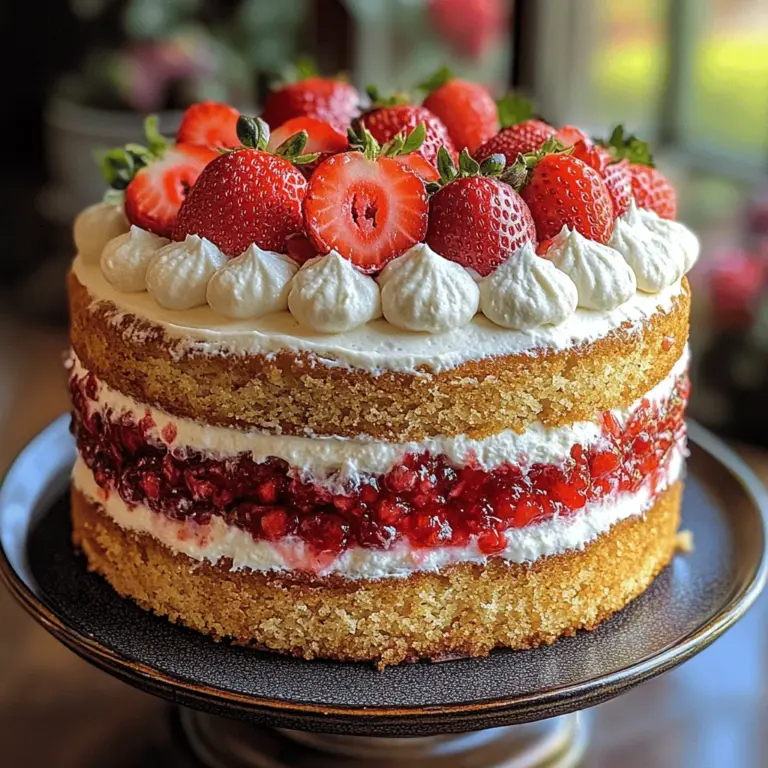
Indulging in the sweet, vibrant flavors of a Strawberry Bliss Cake is a delightful experience that can elevate any occasion. This heavenly dessert, with its light and fluffy texture, layered with fresh strawberries and whipped cream, is perfect for summer celebrations, birthdays, or simply to satisfy your sweet tooth. With a brilliant combination of flavors and textures, the Strawberry Bliss Cake is not just a dessert; it’s a celebration on a plate.
Imagine a sunny afternoon, friends and family gathered around, laughter filling the air as you slice into a beautifully crafted cake, revealing layers of soft, moist sponge interspersed with juicy strawberries and cloud-like whipped cream. The first bite is an explosion of flavor, where the sweetness of the strawberries harmonizes with the buttery cake and the silky smoothness of the cream. This cake doesn’t just taste good; it creates memories.
In this article, we will explore each step of creating this exquisite cake, from selecting the freshest strawberries to frosting with a creamy layer of whipped goodness. We’ll also delve into the importance of using high-quality ingredients and provide you with expert tips to ensure that your Strawberry Bliss Cake turns out perfectly every time. Join us as we dive into the art of baking this Strawberry Bliss Cake, ensuring you have all the knowledge and skills to create a masterpiece that is sure to impress.
Understanding the Ingredients
The Importance of Quality Ingredients
When it comes to baking, the ingredients you choose can make or break your final product. In the case of a Strawberry Bliss Cake, using high-quality ingredients is paramount to achieving the best flavor and texture. Each component plays a crucial role in creating that perfect bite.
– Fresh Strawberries: The star of the show! Fresh strawberries not only provide vibrant color but also contribute natural sweetness and juiciness. Using ripe, in-season strawberries will enhance the flavor profile of your cake. Avoid using frozen strawberries, as they can release excess moisture and alter the cake’s texture.
– Dairy Products: Ingredients like unsalted butter and buttermilk are essential for achieving a rich and moist cake. Unsalted butter allows you to control the salt content in the cake, while buttermilk adds tenderness and a slight tang that elevates the overall flavor.
– All-Purpose Flour: This is the foundation of your cake. It provides the structure needed to support the layers and gives the cake its desired crumb texture.
– Granulated Sugar: Sugar does more than just sweeten; it also helps retain moisture, contributing to the cake’s softness. When combined with butter, sugar adds air to the batter, which helps in creating a light and fluffy texture.
Understanding the impact of each ingredient is crucial. Selecting the freshest strawberries and high-quality dairy products can elevate your Strawberry Bliss Cake from good to irresistible.
Key Ingredients Breakdown
1. All-Purpose Flour: The foundation for structure
– All-purpose flour is the backbone of any cake. It’s essential for providing the right texture and support. When measuring flour, spoon it into the measuring cup and level it off for accuracy; this ensures you don’t end up with a dense cake.
2. Granulated Sugar: Balancing sweetness and moisture
– Sugar is not just about sweetness; it also plays a key role in the cake’s moisture content and texture. The right amount of sugar ensures that your cake remains tender and doesn’t become overly dry.
3. Unsalted Butter: Creating a rich, buttery flavor
– Using unsalted butter allows you to control the sodium level in your recipe. It’s important to cream the butter until it’s light and fluffy, as this process incorporates air, resulting in a lighter cake.
4. Buttermilk: Contributing to tenderness and flavor depth
– Buttermilk is an essential ingredient in many cakes, including the Strawberry Bliss Cake. Its acidity reacts with the baking soda or baking powder, helping the cake rise and lending a slight tang that complements the sweetness of the strawberries.
5. Fresh Strawberries: Highlighting the cake’s fruity essence
– Strawberries are more than just a garnish; they are a fundamental part of this cake. Opt for the ripest, freshest strawberries you can find. Wash them gently and remove the stems before slicing them for layering.
6. Whipped Cream: Adding a light and airy finish
– Whipped cream is the finishing touch that brings everything together. It adds a luscious, airy texture that balances the cake’s sweetness and enhances the fresh strawberry flavor. Ensure the cream is cold and whip it until soft peaks form for the best consistency.
Step-by-Step Instructions for Baking the Cake
Preparing the Oven and Cake Pans
Before diving into mixing your ingredients, it’s essential to prepare your oven and cake pans properly.
– Preheat the Oven: Preheating your oven to the correct temperature (usually 350°F or 175°C) is vital for ensuring even baking. If the oven isn’t hot enough when you place the cake inside, it can result in uneven rising and a dense texture.
– Prepare the Cake Pans: Greasing and flouring the cake pans prevents the cake from sticking. Consider using parchment paper for an extra layer of protection. To do this, grease the bottom and sides of the pans with butter or non-stick spray, then place a circle of parchment paper at the bottom. Dust the sides with flour, tapping out any excess. This preparation will allow your cake to release easily after baking.
Mixing the Dry Ingredients
Now that your oven is preheated and your cake pans are ready, it’s time to mix the dry ingredients.
– Combine the Flour, Baking Powder, and Salt: In a large mixing bowl, sift together the all-purpose flour, baking powder, and a pinch of salt. Sifting helps to aerate the flour and evenly distribute the leavening agents, which is crucial for achieving a light texture in your cake.
– Ensure Even Distribution: Make sure to mix the dry ingredients thoroughly with a whisk or a fork. This step is critical to prevent clumps of baking powder or salt, which can lead to uneven rising.
Creaming Butter and Sugar
The creaming process is one of the most crucial steps in baking a cake and directly affects its texture.
– Soften the Butter: Start with room temperature unsalted butter. It should be soft enough to easily indent with your finger but not melted. This allows for better incorporation of air when creaming.
– Mixing Process: In a separate bowl, combine the softened butter and granulated sugar. Using an electric mixer, beat them together on medium speed until the mixture is light and fluffy, usually about 3-5 minutes. This step is essential as it incorporates air, leading to a lighter cake texture.
– Check for Fluffiness: The mixture should be pale in color and have doubled in size. Scrape down the sides of the bowl halfway through to ensure all butter and sugar are evenly combined.
Incorporating Wet Ingredients
Once your butter and sugar are perfectly creamed, it’s time to incorporate the wet ingredients.
– Room Temperature Ingredients: Make sure your eggs and buttermilk are at room temperature before adding them to the mixture. Room temperature ingredients blend more smoothly and contribute to a uniform batter.
– Adding Eggs: Crack in the eggs one at a time, mixing well after each addition. This gradual incorporation helps to maintain the emulsion, ensuring that the batter remains smooth and cohesive.
– Mix in Buttermilk: Finally, pour in the buttermilk, mixing on low speed until just combined. Avoid overmixing, as this can lead to a dense cake.
Combining Mixtures
Now it’s time to bring all the components together.
– Folding Techniques: Gently add the dry ingredients to the wet mixture in three parts. Use a spatula to fold the mixture together, being careful not to overwork the batter. This step is critical for maintaining the airiness you created during the creaming process.
– Final Mix: Once you no longer see streaks of flour, stop mixing. The batter should be smooth and slightly thick, ready to be poured into the prepared cake pans.
This foundational knowledge and these careful steps will set you on the right path to creating a delightful Strawberry Bliss Cake that is sure to impress anyone lucky enough to enjoy a slice. In the following sections, we will dive deeper into assembling and decorating this beautiful cake, bringing your culinary creation to life.

Baking the Cakes to Perfection
Achieving the Right Bake
When it comes to baking the perfect cakes for your Heavenly Strawberry Bliss Cake, patience and attention to detail are key. The ideal bake should be moist, tender, and have a golden-brown color. Here are some signs to look for to ensure your cakes are perfectly baked:
1. Color: The edges of the cake should turn a light golden brown. If the top is browning too quickly, you may need to cover it loosely with aluminum foil to prevent over-baking.
2. Spring Back Test: Gently press the center of the cake with your finger. If it springs back, the cake is done. If it leaves an impression, it needs more time.
3. Toothpick Test: Insert a toothpick in the center of the cake. If it comes out clean or with a few moist crumbs, the cake is ready. If it comes out wet with batter, continue baking and check again in a few minutes.
4. Smell: A pleasant aroma will fill your kitchen when the cakes are close to being done. Trust your senses; they can guide you as much as the clock.
Cooling Techniques
Once you have achieved the perfect bake, it’s crucial to cool the cakes before assembly. Cooling allows the structure of the cake to set, making it easier to handle and frost. Here are steps to ensure proper cooling:
1. Initial Cooling: Let the cakes cool in their pans for about 10-15 minutes. This helps them firm up and makes it easier to release them without breaking.
2. Transfer: Carefully run a knife around the edges of the cakes to loosen them. Turn the pans upside down and gently tap to release the cakes onto a wire rack.
3. Cool Completely: Allow the cakes to cool completely at room temperature before assembling. This can take about an hour. If you’re in a hurry, you can place them in the refrigerator to speed up the cooling process, but avoid freezing them as this can alter their texture.
Preparing the Strawberry Filling
Creating the Strawberry Filling
The strawberry filling is the heart of the Heavenly Strawberry Bliss Cake. It not only enhances the flavor but also adds a delightful texture. Here’s how to create a rich and flavorful strawberry filling:
1. Ingredients: Gather fresh strawberries, granulated sugar, and strawberry preserves. Using both fresh strawberries and preserves enhances the flavor and gives a smooth texture.
2. Preparation:
– Fresh Strawberries: Hull and slice about 2 cups of fresh strawberries. Toss them with 1/4 cup of granulated sugar in a bowl. Let them sit for about 15-20 minutes. This process will draw out the juices and create a syrup that intensifies the strawberry flavor.
– Preserves: In a separate bowl, mix 1/2 cup of strawberry preserves with the macerated strawberries, ensuring the mixture is well combined. This blend will add both sweetness and a luscious consistency to your filling.
3. Adjusting Sweetness: Depending on the sweetness of your strawberries, you may want to adjust the sugar content. Taste the mixture and add more sugar if needed, keeping in mind that it will be layered between sweet cake and whipped cream.
Assembling the Heavenly Strawberry Bliss Cake
Layering the Cake
Now that your cakes are baked and cooled, and your strawberry filling is ready, it’s time to assemble your Heavenly Strawberry Bliss Cake. Follow these steps for stable and appealing layers:
1. Level the Cakes: Use a serrated knife to level the tops of the cakes if they have domed. This ensures that each layer sits flat and makes for a more professional-looking cake.
2. Base Layer: Place one cake layer on a serving platter or a cake board. This will serve as your base layer.
3. Add Strawberry Filling: Spread a generous layer of the strawberry filling on top of the first cake layer. Use a spatula to create an even layer, ensuring it reaches the edges to avoid a dry bite.
4. Repeat: Place the second layer on top of the filling and repeat the process. If you’re making a three-layer cake, repeat this step for the third layer as well.
5. Crumb Coat: Once all layers are stacked, apply a thin layer of whipped cream frosting around the entire cake to seal in the crumbs. This is called a crumb coat and helps achieve a clean finish.
Frosting with Whipped Cream
To achieve a smooth and professional-looking finish, follow these tips for frosting your cake:
1. Prepare Whipped Cream: Whip 2 cups of heavy cream with 1/4 cup of powdered sugar and a teaspoon of vanilla extract until soft peaks form. Be careful not to over-whip, as it can turn into butter.
2. Frost the Cake: Start by adding a dollop of whipped cream on top of the cake and spread it evenly over the top and sides using an offset spatula. Make sure to cover the entire cake, smoothing out any imperfections.
3. Finish with a Smooth Coat: For a polished look, you can use a bench scraper or a straight edge to smooth the sides of the cake. Rotate the cake while applying gentle pressure to ensure an even finish.
Garnishing and Presentation
Adding Fresh Strawberries
To elevate the visual appeal of your Heavenly Strawberry Bliss Cake, garnishing with fresh strawberries is key. Here are some creative ideas:
1. Top Layer: Place whole or halved fresh strawberries on top of the cake. You can arrange them in a circular pattern or create a cluster for a more rustic look.
2. Drizzle: Consider drizzling some strawberry syrup or a thin glaze over the top for added shine and a pop of color.
3. Mint Leaves: Adding a few fresh mint leaves can provide a beautiful contrast in color and a hint of freshness.
4. Edible Flowers: For a more elegant touch, consider decorating with edible flowers that complement the strawberries.
Serving Suggestions
When it comes to slicing and serving your Heavenly Strawberry Bliss Cake, maintaining its presentation is important. Here are some best practices:
1. Use a Sharp Knife: A sharp, serrated knife will help you slice through the cake without squishing the layers. Dip the knife in hot water and wipe it dry before each cut for a cleaner slice.
2. Serve Chilled: This cake is best served chilled, so keep it in the refrigerator until you’re ready to serve. This will also help the whipped cream hold its shape.
3. Plating: For a beautiful presentation, serve each slice on a chilled plate. Consider adding a dollop of whipped cream and a few slices of fresh strawberries on the side.
Nutritional Considerations
Understanding Caloric Content
When indulging in dessert, being aware of the caloric content can help you enjoy it more mindfully. A typical slice of Heavenly Strawberry Bliss Cake contains approximately 300-400 calories, depending on the size and the amount of frosting used. This can vary based on the ingredients and portion sizes, so consider these factors when serving.
Modifications for Dietary Preferences
For those who have dietary restrictions or preferences, here are some suggestions to modify the Heavenly Strawberry Bliss Cake:
1. Gluten-Free: Substitute all-purpose flour with a gluten-free flour blend. Make sure to use gluten-free baking powder as well.
2. Lower-Sugar Variations: You can reduce the sugar content in the cake and filling. Consider using natural sweeteners like honey or maple syrup, or sugar substitutes that fit your dietary needs.
3. Dairy-Free Option: To make this cake dairy-free, substitute the heavy cream with coconut cream for the frosting and use dairy-free milk alternatives in the cake.
Conclusion
Creating a Heavenly Strawberry Bliss Cake is a rewarding endeavor that blends fresh flavors with the joy of baking. The combination of light, fluffy cake layers, rich strawberry filling, and luscious whipped cream makes this dessert a standout for any occasion. Whether it’s a birthday celebration, a summer gathering, or simply a treat for yourself, this cake promises to impress.
With the step-by-step instructions and insights shared here, you now have the tools needed to confidently bake this delightful treat. Embrace the sweetness of strawberries and the joy of homemade desserts, and let this cake bring happiness to your table. Enjoy the process of baking and the smiles that come with sharing this beautiful cake with your loved ones.


