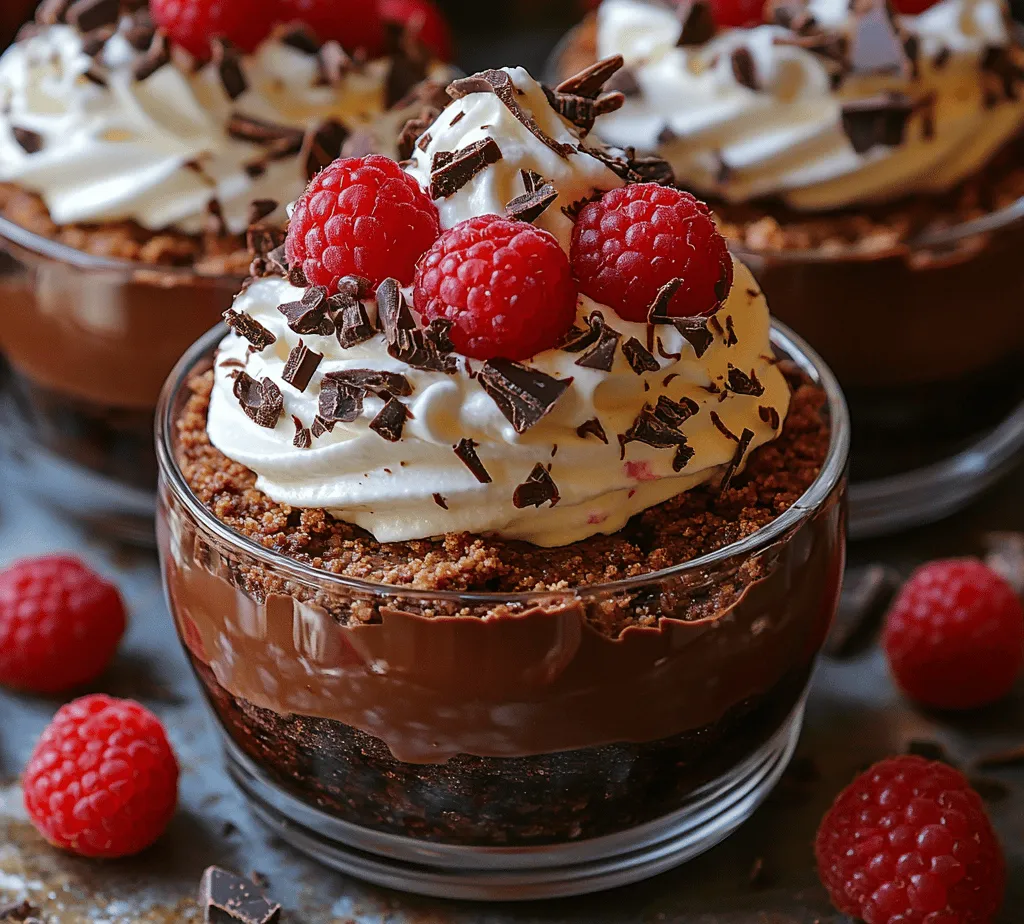
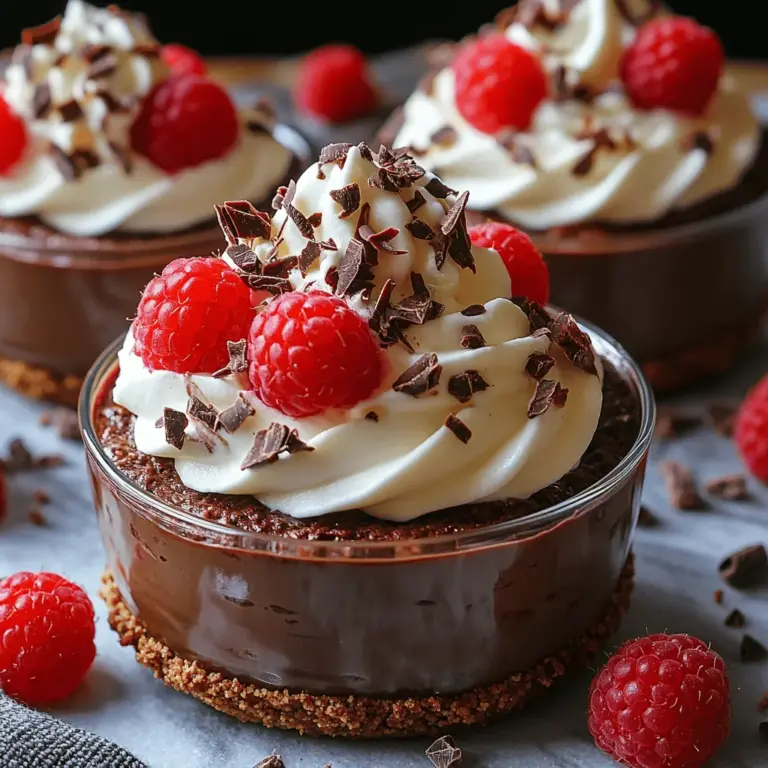
Introduction to Marry Me No Bake Raspberry Chocolate Mousse Cups
No-bake desserts have carved out a special niche in the world of culinary delights, providing a perfect solution for those who wish to whip up something delicious without the need for an oven. These desserts are not only convenient but also allow for creative flavor combinations that can satisfy any sweet tooth. Among the myriad of no-bake options, the Marry Me No Bake Raspberry Chocolate Mousse Cups stand out as an exquisite choice, blending the rich, creamy decadence of chocolate mousse with the tartness of fresh raspberries.
The combination of velvety chocolate and vibrant raspberries creates a tantalizing dessert that is as pleasing to the eye as it is to the palate. Perfect for romantics and dessert lovers alike, these mousse cups are an ideal way to impress a loved one or to celebrate a special occasion. Whether it’s an anniversary dinner, Valentine’s Day, or simply a cherished date night at home, this dessert adds an elegant touch that can elevate any event.
Understanding the Ingredients
To create the Marry Me No Bake Raspberry Chocolate Mousse Cups, it’s essential to understand the role each ingredient plays in crafting this delightful treat. Below, we break down the ingredients used in the mousse, crust, and topping, explaining their significance and how they contribute to the overall flavor and texture of the dessert.
Mousse Ingredients
1. Heavy Whipping Cream:
Heavy whipping cream is the backbone of the mousse, providing a luxurious texture and richness that makes this dessert truly indulgent. When whipped, it incorporates air, resulting in a light and fluffy consistency that is essential for a successful mousse. The high-fat content in heavy cream ensures that the mousse holds its shape while remaining soft and creamy.
2. Semi-Sweet Chocolate Chips:
Semi-sweet chocolate chips are used to impart a deep chocolate flavor to the mousse, balancing sweetness and richness. Their melting point makes them easy to incorporate into the whipped cream, ensuring that the chocolate blends seamlessly into the mixture. This ingredient is crucial for achieving the desired chocolatey depth without overwhelming the other flavors.
3. Vanilla Extract:
A splash of vanilla extract enhances the overall flavor profile of the mousse, adding a warm, aromatic note that complements the chocolate and raspberries beautifully. It acts as a flavor bridge, bringing all the ingredients together and enhancing their individual characteristics.
4. Powdered Sugar:
Powdered sugar is used to sweeten the mousse without altering its texture. Its fine consistency allows it to dissolve quickly, providing a smooth sweetness that balances the rich chocolate and tart raspberries. This ingredient helps achieve the perfect level of sweetness without making the mousse overly sugary.
5. Fresh Raspberries:
Fresh raspberries are not just a garnish; they play a pivotal role in the flavor of this dessert. Their bright tartness cuts through the richness of the chocolate, creating a harmonious balance. Additionally, the vibrant color of raspberries adds an appealing visual element, making the dessert even more enticing.
Crust Ingredients
1. Chocolate Graham Cracker Crumbs:
The base of the mousse cups is made from chocolate graham cracker crumbs, which provide a deliciously sweet and slightly crunchy texture. This crust serves as a delightful contrast to the smooth mousse, and the chocolate flavor amplifies the dessert’s overall taste, ensuring a cohesive flavor experience.
2. Unsalted Butter:
Unsalted butter is melted and combined with the graham cracker crumbs to bind the crust together. It adds richness and depth to the flavor while ensuring that the crust holds its shape once set. Using unsalted butter allows for better control over the overall saltiness of the dessert.
3. Granulated Sugar:
A small amount of granulated sugar is added to the crust to enhance its sweetness. This ingredient works in tandem with the chocolate graham cracker crumbs, ensuring that the crust is not only flavorful but also provides a pleasant sweetness that balances the richness of the mousse.
Topping Ingredients
1. Whipped Cream Options:
The topping for the mousse cups can be made from either freshly whipped cream or store-bought alternatives. Freshly whipped cream offers a light and airy texture that perfectly complements the mousse, while store-bought options provide convenience without compromising too much on taste. Whipped cream adds a finishing touch of creaminess that elevates the dessert even further.
2. Fresh Raspberries:
Just as in the mousse, fresh raspberries are used as a garnish for the mousse cups, providing a pop of color and a burst of flavor. Their tartness enhances the sweetness of the chocolate mousse, creating a balance that is both refreshing and indulgent.
3. Dark Chocolate Shavings or Cacao Nibs:
To add a touch of sophistication and a delightful texture, dark chocolate shavings or cacao nibs can be sprinkled on top of the whipped cream. Dark chocolate shavings offer a rich chocolate flavor that complements the mousse, while cacao nibs provide a crunchy contrast that enhances the overall aesthetic and taste of the dessert.
Step-by-Step Preparation
Now that we’ve explored the components that come together to create the Marry Me No Bake Raspberry Chocolate Mousse Cups, let’s dive into the preparation process. The first step in our recipe is to prepare the crust, which sets the stage for the luscious mousse that follows.
Preparing the Crust
1. Gather Your Ingredients:
Start by gathering all the ingredients needed for the crust: chocolate graham cracker crumbs, unsalted butter, and granulated sugar. Make sure to have them measured out for efficiency during the preparation process.
2. Melt the Butter:
In a microwave-safe bowl or on the stove, melt approximately 5 tablespoons of unsalted butter until completely liquid. Allow it to cool slightly before mixing it with the dry ingredients to avoid melting the chocolate crumbs prematurely.
3. Combine the Ingredients:
In a separate mixing bowl, combine 1 ½ cups of chocolate graham cracker crumbs with ¼ cup of granulated sugar. Mix these dry ingredients together until they are well incorporated.
4. Add the Melted Butter:
Pour the melted butter into the crumb mixture. Using a fork or your hands, mix until the crumbs are evenly moistened and resemble damp sand. The mixture should hold together when pressed, indicating that it is ready to be shaped into a crust.
5. Press the Mixture into Cups:
Take your individual serving cups or a muffin tin and evenly distribute the crumb mixture into the bottom of each cup. Using the back of a spoon or your fingers, firmly press the mixture down to create a solid base for the mousse. Ensure that the crust is compact and even to support the mousse layer on top.
6. Chill the Crust:
Place the cups in the refrigerator for about 15-20 minutes to allow the crust to set. This chilling step is crucial as it helps the crust firm up, providing a stable base for the creamy mousse that will be added later.
As we wrap up this initial preparation phase, the crust is now complete and ready to be filled with the rich chocolate mousse. Stay tuned as we continue with the next steps, where we’ll whip up the luscious mousse filling and assemble these beautiful dessert cups.

Mixing Crust Ingredients for Optimal Texture
To create the perfect crust for your Marry Me No Bake Raspberry Chocolate Mousse Cups, start by selecting high-quality graham cracker crumbs. The texture of your crust will play a crucial role in holding together the mousse and providing a satisfying crunch. In a medium mixing bowl, combine 1 cup of graham cracker crumbs with 4 tablespoons of melted unsalted butter. The butter acts as a binding agent, ensuring that the crumbs stick together.
For added flavor, consider incorporating 2 tablespoons of granulated sugar into the mixture. This will enhance the sweetness of the crust, balancing the rich chocolate mousse. Use a fork to mix the ingredients thoroughly until the crumbs are evenly coated in butter, resembling wet sand.
Tips for Pressing the Crust Evenly
Once your crust mixture is ready, it’s time to transfer it into your serving cups. For a professional finish, use a small measuring cup or the back of a spoon to press the mixture firmly into the bottom of each cup. Start by placing a spoonful of the crust mixture into the bottom of the cup, then press down firmly and evenly. Aim for a uniform thickness of about 1/4 inch, which will provide a solid foundation for the mousse without overshadowing its delicate texture.
Be sure to compact the crust well, as this will help it hold its shape once the mousse is added. If you’re using clear cups, take a moment to ensure the crust is level, as this will enhance the visual appeal of the finished dessert. Once all the cups are filled and pressed, set them aside while you prepare the chocolate mousse.
Creating the Chocolate Mousse
The chocolate mousse is the star of this dessert, and getting it just right is essential. Begin by melting your chocolate. Use 6 ounces of high-quality semi-sweet or dark chocolate, chopped into small pieces for even melting. Place the chocolate in a heatproof bowl over a pot of simmering water, creating a double boiler. This method helps to gently melt the chocolate without burning it. Stir the chocolate frequently as it melts, allowing it to reach a smooth consistency.
Alternatively, you can melt the chocolate in the microwave. Place the chopped chocolate in a microwave-safe bowl and heat it in 20-second intervals, stirring in between. This method requires close attention, as chocolate can quickly go from perfectly melted to scorched.
Whipping the Cream to Stiff Peaks
While your chocolate is cooling slightly, it’s time to whip the heavy cream. In a separate mixing bowl, add 1 cup of heavy whipping cream and 2 tablespoons of powdered sugar. Use an electric mixer on medium-high speed to whip the cream. Start at a lower speed to avoid splattering, then gradually increase to medium-high until soft peaks form. This process typically takes around 3-5 minutes.
To achieve stiff peaks, continue whipping the cream until it holds its shape and stands tall when the whisk is lifted. Be cautious not to over-whip, as this can turn the cream into butter. The whipped cream will add lightness to the mousse, providing an airy texture that beautifully contrasts with the rich chocolate.
Folding the Whipped Cream into the Chocolate Mixture
With both the melted chocolate and whipped cream prepared, it’s time to combine them. First, allow the melted chocolate to cool for a few minutes until it is lukewarm but still pourable. You want to avoid adding the whipped cream to hot chocolate, as this can cause the cream to lose its volume.
In a large mixing bowl, add about one-third of the whipped cream to the chocolate and gently mix with a spatula. This initial incorporation lightens the chocolate base, making it easier to fold in the remaining whipped cream. After this, gently add the rest of the whipped cream in two additions, using a folding motion. Carefully lift and turn the mixture over itself, being cautious not to deflate the whipped cream. The goal is to maintain as much air as possible for a fluffy mousse.
Incorporating Fresh Raspberries
To elevate the flavor and visual appeal of your mousse, gently fold in 1/2 cup of fresh raspberries. It’s important to handle the raspberries delicately to prevent them from breaking apart completely, which could turn your mousse a pink hue. Instead, aim to keep some whole and just slightly crush others to release their juices. This will create beautiful pockets of raspberry flavor throughout the mousse, adding a delightful tartness to balance the sweetness.
Assembling the Cups
Now that your chocolate mousse is ready, it’s time to fill the cups. Using a piping bag or a spoon, carefully spoon the mousse into each cup over the prepared crust. Aim for even layers, filling them about three-quarters full to leave room for garnishes. The mousse should sit atop the crust, creating a lovely two-layer effect that is visually striking.
Once all the cups are filled, gently tap the cups on the counter to settle the mousse and eliminate any air bubbles. This step ensures a smooth, well-layered appearance. After filling, cover the cups with plastic wrap and refrigerate them for at least two hours, or until the mousse is set. Chilling not only helps the mousse firm up but also allows the flavors to meld beautifully.
Serving Suggestions
When it comes time to serve your Marry Me No Bake Raspberry Chocolate Mousse Cups, presentation is key. Carefully remove the plastic wrap and consider garnishing each cup with a dollop of freshly whipped cream on top. You can use a star-shaped piping tip for a decorative finish that adds an elegant touch.
Next, add a few whole raspberries on top for a pop of color, and finish with chocolate shavings or a drizzle of melted chocolate. These garnishes not only enhance the visual appeal but also invite guests to dive into the dessert with excitement.
For a delightful pairing, consider serving your mousse cups with a glass of dessert wine, such as a sweet Riesling or a rich port. Alternatively, a strong cup of coffee or espresso pairs beautifully with the chocolate, enhancing its flavors while providing a comforting contrast.
Nutritional Information and Dietary Considerations
These Marry Me No Bake Raspberry Chocolate Mousse Cups, while indulgent, can be enjoyed in moderation. Each cup contains approximately 250 calories, with 18 grams of fat, 22 grams of carbohydrates, and 3 grams of protein. The addition of fresh raspberries contributes antioxidant properties and a boost of vitamin C, making this dessert a more health-conscious choice.
For those with dietary restrictions, there are several adjustments you can make without sacrificing flavor. To make the dessert gluten-free, substitute the graham cracker crumbs with gluten-free cookie crumbs. If you need a dairy-free option, you can use coconut cream instead of heavy cream and opt for dairy-free chocolate. These substitutions will still yield a delicious mousse, ensuring everyone can enjoy this delightful treat.
Conclusion: The Perfect No-Bake Dessert for Any Occasion
The Marry Me No Bake Raspberry Chocolate Mousse Cups are not just a dessert; they are an experience. With their rich chocolate flavor and refreshing raspberry notes, these cups are the perfect sweet ending to any meal. Their no-bake nature makes them easy to prepare, allowing you to spend more time enjoying your guests and less time in the kitchen.
Whether you’re celebrating a special occasion or simply treating yourself and your loved ones, this dessert is sure to impress. The combination of creamy mousse, crunchy crust, and vibrant raspberries creates a stunning presentation that captures attention and satisfies cravings. So, gather your ingredients, follow these simple steps, and indulge in this delightful dessert that’s bound to win hearts and taste buds alike. Enjoy every luscious bite!


