Introduction
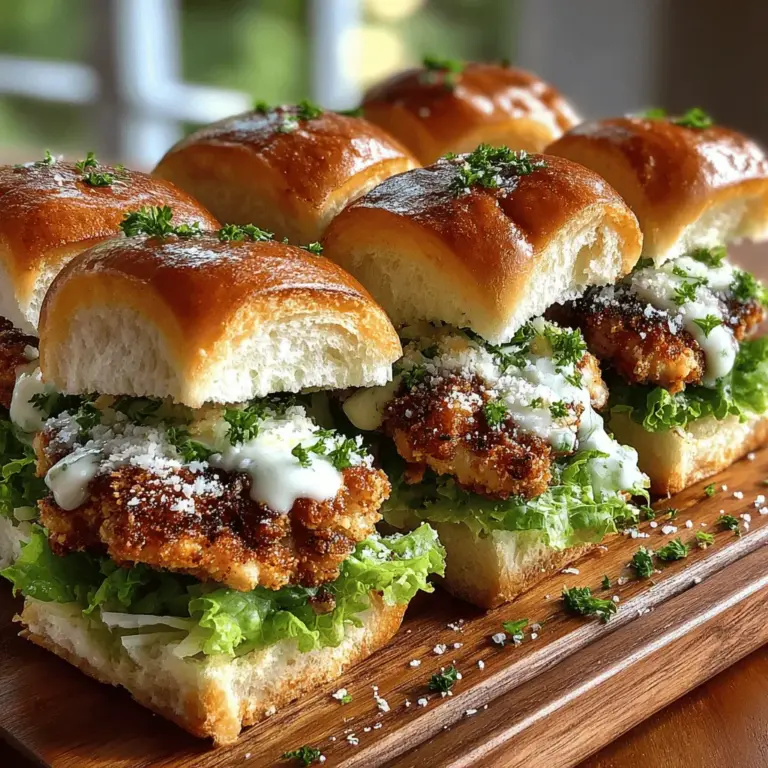
In the world of comfort food, few dishes can rival the delight of sliders. These bite-sized sandwiches are the perfect blend of flavors and textures, making them a favorite for gatherings and casual meals alike. Today, we’re bringing a twist on the classic Caesar salad with our Mini Crispy Chicken Caesar Sliders. This recipe combines the crunch of fried chicken, the creaminess of Caesar dressing, and the freshness of romaine lettuce—all nestled in a soft slider bun. Perfect for parties, game days, or a cozy family dinner, these sliders are not only delicious but also easy to prepare. Let’s dive into the details of how to create these mouthwatering mini sandwiches that promise to impress.
The concept of sliders has taken the culinary world by storm, evolving from simple variations on the traditional burger to more creative interpretations, such as these Mini Crispy Chicken Caesar Sliders. By taking the familiar components of a Caesar salad—crispy chicken, tangy dressing, and crisp greens—and reimagining them as handheld delights, we cater to both the traditionalist and the adventurous eater. The beauty of this recipe lies in its versatility; whether you’re feeding a crowd or just looking for a quick weeknight meal, these sliders can be easily scaled to meet your needs.
Ingredients Overview
Understanding the key components of our sliders is essential for achieving the perfect balance of flavors and textures. Each ingredient plays a vital role in creating the ultimate mini sandwich experience.
Crispy Chicken Essentials
The heart of our Mini Crispy Chicken Caesar Sliders is the chicken itself. Here’s what you need:
– Chicken breast: The star ingredient, providing lean protein that is both satisfying and nutritious. Chicken breasts are an ideal choice for sliders as they can easily be cut into manageable pieces and cooked to a crispy perfection.
– Buttermilk: This ingredient acts as a tenderizer, allowing the chicken to soak up moisture and flavor. The acidity in buttermilk breaks down the protein in the chicken, resulting in a juicier and more flavorful bite.
– Panko bread crumbs: Unlike traditional bread crumbs, panko is lighter and airier, offering an irresistible crunch that elevates the texture of the chicken. This crispy coating is essential for creating that satisfying crunch with each bite of the slider.
– Seasonings: A blend of garlic powder, onion powder, and paprika will enhance the chicken’s flavor profile. These seasonings not only add depth but also create a beautifully golden crust when fried.
Caesar Dressing Components
A classic Caesar salad wouldn’t be complete without its signature dressing. For our sliders, we’ll prepare a simple yet delicious homemade version:
– Mayonnaise: This forms the creamy base of the dressing, providing richness and a smooth texture. Using high-quality mayonnaise will make a noticeable difference in flavor.
– Parmesan cheese: Adding a rich, savory depth, freshly grated Parmesan cheese is essential for that authentic Caesar taste. It also contributes a delightful umami flavor that complements the chicken perfectly.
– Fresh garlic and lemon juice: These ingredients provide brightness and zing, balancing the creaminess of the mayonnaise with a refreshing tang. The garlic infuses the dressing with a robust flavor, while the lemon juice adds a hint of acidity that lifts the overall taste.
Assembly Ingredients
Once the chicken and dressing are prepared, it’s time to bring our sliders together. The assembly ingredients include:
– Slider buns: The foundation for our delicious layers. Choose soft and slightly sweet slider buns to create a harmonious balance with the savory chicken and tangy dressing.
– Romaine lettuce: This ingredient adds a fresh, crisp texture that contrasts beautifully with the warm, crispy chicken. The lettuce not only adds crunch but also a touch of color to the finished sliders.
– Extra Parmesan: For a finishing touch and presentation, sprinkle additional grated Parmesan on top of the assembled sliders. This not only enhances the visual appeal but also reinforces the classic Caesar flavor.
Preparation Steps for Mini Crispy Chicken Caesar Sliders
Creating the perfect Mini Crispy Chicken Caesar Sliders begins with the preparation of the chicken. The first step in this journey is marinating the chicken for optimal flavor.
Marinating the Chicken for Optimal Flavor
Start by cutting your chicken breasts into small, slider-sized pieces. This allows for quicker cooking and easier assembly later on. Place the chicken pieces in a bowl and pour in enough buttermilk to cover them completely. For added flavor, mix in a teaspoon of salt and pepper, along with a pinch of garlic powder and onion powder. Cover the bowl and refrigerate for at least 30 minutes, or up to overnight if time allows. This marination time is crucial, as it allows the chicken to absorb the flavors and become tender.
Once your chicken has marinated, it’s time to prepare for frying. Take the chicken out of the refrigerator and let it sit at room temperature for about 10 minutes. This helps the chicken cook evenly. Meanwhile, set up a breading station with three bowls: one with flour, another with beaten eggs, and the last with panko bread crumbs mixed with the remaining seasonings (garlic powder, onion powder, and paprika).
Dredge each piece of marinated chicken first in the flour, shaking off any excess, then dip it into the beaten eggs, and finally coat it thoroughly in the panko mixture. This three-step breading process is key to achieving that coveted crispy exterior.
With the chicken breaded, heat oil in a pan over medium-high heat. Once the oil is hot, carefully add the chicken pieces, ensuring not to overcrowd the pan. Fry the chicken for about 3-4 minutes per side or until golden brown and cooked through. Once cooked, transfer the chicken to a paper towel-lined plate to drain any excess oil.
As the chicken cools slightly, you can prepare the Caesar dressing. In a bowl, combine mayonnaise, grated Parmesan cheese, minced fresh garlic, and lemon juice. Whisk the ingredients together until smooth and creamy. Taste and adjust the seasoning if necessary, adding salt and pepper to suit your preference.
Now that you have your crispy chicken and homemade Caesar dressing ready, it’s time to assemble your sliders. Start by slicing the slider buns in half and lightly toasting them if desired. Spread a generous amount of Caesar dressing on the bottom half of each bun, followed by a piece of crispy chicken. Top the chicken with a few leaves of romaine lettuce and a sprinkle of extra Parmesan. Finally, place the top half of the bun on each slider, securing all the delicious layers within.
With these detailed steps, you’re well on your way to creating Mini Crispy Chicken Caesar Sliders that are sure to impress your guests or family. Stay tuned for the remainder of the recipe to learn how to serve and enjoy these delightful sliders!
Importance of Buttermilk Marination
Marinating chicken in buttermilk is a game changer when it comes to achieving tender, flavorful meat. Buttermilk is slightly acidic, which helps to break down the proteins in the chicken, resulting in a juicier, more succulent bite. The richness of buttermilk also infuses the chicken with flavor, ensuring that each piece is seasoned throughout. This marination process not only enhances the chicken’s texture but also allows it to retain moisture during cooking, leading to perfectly crispy and juicy sliders. Allow your chicken to marinate for at least 1 hour, or, for best results, overnight in the refrigerator.
Creating the Breading Station
Setting up an efficient breading station is crucial for a smooth cooking process. Here’s how to organize your space:
1. Gather Your Ingredients: You will need all-purpose flour, buttermilk, and panko breadcrumbs. You might also want to season your flour with salt, pepper, and any other spices you prefer, such as garlic powder or paprika.
2. Arrange Your Stations:
– First Station: Place a shallow dish with seasoned flour.
– Second Station: Prepare a bowl with the buttermilk from your marinated chicken.
– Third Station: Set up a plate or tray with panko breadcrumbs, ensuring it’s wide enough to accommodate the chicken pieces.
3. Create a Flow: Position your stations in a line, moving from left to right: flour, buttermilk, panko. This organization helps you easily and efficiently coat each piece without creating a mess.
Breading Technique for Maximum Crispiness
To achieve that coveted crispy exterior, follow this detailed breading technique known as the triple-dip method:
1. Coat in Flour: Take a piece of marinated chicken and lightly dredge it in the seasoned flour. Make sure to coat all sides, shaking off any excess flour. This initial layer helps the buttermilk adhere better.
2. Dip in Buttermilk: Next, dip the floured chicken into the buttermilk. Allow any excess to drip off. This layer will help the panko stick to the chicken.
3. Press into Panko: Finally, press the chicken into the panko breadcrumbs, ensuring an even coating. For an extra crispy texture, you can double-dip the chicken back into the buttermilk and then again in the panko. This method creates a thicker crust that is incredibly crunchy when fried.
4. Rest Before Frying: Let the breaded chicken rest for about 10 minutes. This helps the coating adhere and prevents it from falling off during frying.
Frying the Chicken to Perfection
Frying your chicken correctly is essential for achieving that golden-brown, crispy exterior while keeping the inside juicy. Here are some tips:
1. Oil Temperature: Heat oil in a cast-iron skillet or deep pot to around 350°F (175°C). The right temperature is critical; too low, and the chicken will absorb excess oil, becoming greasy; too high, and the coating will burn before the chicken cooks through.
2. Cooking in Batches: To avoid overcrowding, fry the chicken in batches. This allows for even cooking and browning. Too many pieces at once will lower the oil temperature, resulting in soggy chicken instead of crispy perfection.
3. Monitor Cooking Time: Depending on the thickness of your chicken pieces, frying should take about 4-6 minutes per side. Use a meat thermometer to ensure the internal temperature reaches 165°F (74°C).
4. Drain After Frying: Once cooked, place the chicken on a wire rack or paper towels to drain excess oil. This step helps maintain the crispiness of the breading.
Crafting the Perfect Caesar Dressing
A great Caesar dressing is the heart of these sliders. Here’s how to create a homemade version that is both flavorful and fresh:
Ingredients:
– 1 cup mayonnaise
– 1 tablespoon Dijon mustard
– 1 tablespoon Worcestershire sauce
– 1 tablespoon lemon juice (freshly squeezed)
– 2 cloves garlic (minced)
– 1/4 cup grated Parmesan cheese
– Salt and pepper to taste
Breakdown of Ingredients:
– Mayonnaise: Acts as a creamy base and provides richness.
– Dijon Mustard: Adds a tangy depth of flavor.
– Worcestershire Sauce: Contributes umami and complexity.
– Lemon Juice: Brightens the dressing and balances the richness.
– Garlic: Adds a robust flavor that enhances the overall taste.
– Parmesan Cheese: Provides a salty, nutty element that is essential in Caesar dressing.
Instructions:
1. In a mixing bowl, combine the mayonnaise, Dijon mustard, Worcestershire sauce, lemon juice, and minced garlic.
2. Whisk until smooth and well-blended.
3. Fold in the grated Parmesan cheese and season with salt and pepper to taste.
4. Adjust the consistency by adding a little more lemon juice or water if desired.
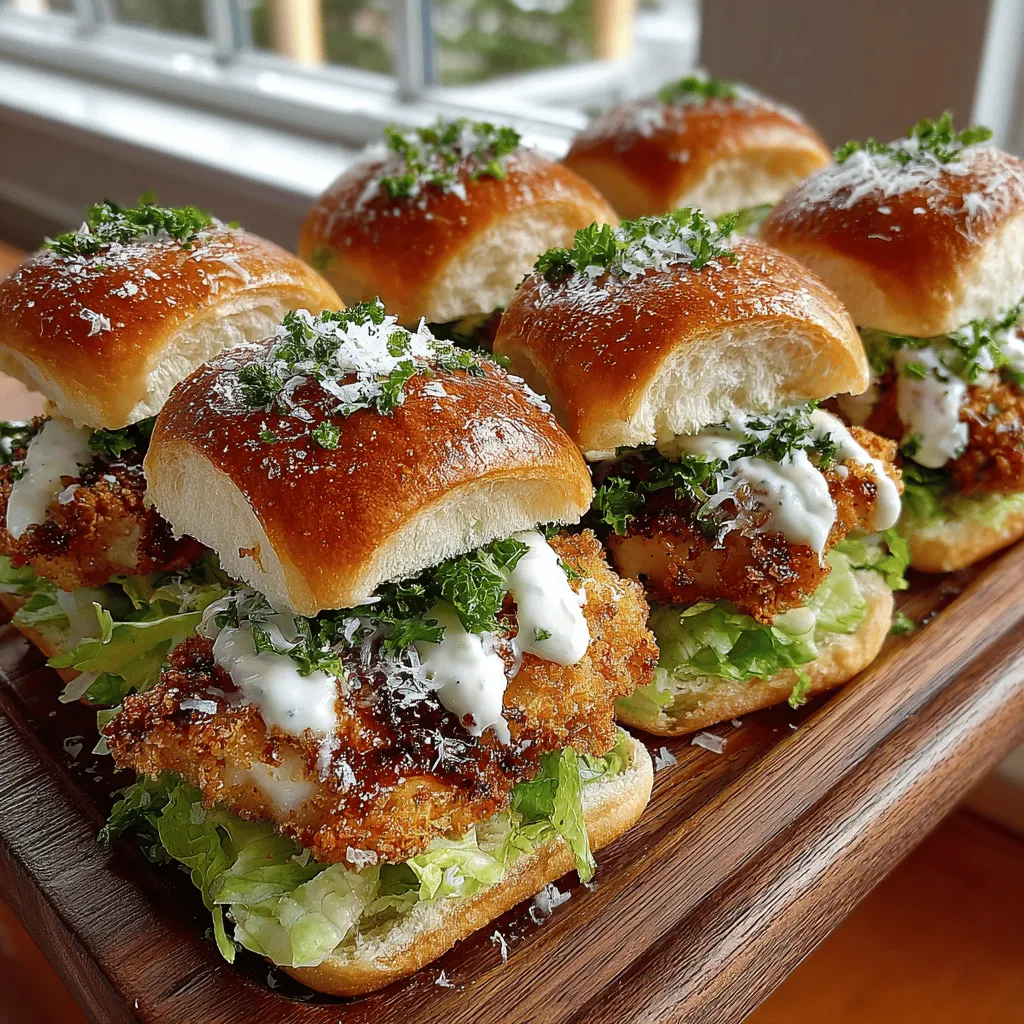
Assembling the Sliders for Presentation
Once your chicken is fried and your dressing is ready, it’s time to assemble the sliders:
1. Choose Your Buns: Use small slider buns or mini brioche rolls for a touch of sweetness. Lightly toast them for added texture and flavor.
2. Layering Techniques:
– Start with a base of romaine lettuce on the bottom bun for crunch.
– Place a piece of crispy chicken on top of the lettuce.
– Drizzle a generous amount of homemade Caesar dressing over the chicken.
– Add a sprinkle of extra Parmesan cheese for a finishing touch.
– Cap with the top bun, and if desired, secure with a toothpick for easy handling.
This layering not only enhances the visual appeal but also ensures that each bite is a delightful combination of flavors and textures.
Serving Suggestions and Pairings
Mini Crispy Chicken Caesar Sliders are perfect for any occasion, from casual gatherings to parties. Here are some serving suggestions to elevate your meal:
1. Side Dishes:
– Sweet Potato Fries: Their sweetness complements the savory sliders beautifully.
– Garlic Parmesan Roasted Vegetables: A healthy side that adds color and nutrition.
– Classic Caesar Salad: For those who want to enjoy the traditional flavors alongside the sliders.
2. Beverage Pairings:
– Light Beers: A refreshing lager or pilsner can balance the richness of the sliders.
– White Wine: A crisp Sauvignon Blanc pairs well with the chicken and dressing.
– Sparkling Water with Lemon: For a non-alcoholic option, this adds a refreshing touch.
Nutritional Information and Serving Size
Nutritional Benefits of Ingredients
1. Chicken: A great source of lean protein, essential for muscle growth and repair.
2. Romaine Lettuce: Low in calories and high in vitamins A and K, it provides essential nutrients and adds crunch.
3. Homemade Dressing: Unlike store-bought versions, homemade dressing allows you to control the ingredients, reducing preservatives and unhealthy additives.
Serving Information
Typically, each person can enjoy 2-3 sliders, depending on their appetite. This makes the recipe ideal for sharing at gatherings or as a main dish accompanied by sides. Adjust the recipe quantities based on the number of guests you plan to serve.
Conclusion
Mini Crispy Chicken Caesar Sliders are a delightful fusion of flavors and textures that elevate the traditional Caesar salad into a fun and portable format. With their crispy chicken, creamy dressing, and fresh romaine, these sliders are sure to become a favorite in your household. Whether for a casual gathering or a special occasion, they are quick to prepare and offer a satisfying bite that everyone will love. Embrace the joy of cooking and indulge in these delicious sliders to create lasting memories around the dining table.