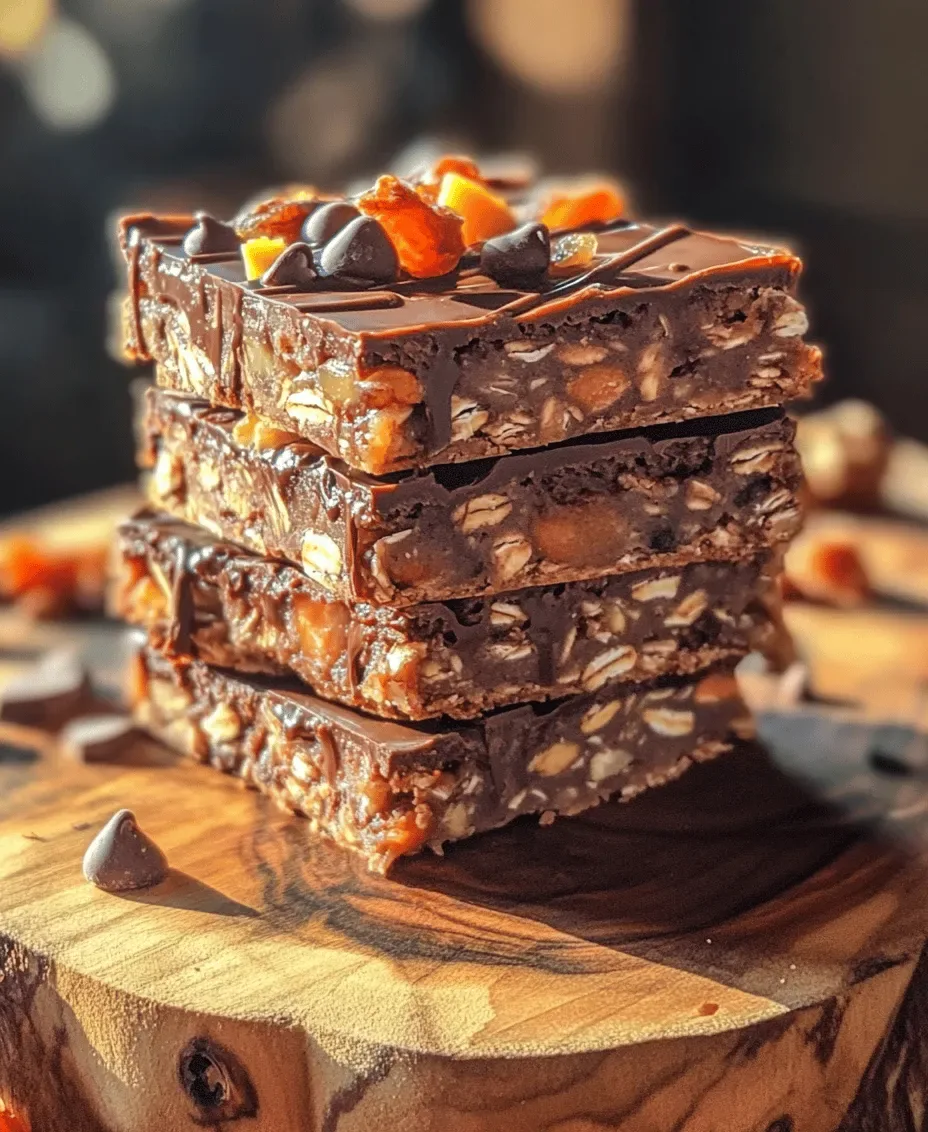
Imagine biting into a bar that feels indulgent enough for dessert yet fuels you like a wholesome breakfast. Our No Bake Chocolate Oat Bars deliver that perfect balance, marrying the deep richness of cocoa with the hearty texture of rolled oats—all without turning on the oven.
What makes these bars truly special is the blend of natural sweeteners, plant‑based fats, and a touch of crunch from nuts and seeds. The result is a snack that’s both satisfyingly chocolatey and nutritionally smart, giving you steady energy without the sugar crash.
Busy parents, fitness enthusiasts, and anyone craving a quick grab‑and‑go bite will love these bars. They shine at weekend brunches, as a pre‑workout boost, or as an after‑school treat that feels guilt‑free.
The process is delightfully simple: combine dry ingredients, whisk wet components, fold everything together, press into a pan, and let the mixture set in the fridge. In under half an hour you’ll have a batch of bars ready to slice and serve.
Why You'll Love This Recipe
Zero Oven Required: Skipping the oven saves energy and keeps your kitchen cool, making these bars perfect for hot summer mornings or dorm‑room kitchens.
Balanced Nutrition: Each bite offers complex carbs, healthy fats, and a modest amount of natural sugar, providing sustained fuel for busy days.
Customizable Crunch: Add nuts, seeds, or dried fruit for texture variations, letting you tailor the bars to your personal crunch cravings.
Kid‑Approved Sweetness: The cocoa‑sweet combo satisfies chocolate lovers while staying free from refined sugars, making it a smart snack for the whole family.
Ingredients
For these bars I focus on whole‑food staples that bring both flavor and nutrition. Rolled oats form the sturdy base, while cocoa powder delivers that deep chocolate note. Creamy nut butter and a drizzle of honey or maple syrup bind everything together, and a splash of vanilla lifts the profile. Finally, a handful of nuts, seeds, and dried fruit add texture and a burst of natural sweetness.
Dry Ingredients
- 2 cups rolled oats
- 1/3 cup unsweetened cocoa powder
- 1/4 teaspoon sea salt
Wet Ingredients
- 1/2 cup natural almond butter (or peanut butter)
- 1/4 cup pure maple syrup (or honey)
- 1 teaspoon pure vanilla extract
Add‑Ins & Toppings
- 1/4 cup chopped almonds (or walnuts)
- 2 tablespoons chia seeds
- 1/4 cup dried cranberries (or raisins)
The dry components give the bars structure, while the wet mixture acts as a natural glue that sets when chilled. Cocoa adds antioxidants and a rich flavor, almond butter contributes heart‑healthy monounsaturated fats, and maple syrup offers a gentle sweetness without refined sugar. The nuts, seeds, and dried fruit not only boost texture but also supply protein, fiber, and micronutrients, turning a simple snack into a balanced mini‑meal.
Step-by-Step Instructions
Preparing the Dry Base
Begin by measuring all dry ingredients into a large mixing bowl. Stir the rolled oats, cocoa powder, and sea salt together until the cocoa is evenly distributed, preventing any bitter pockets. This uniform coating ensures each bite carries the same chocolate intensity.
Mixing the Wet Components
In a separate microwave‑safe bowl, combine the almond butter, maple syrup, and vanilla extract. Warm the mixture for about 20‑30 seconds, just enough to loosen the butter without melting it completely. Whisk until the blend is smooth and glossy; this step creates a cohesive binder that will hold the bars together once chilled.
Combining & Setting
- Combine Wet and Dry. Pour the warm wet mixture over the dry oat mixture. Using a sturdy spatula, fold the ingredients together, ensuring every oat is coated. The moisture from the butter‑syrup combo should make the mixture slightly sticky but not soggy.
- Incorporate Add‑Ins. Gently stir in the chopped almonds, chia seeds, and dried cranberries. These additions add crunch, omega‑3 fatty acids, and natural sweetness, enhancing both texture and nutrition.
- Press into Pan. Line an 8×8‑inch square pan with parchment paper, leaving an overhang for easy removal. Transfer the mixture to the pan and press firmly with the back of a spoon or a flat spatula. Compacting removes air pockets and creates a uniform surface that will slice cleanly.
- Chill to Set. Place the pan in the refrigerator for 20‑30 minutes, or until the bars are firm enough to cut. Chilling solidifies the natural sugars and fats, giving the bars a slice‑ready consistency without baking.
Finishing Touches
Once set, lift the parchment paper to release the slab and place it on a cutting board. Using a sharp knife, cut the slab into twelve even bars. Store them in an airtight container; they’ll stay soft and chewy for up to four days in the fridge, or longer if frozen. Enjoy immediately for the freshest texture.
Tips & Tricks
Perfecting the Recipe
Warm the Nut Butter Slightly. Heating the butter for just 20‑30 seconds makes it easier to blend, ensuring a smooth binder without lumps.
Press Firmly. Use a flat-bottomed glass or a heavy pan to compress the mixture; a compact bar holds together better when sliced.
Use Fresh Oats. Slightly toasted oats add a subtle nuttiness and improve texture, but be sure they’re cool before mixing.
Adjust Sweetness. Taste the wet mixture before adding oats; if you prefer a sweeter bar, increase the maple syrup by a tablespoon.
Flavor Enhancements
Add a pinch of espresso powder to intensify the chocolate flavor without adding bitterness. For a tropical twist, swap dried cranberries for chopped dried mango and sprinkle unsweetened coconut flakes on top before chilling.
Common Mistakes to Avoid
Avoid using cold nut butter straight from the fridge; it won’t blend smoothly and can leave gritty pockets. Also, don’t over‑mix the dry and wet ingredients—excess stirring can break down the oats, resulting in a mushy texture.
Pro Tips
Line with Parchment. The overhang makes bar removal effortless and prevents sticking, keeping edges neat.
Freeze for Travel. Pack individual bars in zip‑top bags; they stay firm for days and are perfect for on‑the‑go breakfasts.
Use a Food Processor. If you prefer a finer texture, pulse the oats briefly before mixing; this creates a denser, brownie‑like bar.
Top with a Drizzle. A thin ribbon of melted dark chocolate after chilling adds an elegant finish and extra cocoa punch.
Variations
Ingredient Swaps
Replace almond butter with cashew or sunflower seed butter for a different nutty profile. Swap maple syrup for agave nectar or brown rice syrup if you need a lower‑glycemic option. Dried fruit can be exchanged for fresh berries, and you can experiment with pumpkin seeds, hemp hearts, or toasted coconut for varied crunch.
Dietary Adjustments
For a vegan version, ensure the maple syrup is pure and use a plant‑based nut butter without added honey. Gluten‑free diners can substitute rolled oats with certified gluten‑free oats or millet flakes. To make it keto‑friendly, replace maple syrup with a sugar‑free liquid sweetener and increase the ratio of nuts and seeds while reducing oats.
Serving Suggestions
Pair a bar with a dollop of Greek yogurt and fresh fruit for a balanced brunch plate. Crumble bars over overnight oats for extra chocolate flavor, or serve alongside a cup of chai tea for a cozy afternoon snack. They also travel well in lunchboxes, making them ideal for school or office.
Storage Info
Leftover Storage
Once cut, place the bars in an airtight container or a zip‑top bag. Keep them in the refrigerator for up to four days; the chill maintains firmness and flavor. For longer keeping, arrange individual bars on a parchment sheet, freeze, then transfer to a freezer‑safe bag for up to three months. This method prevents freezer burn and makes portioning easy.
Reheating Instructions
These bars are best enjoyed cold, but if you prefer a softer texture, microwave a single bar on medium power for 10‑15 seconds, or let it sit at room temperature for 10 minutes. Avoid overheating, as the nut butter can become oily and the chocolate flavor may dull.
Frequently Asked Questions
This No Bake Chocolate Oat Bars recipe proves that wholesome breakfast can be as indulgent as dessert. We’ve walked through every step—from selecting nutrient‑dense oats and cocoa to mastering the perfect press and chill technique—so you can create bars that are both tasty and nourishing. Feel free to experiment with nuts, seeds, or sweeteners to make the recipe truly yours. Slice, store, and savor each chocolate‑kissed bite whenever you need a quick, healthy pick‑me‑up.