Introduction
In recent years, no-churn ice cream has taken the culinary world by storm, providing a simple and delightful way to enjoy homemade frozen treats without the need for bulky ice cream machines. This trend has revolutionized how we think about making ice cream, allowing everyone to indulge in creamy, rich flavors at home with minimal effort. Among the myriad flavors available, pistachio ice cream stands out as a unique and delicious dessert option that is both indulgent and surprisingly easy to prepare.
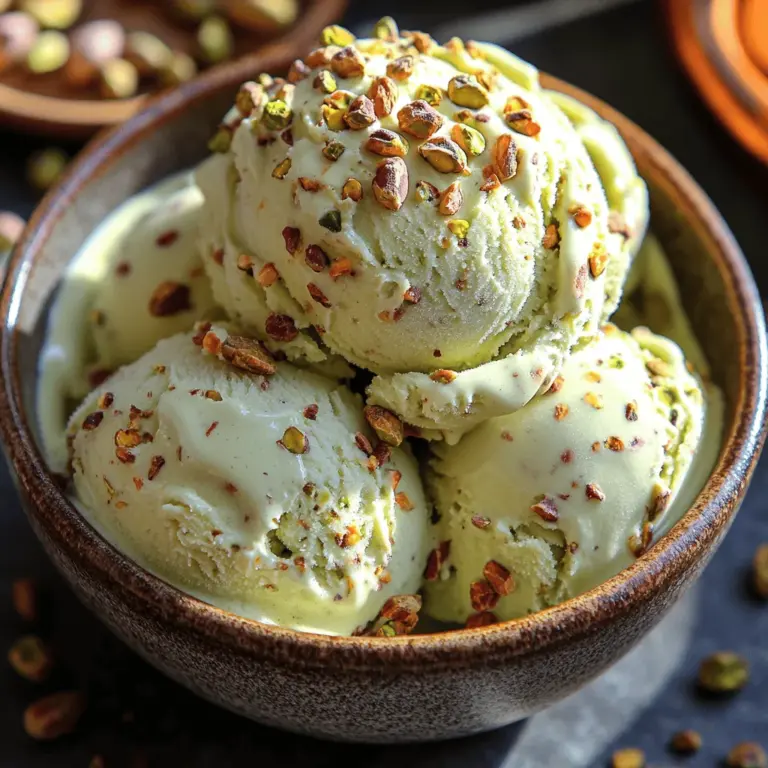
This no-churn pistachio ice cream recipe combines the nutty richness of pistachios with a creamy base, creating a dessert that is not only satisfying but also incredibly versatile. The beauty of this recipe lies in its simplicity; you can whip it up in just a few easy steps, making it an accessible choice for both novice home cooks and seasoned bakers alike.
The key ingredients in our no-churn pistachio ice cream recipe are heavy whipping cream, sweetened condensed milk, unsalted pistachios, vanilla extract, and a touch of salt. Each element plays a crucial role in creating a smooth and luscious ice cream that bursts with flavor. The combination of these ingredients results in a dessert that is not only delicious but also packed with the distinctive taste of pistachios, making it a perfect choice for any occasion.
Understanding the Appeal of No-Churn Ice Cream
No-churn ice cream is a game-changer in the dessert world. Unlike traditional ice cream, which requires churning to incorporate air and achieve a light texture, no-churn recipes utilize whipped cream and sweetened condensed milk to create a creamy consistency. This method eliminates the need for specialized equipment, making it possible to create delightful frozen desserts in any kitchen, regardless of the tools at hand.
One of the primary benefits of making no-churn ice cream at home is the control it provides over the ingredients. By preparing your own ice cream, you can avoid artificial flavors and preservatives often found in store-bought options. Additionally, no-churn ice cream recipes are highly customizable. You can experiment with various flavors, mix-ins, and toppings to create a dessert that perfectly suits your taste preferences.
The versatility of no-churn ice cream is undeniable. Whether you crave classic vanilla, rich chocolate, or fruity flavors, the base recipe can be easily adapted to suit your cravings. This flexibility allows for endless creativity, making it a fun and engaging experience for anyone who enjoys cooking.
The Allure of Pistachios in Desserts
Pistachios are not only a delightful snack but also a fantastic addition to desserts. These nutty gems are packed with nutritional benefits, including healthy fats, protein, and fiber, making them a guilt-free indulgence in moderation. As a result, pistachios have gained popularity not only for their taste but also for their health-conscious appeal.
The trend of incorporating pistachio flavor into desserts has been on the rise, with many bakeries and ice cream shops featuring this unique flavor prominently on their menus. The rich, earthy taste of pistachios adds depth to various confections, and when paired with creamy bases like ice cream, it creates a harmonious balance of flavors.
When it comes to flavor profile, pistachios offer a subtle sweetness combined with a slightly savory note that enhances the overall taste of ice cream. Their distinct green hue adds visual appeal, making every scoop a feast for the eyes as well. With their unique taste and texture, pistachios elevate the experience of enjoying ice cream, making our no-churn pistachio ice cream a must-try for dessert lovers.
Ingredients Breakdown
To create this indulgent no-churn pistachio ice cream, you will need the following ingredients, each contributing to the final product’s creamy texture and delicious flavor:
Heavy Whipping Cream
Heavy whipping cream is the cornerstone of this ice cream recipe. It provides the necessary fat content to create a rich and creamy texture, ensuring that every scoop is smooth and satisfying. When whipped, the cream incorporates air, giving the ice cream a light, airy feel. This ingredient is essential for achieving the perfect consistency that melts in your mouth.
Sweetened Condensed Milk
Sweetened condensed milk plays a dual role in this recipe. Firstly, it adds sweetness to the ice cream, balancing the nutty flavor of the pistachios. Secondly, it contributes to the creaminess of the base, allowing for a velvety texture that is characteristic of traditional ice cream. Using sweetened condensed milk eliminates the need for additional sugar and simplifies the preparation process, making it a favorite among no-churn ice cream enthusiasts.
Unsalted Pistachios
The star of this recipe is, of course, the unsalted pistachios. These nuts provide the primary flavor and texture, giving the ice cream its unique identity. Unsalted pistachios are preferred to control the sodium content and ensure that the natural sweetness of the nuts shines through. In addition to their delightful flavor, pistachios are also a source of healthy fats and protein, making this ice cream a more nutritious dessert option.
Vanilla Extract
A splash of vanilla extract enhances the overall flavor profile of the ice cream, providing a warm and comforting undertone that complements the pistachios beautifully. The depth of flavor that vanilla adds is vital for rounding out the sweetness and nuttiness, creating a more balanced dessert.
Salt
While it may seem counterintuitive to add salt to a sweet dessert, a pinch of salt is crucial in this recipe. Salt enhances the flavors of the other ingredients, bringing out the sweetness of the condensed milk and the nuttiness of the pistachios. It creates a more complex flavor experience, making each bite more enjoyable.
Optional Toppings
To personalize your no-churn pistachio ice cream experience, consider adding optional toppings. Chopped pistachios, chocolate shavings, or a drizzle of caramel sauce can elevate the dessert and add an extra layer of flavor and texture. These toppings allow for creativity and customization, making your homemade ice cream truly unique.
Step-by-Step Instructions for Making No-Churn Pistachio Ice Cream
Preparing the Pistachios
The first step in creating your no-churn pistachio ice cream is preparing the pistachios. Toasting the nuts is essential for enhancing their flavor, bringing out their natural oils, and adding a delightful crunch to the ice cream. Here’s how to toast and prepare the pistachios:
1. Toast the Pistachios: Preheat your oven to 350°F (175°C). Spread the unsalted pistachios in a single layer on a baking sheet. Toast them in the oven for about 8-10 minutes, stirring halfway through to ensure even browning. Keep a close eye on them, as they can burn quickly. Once they are fragrant and lightly golden, remove them from the oven and let them cool completely.
2. Chop and Grind: After the pistachios have cooled, you can chop and grind them to your desired consistency. For a chunkier texture, use a sharp knife to chop the pistachios into small pieces. If you prefer a finer texture, place the cooled pistachios in a food processor and pulse until they reach a coarse meal consistency. Be cautious not to overprocess them, as you don’t want to end up with pistachio butter.
With the pistachios properly prepared, you’re now ready to move on to the next steps in crafting your creamy no-churn pistachio ice cream. Stay tuned for the following sections, where we will explore the assembly process and the simple steps to transform these ingredients into a delightful homemade dessert.
Whipping the Cream
The foundation of any great ice cream lies in its creaminess, which begins with whipping the heavy cream. When whipped correctly, the cream should achieve soft peaks—a stage where the mixture holds its shape but still has a slight droop at the tips. This texture is crucial for creating a light and airy ice cream that melts beautifully in your mouth.
Tips for Achieving the Perfect Whipped Cream:
1. Chill Your Equipment: Before you start, place your mixing bowl and beaters in the freezer for about 10-15 minutes. Cold equipment helps the cream whip faster and increases volume.
2. Use High-Quality Heavy Cream: Opt for heavy cream with a fat content of at least 36%. This richness contributes to the overall texture and mouthfeel of your ice cream.
3. Don’t Overwhip: Keep an eye on your cream as it whips. Once you see soft peaks forming, stop mixing. Overwhipped cream can turn grainy and lose its airy quality, which will affect the final texture of your ice cream.
Combining Wet Ingredients
After achieving the perfect whipped cream, it’s time to combine it with the other wet ingredients—sweetened condensed milk and vanilla extract. This step is essential for ensuring that all flavors are well integrated and balanced throughout the ice cream.
Importance of Thorough Mixing for Flavor Integration:
The sweetened condensed milk provides the necessary sweetness and creaminess, while the vanilla extract adds depth. If not mixed well, you could end up with pockets of sweetness or a muted flavor profile, which is far from ideal.
Techniques for Ensuring a Smooth Mixture:
1. Start Slowly: Begin by adding the whipped cream to the sweetened condensed milk in small batches. This prevents the whipped cream from deflating too quickly.
2. Use a Whisk or Rubber Spatula: A whisk is great for mixing, but a rubber spatula is ideal for folding, as it gently incorporates the ingredients while maintaining airiness.
3. Mix Until Just Combined: Stir until you see no streaks of sweetened condensed milk, but be careful not to over-mix. The goal is a smooth, uniform mixture without losing the volume of the whipped cream.
Folding Techniques
Folding is a critical technique in ice cream making, as it helps to maintain the lightness of the whipped cream while incorporating it into the heavier ingredients.
Explanation of Folding and Its Importance in Maintaining Airiness:
Folding involves gently combining ingredients by lifting and turning the mixture rather than stirring vigorously. This technique preserves the air pockets formed during whipping, which are essential for a light and creamy texture.
Insights on How to Properly Incorporate Whipped Cream:
1. Scoop and Lift: Use a rubber spatula to scoop from the bottom of the bowl, lift the mixture up, and over the top. Rotate the bowl as you go to ensure even distribution.
2. Be Gentle: Use a light hand and avoid aggressive mixing. The goal is to combine without flattening the whipped cream.
3. Check Consistency: Once you see a uniform color and texture, stop folding. You should still see a few airy pockets in the mixture.
Incorporating Chopped Pistachios
Chopped pistachios are the star of this no-churn pistachio ice cream. Their unique flavor and texture not only enhance the taste but also add a delightful crunch.
Distribution of Texture and Flavor Through the Mixture:
Evenly distributing the chopped pistachios is key to ensuring that each scoop of ice cream is bursting with flavor. The earthy, nutty notes of the pistachios complement the sweetness of the cream base beautifully.
Tips for Incorporating Chopped Pistachios:
1. Fold Them In Last: After your cream mixture is fully combined, gently fold in the chopped pistachios. This prevents them from sinking to the bottom.
2. Coarse Chopping: Aim for a coarse chop rather than finely chopped pistachios. This will ensure that the pieces maintain their texture and provide that satisfying crunch.
3. Adjust Quantity to Taste: Feel free to adjust the amount of pistachios based on your preference. More pistachios will yield a nuttier flavor, while less will allow the creamy base to shine through.
Transferring and Freezing
Once the mixture is well combined, it’s time to transfer it to a suitable container for freezing. The right container ensures even freezing and helps maintain the ice cream’s texture.
Best Practices for Container Selection and Smoothing the Top:
1. Choose an Airtight Container: Select a container that is both airtight and has a wide opening for easy access. A shallow container will freeze faster than a deep one, which is beneficial for achieving a smooth texture.
2. Smooth the Top: Use a spatula to spread the ice cream mixture evenly across the container. Smoothing the top allows for a more even freeze and helps prevent ice crystals from forming.
3. Cover with Plastic Wrap: To further prevent ice crystals, press a piece of plastic wrap directly onto the surface of the ice cream before sealing the container with its lid.
Tips for Effectively Freezing the Ice Cream to Achieve Optimal Texture:
– Freeze for At Least 6 Hours: For the best results, let the ice cream freeze for at least 6 hours or overnight. This allows for the flavors to meld and the texture to become creamy.
– Avoid Frequent Opening: Each time you open the freezer, warm air enters, which can affect the texture. Try to limit how often you check on your ice cream during the freezing process.
Serving Suggestions
Presentation matters when it comes to dessert, and no-churn pistachio ice cream can be served in many delightful ways.
Presentation Ideas for Serving the Ice Cream:
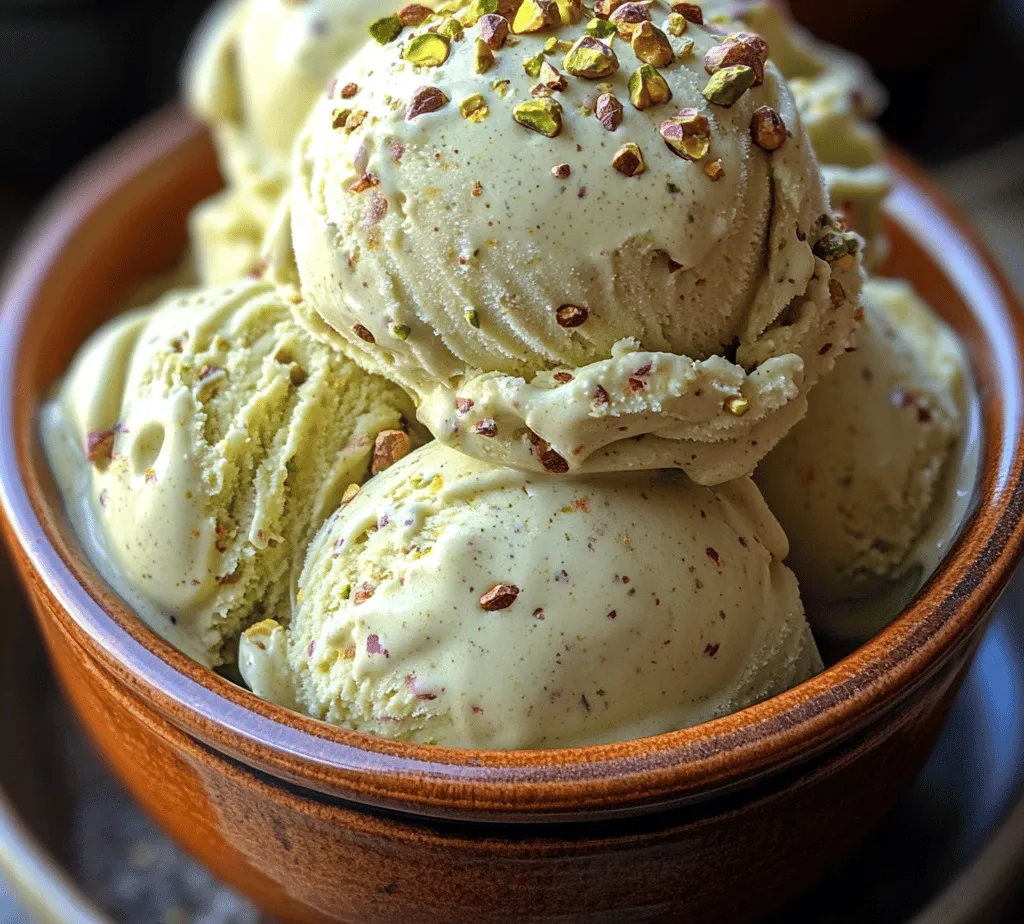
1. Classic Bowls: Serve scoops in elegant dessert bowls, garnished with additional chopped pistachios and a drizzle of honey or chocolate syrup.
2. Ice Cream Cones: For a fun twist, scoop the ice cream into waffle or sugar cones. This adds a crunchy element and makes for a great handheld treat.
3. Sundae Style: Elevate your dessert by creating a sundae. Top the pistachio ice cream with whipped cream, maraschino cherries, and a sprinkle of crushed pistachios.
Suggestions for Pairing with Other Desserts or Garnishes:
– Chocolate Cake: A slice of rich chocolate cake pairs beautifully with pistachio ice cream, creating a delightful flavor contrast.
– Fruit Compote: Serve alongside a warm fruit compote, such as berries or cherries, to add a tart balance to the creamy sweetness.
– Cookies: Complement the ice cream with homemade or store-bought cookies for a delightful ice cream sandwich.
Highlighting the Versatility of This Dessert for Various Occasions:
No-churn pistachio ice cream is perfect for any occasion, from casual summer gatherings to more formal dinner parties. Its impressive flavor and easy preparation make it an ideal choice for impressing guests or simply indulging in a self-care treat.
The Experience of Homemade Ice Cream
There’s a unique joy that comes from creating desserts from scratch, especially ice cream. The process is as enjoyable as the final product itself.
Discussing the Joy and Satisfaction of Creating Desserts from Scratch:
Making your own ice cream allows you to experiment with flavors and adjust recipes to your tastes. There’s a sense of accomplishment in crafting a delicious treat that you can share with family and friends. Each scoop is a reminder of the love and care you put into it.
The Sensory Experience of Enjoying Homemade Pistachio Ice Cream:
The first bite of your homemade pistachio ice cream is an experience to savor. The creamy texture coats your palate, while the nutty flavor of the pistachios shines through. The subtle sweetness and rich flavor create a delightful balance that enhances every moment of indulgence.
Encouraging Creativity with Flavor Variations and Additions:
While this recipe is a classic, don’t hesitate to let your creativity flow. Consider adding swirls of caramel or chocolate, incorporating other nuts like almond or hazelnut, or even experimenting with different flavor extracts. The world of ice cream is yours to explore!
Conclusion
Creating no-churn pistachio ice cream at home is a rewarding and delightful experience. Its simplicity—and the ability to whip it up without an ice cream maker—makes it accessible for anyone looking to enjoy a sweet treat.
Recap the steps you took to craft this delicious dessert, from whipping the cream to incorporating the pistachios and freezing the mixture. The blend of flavors and textures in your homemade ice cream offers a taste of joy that store-bought versions simply cannot match.
As you enjoy this flavorful dessert, remember that homemade ice cream is a way to celebrate special moments and everyday indulgences alike. So, gather your ingredients, invite friends or family to join in the fun, and explore the delicious world of homemade ice cream. Your taste buds will thank you!
