Introduction
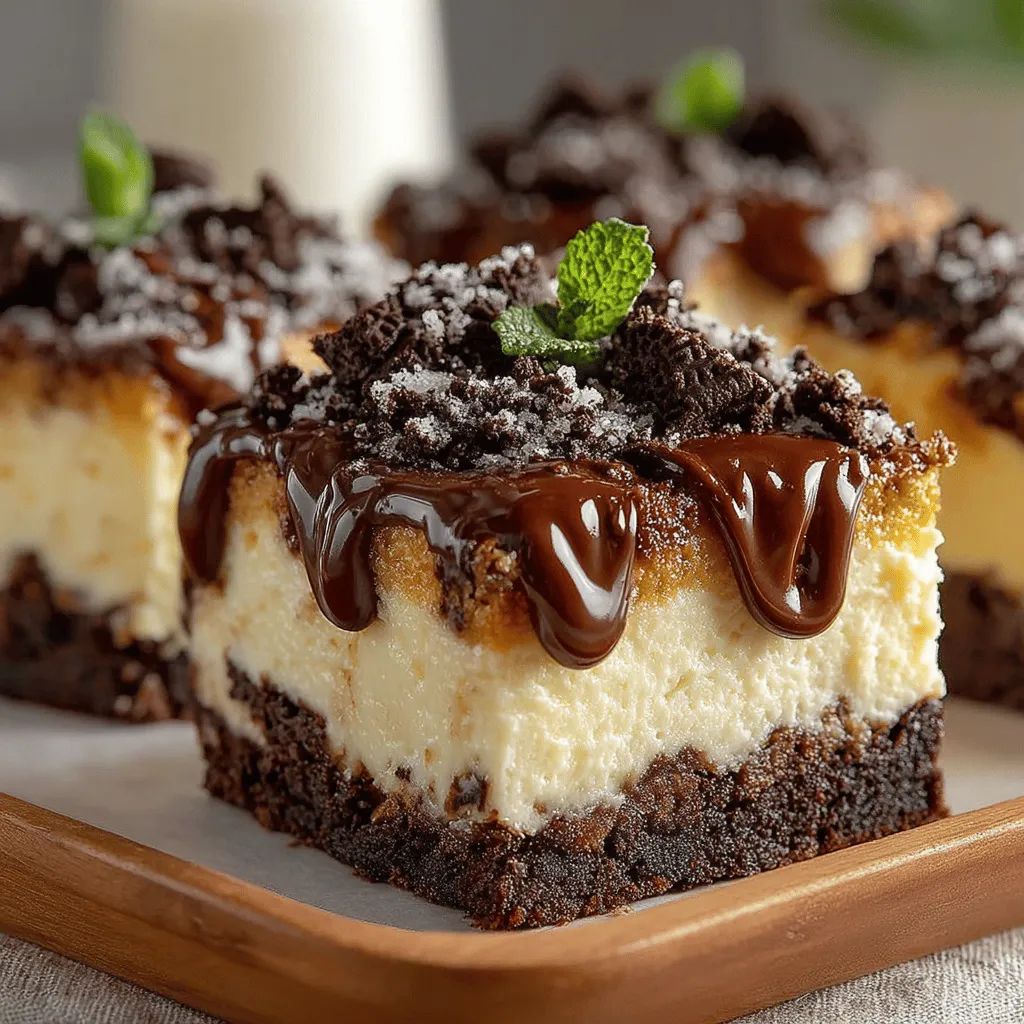
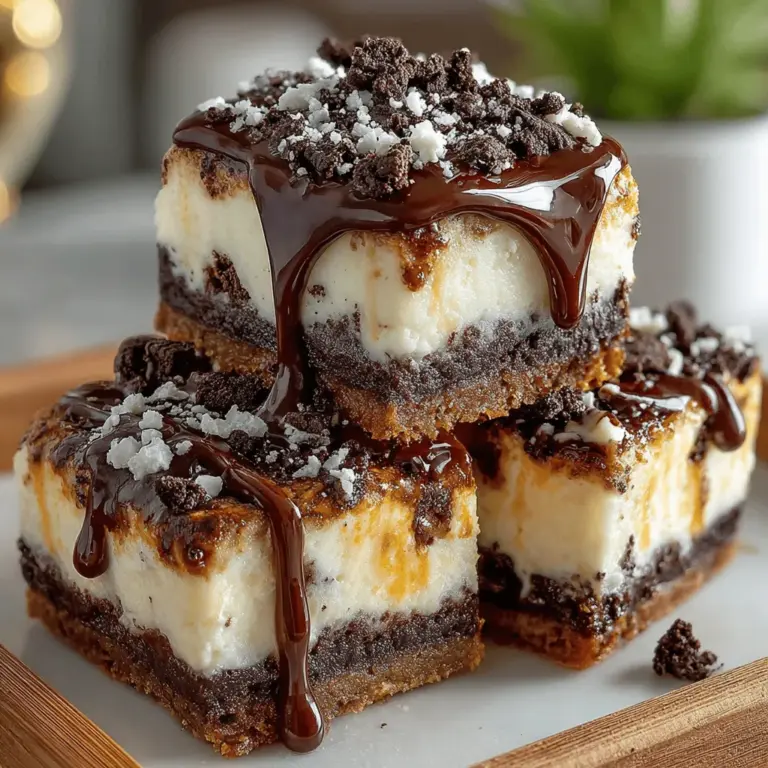
No-bake desserts have carved out a special place in the hearts of dessert lovers everywhere. Their effortless preparation and the delightful results make them a favorite among both novice and experienced bakers. One standout recipe that embodies this appeal is the Oreo Delight No-Bake Cheesecake Bars. These bars are not just a treat for the taste buds; they are a visual spectacle that is sure to impress friends and family alike.
The Oreo Delight No-Bake Cheesecake Bars are a guaranteed crowd-pleaser. With a luscious, creamy filling perfectly balanced with the iconic chocolatey crunch of Oreos, these bars are an indulgent dessert that can be whipped up in no time. The best part? You don’t need to turn on the oven, making this recipe perfect for those warm days when you want to avoid heating up the kitchen. This recipe is incredibly simple and quick to prepare, making it accessible for bakers of all skill levels. Whether you’re a seasoned chef or a kitchen novice, you can successfully create these delicious bars with just a few essential ingredients.
Understanding No-Bake Cheesecakes
To appreciate the Oreo Delight No-Bake Cheesecake Bars, it’s essential to understand what no-bake cheesecakes are. Unlike traditional baked cheesecakes, which require a lengthy baking and cooling process, no-bake cheesecakes rely on the setting power of cold ingredients, typically gelatin or whipped cream, to achieve their creamy texture. This means that you can enjoy a rich and decadent cheesecake without the need for an oven.
The main differences between baked and no-bake cheesecakes lie in their texture and preparation methods. Baked cheesecakes tend to have a denser, firmer texture due to the cooking process, while no-bake cheesecakes are light, airy, and often creamier, thanks to the incorporation of whipped cream or whipped topping. These differences make no-bake cheesecakes particularly appealing for those who prefer a dessert that feels refreshing rather than heavy.
One of the most significant benefits of no-bake cheesecakes is their time-saving aspect. With no baking involved, you can prepare the filling and crust, pop it in the fridge, and let it set while you attend to other matters. This makes no-bake cheesecakes an excellent option for last-minute gatherings or when you’re simply in the mood for a sweet treat without the fuss of extensive baking.
Ingredients Breakdown
Now that we’ve established the appeal and ease of no-bake cheesecakes, let’s take a closer look at the ingredients that make up the Oreo Delight No-Bake Cheesecake Bars.
– Oreo Cookies: The star of the show, these iconic cookies provide the base flavor and texture for the crust and serve as a delightful garnish. Their chocolatey goodness and creamy filling are what make these bars irresistibly delicious.
– Unsalted Butter: This ingredient acts as a binding agent for the crust. When melted and combined with crushed Oreos, the butter helps to hold the crust together, creating a solid base for the cheesecake filling.
– Cream Cheese: The heart of the cheesecake filling, cream cheese provides that rich and creamy texture that is synonymous with cheesecakes. It’s essential to use softened cream cheese for a smooth and lump-free filling.
– Powdered Sugar: This ingredient sweetens the filling while also enhancing its texture. The fine granules of powdered sugar dissolve easily, ensuring a silky-smooth consistency.
– Vanilla Extract: A splash of vanilla extract adds depth of flavor, balancing the sweetness of the powdered sugar and enhancing the overall taste of the cheesecake.
– Heavy Whipping Cream: This ingredient is crucial for creating the lightness and volume of the cheesecake filling. Whipping the cream until stiff peaks form adds airiness, making the cheesecake bars feel less dense and more indulgent.
– Additional Oreos: For added texture and garnish, crushed or halved Oreos can be mixed into the filling or sprinkled on top. This extra layer of Oreos not only enhances the flavor but also provides an attractive visual element.
– Optional Ingredients: For those looking to elevate their cheesecake bars even further, consider adding a drizzle of chocolate or caramel sauce on top. This simple enhancement can take your dessert from delicious to extraordinary, adding a gourmet touch that will impress any guest.
Step-by-Step Instructions
Now that we have all the ingredients laid out, it’s time to dive into the step-by-step instructions for preparing the Oreo Delight No-Bake Cheesecake Bars.
Step 1: Prepare the Crust
Begin by crushing the Oreo cookies into fine crumbs. You can do this by placing them in a food processor or placing them in a zip-top bag and using a rolling pin to crush them. The goal is to achieve a fine crumb texture that will hold together well when mixed with the butter.
Once you have your Oreo crumbs, transfer them to a mixing bowl and melt the unsalted butter. Pour the melted butter over the Oreo crumbs and mix until all the crumbs are evenly coated. The mixture should resemble wet sand and should hold together when pressed.
Next, take a 9×9 inch baking pan and line it with parchment paper, allowing some overhang for easy removal later. Press the Oreo crumb mixture firmly into the bottom of the pan, ensuring an even layer across the base. Use the back of a measuring cup or your hands to compact the crust tightly. Place the pan in the refrigerator to allow the crust to set while you prepare the cheesecake filling.
In the next part of the article, we will continue with the detailed instructions for creating the creamy filling and finishing off these delectable cheesecake bars. Stay tuned for the delightful process that will transform your simple ingredients into a stunning dessert!

Creating a dessert that is both indulgent and easy to prepare is a dream for many home bakers. The Oreo Delight No-Bake Cheesecake Bars are the perfect solution, combining rich flavors with a simple preparation process that doesn’t require turning on the oven. Let’s dive into the steps to make these delectable bars, along with some helpful tips, serving suggestions, and storage information.
Forming and Chilling the Crust
The crust is the foundation of our Oreo Delight No-Bake Cheesecake Bars, and it sets the tone for the entire dessert. To get started, follow these steps:
1. Crush the Oreos: Begin by placing the Oreo cookies in a food processor and pulse until they reach a fine crumb consistency. If you don’t have a food processor, you can also place the cookies in a zip-top bag and crush them with a rolling pin.
2. Mix with Melted Butter: In a mixing bowl, combine the crushed Oreos with melted butter. The butter acts as a binding agent, ensuring that the crust holds together when cut into bars.
3. Press into a Baking Dish: Line an 8×8-inch baking dish with parchment paper for easy removal. Pour the Oreo mixture into the dish and press it down firmly using the back of a measuring cup or your hands to create an even layer. Make sure it’s compact to prevent crumbling later.
4. Chill the Crust: Once the crust is formed, place it in the refrigerator for at least 30 minutes. This chilling time helps the butter to harden, setting the crust firmly in place.
Making the Cheesecake Filling
While the crust is chilling, you can prepare the creamy cheesecake filling. This step is crucial for achieving that velvety texture that makes these bars so irresistible.
1. Beat the Cream Cheese: In a large mixing bowl, use an electric mixer to beat the softened cream cheese until smooth and creamy. Ensure there are no lumps for a silky filling.
2. Add Sugar and Vanilla: Gradually add powdered sugar and vanilla extract to the cream cheese. Beat until well combined and the mixture is fluffy.
3. Fold in the Cool Whip: Gently fold in the Cool Whip (or whipped topping) into the cream cheese mixture. This step is essential as it lightens the filling, giving it that classic cheesecake texture.
Whipping Cream to the Perfect Consistency
For an extra layer of creaminess, you can whip additional heavy cream to incorporate into the filling:
1. Chill Your Tools: Begin by chilling your mixing bowl and beaters in the refrigerator for about 10 minutes. Cold tools help achieve better volume when whipping cream.
2. Whip the Cream: Pour heavy cream into the chilled bowl and beat on medium-high speed until soft peaks form. Be careful not to over-whip, as this can lead to butter formation.
3. Incorporate Whipped Cream: Gently fold the whipped cream into the cheesecake mixture until fully combined. This technique helps maintain the light and airy texture of the filling.
Combining Ingredients Carefully to Maintain Texture
Combining the ingredients for the cheesecake filling is a delicate process. Here’s how to ensure the best texture:
1. Use a Rubber Spatula: When folding the whipped cream into the cream cheese mixture, use a rubber spatula to gently incorporate the ingredients. This method minimizes deflation, resulting in a more luscious filling.
2. Add Crushed Oreos: For added flavor and texture, fold in some crushed Oreos into the cheesecake filling. This will give your bars that signature Oreo taste throughout.
Assembling and Chilling the Final Product
Now that you have both the crust and filling prepared, it’s time to assemble the Oreo Delight No-Bake Cheesecake Bars:
1. Spread the Filling: Pour the cheesecake filling over the chilled Oreo crust. Use a spatula to spread it evenly across the surface, ensuring all corners are filled.
2. Smooth the Top: Use the back of a spoon or an offset spatula to smooth the top of the filling for a professional finish.
3. Chill Again: Cover the baking dish with plastic wrap and refrigerate for at least 4 hours, or preferably overnight. This chilling time allows the bars to firm up, making them easier to cut.
Tips for Achieving the Best Results
To ensure your Oreo Delight No-Bake Cheesecake Bars turn out perfectly, consider these tips:
– Use Room Temperature Ingredients: Let the cream cheese come to room temperature before mixing to ensure a smooth filling.
– Don’t Skimp on Chilling: Allowing enough time in the refrigerator is crucial for a firm texture.
– Be Gentle When Folding: Use a gentle hand when folding in the whipped cream and crushed Oreos to maintain the airiness of the filling.
Serving Suggestions
The presentation of your Oreo Delight No-Bake Cheesecake Bars can elevate the overall experience. Here are some serving suggestions:
1. Garnishing Options: Top your bars with additional crushed Oreos or a generous drizzle of chocolate sauce. You can also add chocolate shavings or whipped cream dollops for an elegant touch.
2. Complementary Desserts or Beverages: These cheesecake bars pair wonderfully with a scoop of vanilla ice cream or a cup of coffee. Consider serving them alongside fresh berries for a refreshing contrast.
3. Best Occasions to Serve: Oreo Delight No-Bake Cheesecake Bars are perfect for any occasion—be it birthday parties, holiday gatherings, or casual family dinners. Their no-bake nature makes them an excellent choice for warm weather events.
Storage and Shelf Life
Proper storage is key to enjoying your cheesecake bars for days to come:
1. Storing in the Refrigerator: Keep the bars covered in the refrigerator. They can last for up to 5 days, though the texture is best within the first couple of days.
2. Freezing Leftovers: If you have leftovers, you can freeze them! Cut the bars into individual pieces, wrap them tightly in plastic wrap, and place them in an airtight container. They can be frozen for up to 3 months.
3. Thawing: To enjoy frozen cheesecake bars, simply transfer them to the refrigerator and allow them to thaw overnight before serving.
Nutritional Information
Understanding the nutritional content of your dessert can help you enjoy it mindfully. Here’s an overview of what to expect per serving (based on cutting into 12 pieces):
– Calories: Approximately 250-300
– Total Fat: 18g
– Saturated Fat: 10g
– Sugar: 18g
– Protein: 4g
Indulgence vs. Moderation
While these bars are a delightful treat, it’s important to enjoy them in moderation. Consider sharing them at gatherings to spread the joy while keeping indulgence in check.
Ingredient Substitutions
For those with dietary restrictions, there are several substitutions you can consider:
– Gluten-Free Oreos: Use gluten-free Oreo cookies to make this dessert suitable for those following a gluten-free diet.
– Vegan Options: Substitute cream cheese with vegan cream cheese and use coconut whipped cream instead of Cool Whip for a dairy-free version.
Conclusion
The Oreo Delight No-Bake Cheesecake Bars are a simple yet indulgent dessert that offers a delightful balance of flavors and textures. With a rich Oreo crust, creamy cheesecake filling, and the ease of no-bake preparation, they are sure to please anyone who takes a bite.
We encourage you to try making this easy and delicious dessert for your next gathering or family dinner. The joy of sharing homemade treats with loved ones is truly unmatched. Dive into the world of no-bake desserts and enjoy the deliciousness that these bars offer!


