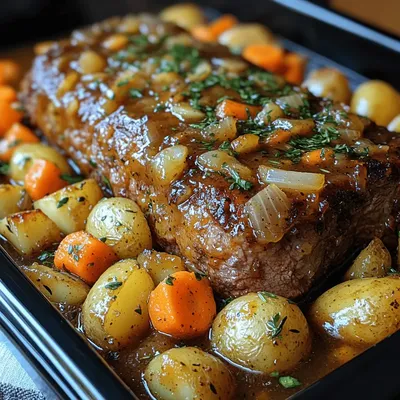
Savory Herb Cheddar Scones: A Culinary Delight
 Save
Save
Imagine the aroma of freshly baked scones drifting through your kitchen, mingling with the earthy scent of herbs and the sharp bite of aged cheddar. That moment is what makes Savory Herb Cheddar Scones a true culinary delight, perfect for any brunch table.
What sets these scones apart is the balance between a tender, flaky crumb and a bold, herb‑infused cheese flavor. The combination of cold butter, sharp cheddar, and a medley of fresh herbs creates a taste that’s both comforting and sophisticated.
These golden pockets of goodness will win over early risers, weekend brunch enthusiasts, and even picky eaters who think “savory” and “scone” don’t belong together. Serve them hot with a dollop of clotted cream, a smear of jam, or a simple drizzle of olive oil.
The process is straightforward: whisk dry ingredients, cut in butter, fold in cheese and herbs, then bind with milk before baking. A quick 18‑minute bake yields perfectly risen scones that are crisp on the outside and melt‑in‑your‑mouth soft inside.
Why You'll Love This Recipe
Flavor‑Packed Simplicity: A handful of pantry staples plus fresh herbs deliver a complex, savory profile without any fancy techniques or hard‑to‑find ingredients.
Quick & Reliable: From mixing bowl to oven in under 40 minutes, these scones are perfect for busy mornings yet never sacrifice texture or taste.
Versatile Presentation: Serve them plain, split and topped with eggs, or paired with a light salad—each option feels elevated yet effortless.
Make‑Ahead Friendly: Bake a batch ahead of time, store, and reheat for a grab‑and‑go breakfast that still tastes bakery‑fresh.
Tips & Tricks
Perfecting the Recipe
Keep butter ice‑cold. Cut it straight from the freezer and work quickly; cold butter creates steam pockets that give the scones their flaky lift.
Don’t over‑mix. Stir just until the dough forms. Over‑mixing develops gluten, resulting in a dense, tough crumb.
Use a sharp cutter. Press straight down without twisting; a clean cut prevents the dough from sealing and losing its rise.
Flavor Enhancements
Add a pinch of smoked paprika for a subtle smoky depth, or stir in a tablespoon of grated Parmesan for extra umami. A light drizzle of truffle oil just before serving turns these scones into a gourmet treat.
Common Mistakes to Avoid
Skipping the chilling step for the butter often yields a greasy crumb rather than flaky layers. Also, avoid using warm milk; it can melt the butter before the oven has a chance to create steam, compromising texture.
Pro Tips
Brush with egg wash. A quick brush of beaten egg before baking gives the tops an irresistible glossy finish.
Use parchment paper. It prevents sticking and ensures even browning on the bottom of each scone.
Cool on a rack. Transferring hot scones directly to a plate traps steam, making the bottoms soggy; a wire rack maintains crispness.
Variations
Ingredient Swaps
Swap sharp cheddar for Gruyère or aged gouda for a nuttier profile. Replace chives with finely diced shallots or spring onions for a sweeter bite. If you love a little heat, fold in a teaspoon of finely chopped jalapeño or a pinch of red‑pepper flakes.
Dietary Adjustments
For a gluten‑free version, use a 1‑to‑1 gluten‑free flour blend and ensure the baking powder is gluten‑free. Replace the butter with a plant‑based solid margarine for dairy‑free needs. Vegan diners can use oat milk and a flax‑egg (1 tbsp ground flax + 3 tbsp water) as the wet binder.
Serving Suggestions
Pair the warm scones with poached eggs and a drizzle of hollandaise for an indulgent brunch. A simple side of mixed greens tossed in a lemon vinaigrette adds freshness. For a sweet contrast, serve with a dollop of honey‑infused ricotta or a spoonful of berry compote.
Storage Info
Leftover Storage
Allow scones to cool completely, then place them in an airtight container or a zip‑top bag. Store in the refrigerator for up to four days. For longer keeping, wrap each scone in parchment, then foil, and freeze for up to three months; this prevents freezer burn and preserves flavor.
Reheating Instructions
Reheat frozen or refrigerated scones in a pre‑heated 350°F (175°C) oven for 8‑10 minutes, covered loosely with foil to avoid over‑browning. For a quicker method, microwave a single scone on medium power for 30‑45 seconds, then finish under a hot broiler for 1 minute to restore crispness.
Frequently Asked Questions
Can I make these scones ahead of time?
What if I don’t have fresh herbs?
How do I know when the scones are done?
Can I add other mix‑ins like bacon or sun‑dried tomatoes?
These Savory Herb Cheddar Scones bring bakery‑level flavor to your own kitchen with just a few simple steps. By mastering the cold‑butter technique and respecting the delicate balance of herbs and cheese, you’ll create a brunch centerpiece that’s both impressive and comforting. Feel free to experiment with the suggested swaps or add your own favorite ingredients—cooking is an adventure, after all. Serve them warm, share them with loved ones, and enjoy every flaky, cheesy bite.
Savory Herb Cheddar Scones: A Culinary Delight
Delicious Savory Herb Cheddar Scones: A Culinary Delight
Ingredients
Dry Ingredients
- 2 cups (250 g) all‑purpose flour
- 2 teaspoons baking powder
- ½ teaspoon kosher salt
Butter & Cheese
- 6 tablespoons (85 g) cold unsalted butter, cubed
- 1 cup (100 g) shredded sharp cheddar cheese
Herbs & Wet Mix
- 2 tablespoons finely chopped fresh chives
- 1 tablespoon chopped fresh thyme leaves
- ¾ cup (180 ml) whole milk, chilled
- 1 large egg, lightly beaten
Instructions
Baking the Scones
- Make the wet slurry. In a small bowl whisk the chilled milk with the beaten egg. The cold liquid helps keep the butter from melting prematurely, preserving the flaky texture.
- Combine wet and dry. Pour the milk‑egg mixture over the crumbly dough. Gently stir with a wooden spoon until the dough just comes together; it should be slightly shaggy and not over‑worked. Over‑mixing develops gluten, which would make the scones tough.
- Shape the dough. Turn the dough onto a lightly floured surface. Pat it into a 1‑inch‑thick circle. Using a sharp 2‑inch round cutter, press straight down without twisting to create clean edges. Gather the scraps, reshape, and cut again until you have eight scones.
- Bake to golden perfection. Transfer the scones to a parchment‑lined baking sheet, spacing them a little apart. Brush the tops with a little extra milk for a glossy finish. Bake in a pre‑heated 425°F (220°C) oven for 15‑18 minutes, or until the tops are deep golden and a toothpick inserted into the center comes out clean. The high heat creates a crisp crust while the interior stays tender.
Similar Recipes
 Breakfast
Eggs Benedict Casserole: A Delicious Twist on a Classic Brunch Favorite
Delicious Eggs Benedict Casserole: A Delicious Twist on a Classic Brunch Favorite
 Breakfast
Indulge in Autumn with Pumpkin Spice Delight Overnight Oats: A Wholesome Breakfast Recipe
Delicious Indulge in Autumn with Pumpkin Spice Delight Overnight Oats: A Wholesome Breakfast Recipe
 Breakfast
Blueberry Bliss Oat Muffins: A Wholesome Delight
Delicious Blueberry Bliss Oat Muffins: A Wholesome Delight
 Breakfast
Spiced Pumpkin Cream Cheese Muffins: A Seasonal Delight
Delicious Spiced Pumpkin Cream Cheese Muffins: A Seasonal Delight
 Breakfast
Delicious Ham & Cheese Breakfast Calzone Recipe
Delicious Delicious Ham & Cheese Breakfast Calzone Recipe
 Breakfast
classic eggnog french toast bake with warm spices for holiday breakfast
Learn how to make delicious classic eggnog french toast bake with warm spices for holiday breakfast.…
 Breakfast
Mini Morning Delights Recipe
Delicious Mini Morning Delights Recipe
 Breakfast
Savory Breakfast Croissant Casserole
Delicious Savory Breakfast Croissant Casserole

Caroline
I cook these recipes at home before they ever land here — simple ingredients, clear steps.