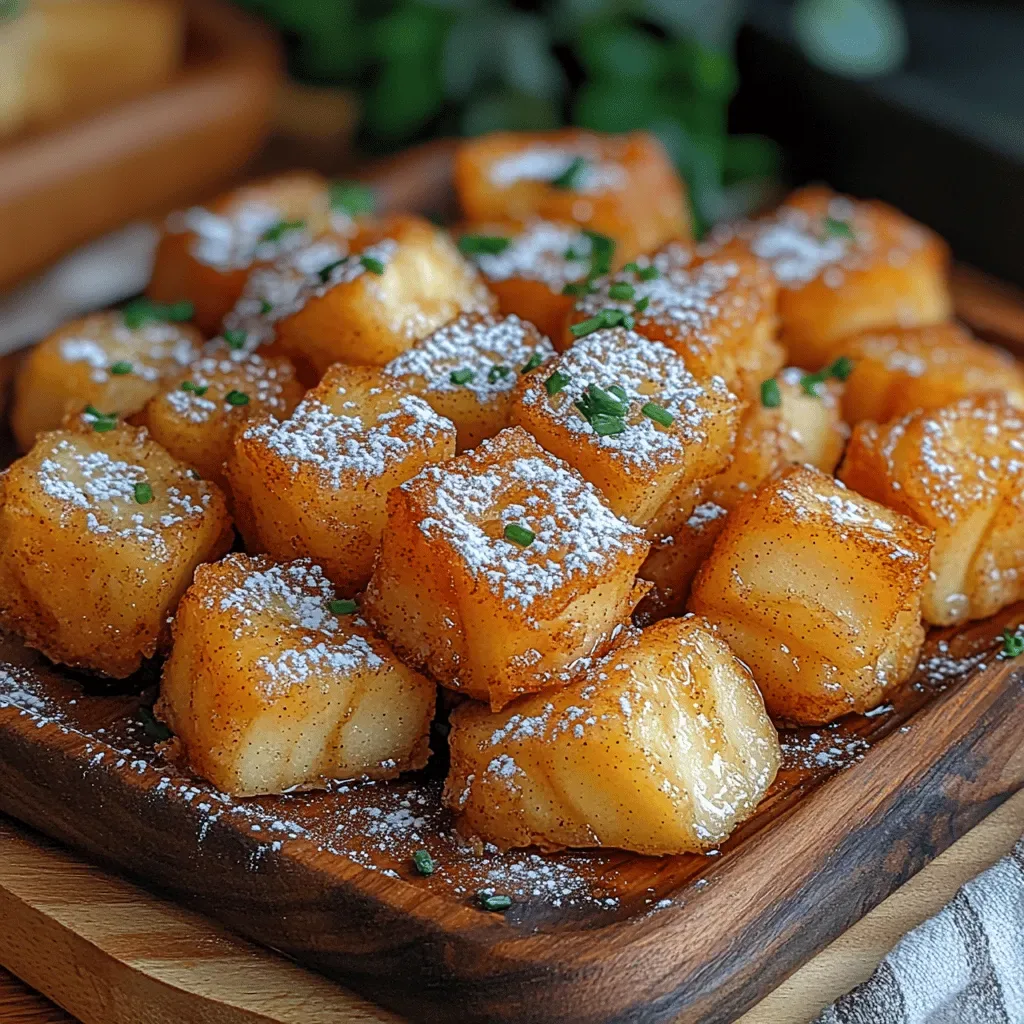
Imagine biting into a warm, golden‑brown pretzel that’s soft on the inside, chewy on the outside, and just salty enough to make you smile. That’s the magic of Soft & Chewy Pretzel Bliss, a homemade treat that turns a simple dough into a brunch‑room star.
What sets this pretzel apart is the classic alkaline boil paired with a buttery brush and a sprinkle of flaky sea salt, giving it that signature chew without the industrial crunch of store‑bought varieties.
Anyone who loves a comforting carb—kids, brunch enthusiasts, or even seasoned bakers looking for a quick project—will adore these pretzels. Serve them fresh from the oven for a weekend brunch, a casual coffee‑shop vibe, or as a festive snack at a gathering.
The process is straightforward: mix a soft dough, let it rest, shape the iconic knots, give them a quick boil in a baking‑soda bath, then bake until they’re perfectly puffed and lightly golden.
Why You'll Love This Recipe
Soft, Chewy Texture: The alkaline boil creates a tender crumb while the bake locks in moisture, delivering that classic pretzel chew every time.
Simple Ingredient List: Only pantry staples are required—flour, yeast, baking soda, and a few seasonings—making it easy to pull together on a busy morning.
Customizable Toppings: From classic sea salt to sweet cinnamon sugar or shredded cheese, you can tailor each pretzel to suit any palate.
Perfect for Brunch Gatherings: These pretzels look impressive on a platter yet are quick enough to make alongside eggs, fruit, or a coffee bar.
Ingredients
The foundation of a great pretzel is a well‑balanced dough that’s slightly sweet, a little salty, and rich enough to stay tender after baking. Yeast gives it lift, while the baking‑soda bath creates that iconic dark crust. Finishing with butter and flaky sea salt adds flavor depth, and optional toppings let you switch from savory to sweet in seconds.
Dough Ingredients
- 3 ½ cups (440 g) all‑purpose flour
- 1 tablespoon granulated sugar
- 2 ¼ teaspoons (1 packet) active dry yeast
- 1 ½ teaspoons kosher salt
- 1 ¼ cups warm water (110°F/43°C)
- 2 tablespoons unsalted butter, melted
Boiling Solution
- 10 cups water
- 2/3 cup baking soda
Toppings & Finishing
- 2 tablespoons melted butter (for brushing)
- Coarse sea salt, to taste
- Optional: ¼ cup grated Parmesan or cinnamon‑sugar mix
Each component plays a role: the flour and yeast create a light, airy interior, while the sugar feeds the yeast for a gentle rise. Salt balances the sweetness and enhances flavor. The warm water activates the yeast, and the melted butter adds richness to the dough. The baking‑soda bath raises the pH, giving the pretzels their characteristic deep‑brown crust and chewy bite. Finally, brushing with butter and sprinkling sea salt locks in flavor and adds that irresistible sparkle on top.
Step-by-Step Instructions
Preparing the Dough
In a large mixing bowl, whisk together the flour, sugar, yeast, and kosher salt. Warm the water to 110°F, then stir in the melted butter. Pour the liquid into the dry ingredients and mix until a shaggy dough forms. Turn the dough onto a lightly floured surface and knead for 8‑10 minutes, or until smooth and elastic. The kneading develops gluten, which is essential for that signature chew.
First Rise & Shaping
Place the dough in a lightly oiled bowl, cover with a clean kitchen towel, and let it rise in a warm spot for 45‑60 minutes, or until doubled in size. After rising, punch down gently, divide the dough into 12 equal pieces, and roll each piece into a 12‑inch rope. Form each rope into a pretzel shape by creating a U, crossing the ends, and pressing them onto the bottom of the U.
Alkaline Boil
- Heat the water. Bring the 10 cups of water to a gentle boil in a large pot. Once boiling, carefully stir in the baking soda—watch for a vigorous fizz, which is normal and creates the alkaline environment.
- Brief dip. Using a slotted spoon, lower each pretzel into the boiling solution for exactly 30 seconds. This short boil gelatinizes the surface starches, forming the glossy crust that turns deep brown in the oven.
- Drain and arrange. Remove pretzels with the slotted spoon, let excess liquid drip off, and place them on a parchment‑lined baking sheet, leaving a little space between each.
Baking & Finishing
Preheat the oven to 425°F (220°C). Brush each pretzel generously with melted butter, then sprinkle coarse sea salt (or your chosen topping) over the surface. Bake for 12‑15 minutes, or until the pretzels are a deep golden‑brown and sound hollow when tapped on the bottom. The butter adds flavor and helps the salt adhere, while the high heat finishes the chewy interior.
Serving
Transfer the baked pretzels to a wire rack and let them rest for 3‑5 minutes. Serve warm with mustard, cheese dip, or a sweet jam. The brief resting period allows the interior to set while keeping the exterior delightfully soft.
Tips & Tricks
Perfecting the Recipe
Temperature of Water: Keep the water for the dough between 105‑110°F; hotter water can kill the yeast, while cooler water slows the rise.
Don’t Over‑Boil: Exactly 30 seconds in the soda bath gives the pretzel its crust without making it soggy.
Rest Before Baking: Let pretzels sit for a few minutes after the boil; this helps the surface dry slightly, improving browning.
Use a Baking Stone: If you have one, preheat it with the oven; it provides even heat and a crisper bottom.
Flavor Enhancements
Add a teaspoon of malt syrup to the dough for a subtle caramel note, or brush the pretzels with garlic‑infused butter before serving for a savory twist. A light drizzle of honey after baking pairs beautifully with a pinch of sea salt for a sweet‑salty combo.
Common Mistakes to Avoid
Skipping the resting period after the boil can cause the pretzels to crack during baking. Also, avoid using too much baking soda in the boil; excess alkalinity can give a bitter aftertaste. Finally, don’t rush the rise—under‑proofed dough won’t develop the desired chew.
Pro Tips
Scale Up Gracefully: Double the recipe for larger gatherings, but keep the rise times the same; larger batches don’t need longer proofing.
Freeze Unbaked: Shape pretzels, freeze on a tray, then transfer to a zip‑lock bag. Bake from frozen, adding a couple of minutes to the bake time.
Season the Butter: Mix a pinch of garlic powder or smoked paprika into the butter before brushing for an extra flavor layer.
Use a Kitchen Scale: Weighing flour and water yields consistent results, especially important for the dough’s hydration level.
Variations
Ingredient Swaps
Swap all‑purpose flour for bread flour to boost gluten development for an even chewier bite. Replace butter with olive oil for a lighter crust, or use whole‑grain flour for a nuttier flavor. For a sweet version, incorporate 2 tablespoons of brown sugar into the dough and finish with cinnamon‑sugar topping.
Dietary Adjustments
Use a gluten‑free flour blend (ensure it contains xanthan gum) and a gluten‑free baking soda. For vegan pretzels, replace butter with plant‑based margarine and use a dairy‑free sweetener. Keto lovers can substitute almond flour for half the flour and use erythritol instead of sugar, keeping the dough’s hydration balanced.
Serving Suggestions
Serve the pretzels alongside a creamy cheese dip, honey‑mustard sauce, or a simple herb‑infused olive oil. Pair with fresh fruit salad for a balanced brunch, or stack them on a charcuterie board with cured meats and pickles for a savory spread.
Storage Info
Leftover Storage
Allow pretzels to cool completely, then place them in an airtight container or zip‑lock bag. Store in the refrigerator for up to 3 days. For longer keeping, freeze in a single layer on a tray, then transfer to a freezer‑safe bag; they’ll keep for up to 2 months.
Reheating Instructions
Reheat refrigerated pretzels in a 350°F (175°C) oven for 8‑10 minutes, or until warmed through and the crust re‑crispes. For frozen pretzels, bake at the same temperature for 12‑15 minutes. A quick microwave burst (20‑30 seconds) works in a pinch, but the oven method preserves the chewy texture best.
Frequently Asked Questions
This Soft & Chewy Pretzel Bliss recipe gives you all the classic flavor of a bakery‑fresh pretzel with the convenience of a home kitchen. By following the step‑by‑step guide, using the tips for perfect texture, and experimenting with the suggested variations, you’ll create a versatile brunch staple that everyone will love. Feel free to make it your own—add toppings, switch flours, or pair with your favorite dip. Enjoy the warm, salty goodness straight from the oven!