Butterfinger Balls: An Irresistible Treat for All Occasions
 Save
Save
Imagine the iconic crunch of a Butterfinger candy bar rolled into bite‑size, melt‑in‑your‑mouth spheres that sparkle with a glossy chocolate coating. Those Butterfinger Balls are the perfect blend of sweet, salty, and buttery, delivering a nostalgic treat that feels special enough for brunch yet simple enough for a weekday breakfast.
What sets this recipe apart is the use of real Butterfinger bars, fresh cream cheese, and a quick‑cook chocolate drizzle that hardens into a satisfying snap. The combination creates a creamy interior wrapped in a crisp, caramel‑infused shell—nothing artificial, just pure indulgence.
Family members of all ages will adore these playful morsels, whether they’re served alongside fresh fruit at a weekend brunch or as a sweet pick‑me‑up during a busy morning. They also shine at holiday gatherings, birthday parties, or any occasion that calls for a crowd‑pleasing dessert.
The process is straightforward: melt the candy, blend it with softened cream cheese, roll into balls, coat in chocolate, and chill until set. In under an hour you’ll have a tray of glossy, irresistible treats ready to wow your guests.
Why You'll Love This Recipe
Irresistible Texture: A creamy center meets a crisp, chocolate‑glazed exterior, delivering a satisfying contrast in every bite that keeps you reaching for more.
Simple Ingredients: Only pantry staples and a few specialty items are needed, making the recipe accessible without a long shopping list.
Quick Assembly: From melting the candy to chilling the finished balls, the entire process fits comfortably into a single morning or brunch prep.
Versatile Presentation: Serve them on a platter, in a muffin tin, or as a garnish for pancakes—their eye‑catching shine elevates any breakfast spread.
Tips & Tricks
Perfecting the Recipe
Room‑temperature cheese. Soften the cream cheese for at least 15 minutes before mixing; this prevents lumps and ensures a silky dough.
Don’t over‑heat the candy. Melt just until smooth; excessive heat can cause the butterfinger to become grainy and lose its signature crunch.
Uniform ball size. Use a small ice‑cream scoop (1‑inch) for consistent portions, which helps the chocolate set evenly.
Flavor Enhancements
Add a pinch of espresso powder to the chocolate glaze for subtle depth, or stir in a teaspoon of caramel sauce for extra buttery richness. A light drizzle of sea‑salt caramel over the finished balls creates a delightful sweet‑salty contrast.
Common Mistakes to Avoid
Skipping the cooling step before coating leads to chocolate sliding off the balls. Also, avoid using chocolate that contains too much milk solid; it won’t harden properly and will stay soft.
Pro Tips
Use a silicone mat. It provides a non‑stick surface, making it easier to lift the balls after coating.
Temper the chocolate. If you have a candy thermometer, heat the chocolate to 115°F, cool to 80°F, then re‑heat to 88°F for a glossy, snap‑ready finish.
Freeze for a firmer bite. After the glaze sets, place the tray in the freezer for 5 minutes; the interior becomes extra firm without losing flavor.
Variations
Ingredient Swaps
Swap the classic Butterfinger bars for Peanut Butter Cups for a nutty twist, or use white chocolate chips in the coating for a softer, ivory finish. You can also replace cream cheese with mascarpone for a richer, slightly tangier interior.
Dietary Adjustments
For a gluten‑free version, ensure the candy bars are certified gluten‑free (most are). To make it dairy‑free, use a plant‑based cream cheese and dairy‑free chocolate chips. For a lower‑sugar option, substitute the powdered sugar with a sugar‑free confectioner’s blend.
Serving Suggestions
Arrange the balls on a decorative platter alongside fresh berries and a dollop of whipped cream for a brunch buffet. Pair them with a hot latte or a chilled mimosa for a balanced sweet‑savory experience. They also work beautifully as a topping for vanilla yogurt parfaits.
Storage Info
Leftover Storage
Transfer any leftovers to an airtight container and store them in the refrigerator. They keep well for up to 4 days, maintaining both texture and flavor. For longer storage, arrange the balls on a tray, freeze solid, then move them to a zip‑top bag; they’ll stay fresh for up to 2 months.
Reheating Instructions
To enjoy a warm interior, microwave a single ball on medium power for 5‑7 seconds. The chocolate will soften slightly, revealing a gooey center while the outer shell stays crisp. For a more even warm‑up, place the balls on a baking sheet and bake at 300°F for 8‑10 minutes.
Frequently Asked Questions
Can I make this recipe ahead of time?
Can I use frozen Butterfinger bars?
What are the best sides to serve with Butterfinger Balls?
Butterfinger Balls bring together nostalgic candy, silky cheese, and a glossy chocolate shell in a single bite that feels both indulgent and effortless. By following the step‑by‑step guide, using the tips provided, and experimenting with the suggested variations, you’ll create a treat that dazzles at any breakfast or brunch table. Let your creativity shine—add your favorite toppings, swap flavors, and enjoy the sweet success of this irresistible treat.
Butterfinger Balls: An Irresistible Treat for All Occasions
Delicious Butterfinger Balls: An Irresistible Treat for All Occasions
Ingredients
Main Ingredients
- 12 Butterfinger candy bars (about 6 oz total), chopped
- 8 oz cream cheese, softened
- 2 tablespoons powdered sugar
Chocolate Coating
- 10 ounces semi‑sweet chocolate chips
- 1 teaspoon vegetable oil (helps the glaze shine)
Seasonings & Optional Toppings
- 1 teaspoon vanilla extract
- ¼ teaspoon sea salt (enhances caramel notes)
- Optional: colorful sprinkles or crushed pretzels for garnish
Instructions
Coating the Balls in Chocolate
- Chill the Balls. Transfer the tray to the refrigerator and let the chocolate set for 15‑20 minutes. You’ll know they’re ready when the glaze feels firm to the touch and no longer smears when gently pressed.
- Optional Garnish. Before the chocolate fully hardens, sprinkle colorful sprinkles or crushed pretzels over each ball for a decorative finish. This adds a subtle crunch and visual pop that makes the treat feel festive.
- Serve or Store. Once set, arrange the Butterfinger Balls on a serving platter. They can be enjoyed immediately or kept chilled until needed. For a warm twist, briefly microwave a single ball for 5‑7 seconds to soften the interior.
- Clean Up. Any leftover chocolate can be reheated and used as a drizzle for pancakes or waffles. Store the remaining mixture in an airtight container in the fridge for up to 3 days; the texture remains creamy and easy to re‑shape.
Similar Recipes
 Desserts
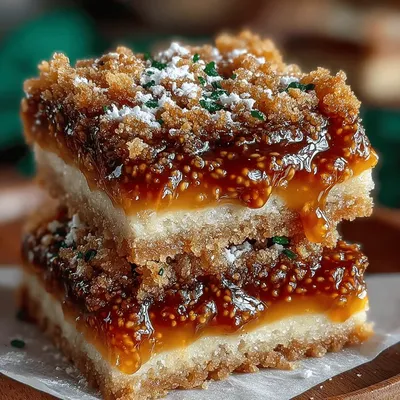
Gooey Fig Jam Bars: A Deliciously Sweet Delight
Delicious Gooey Fig Jam Bars: A Deliciously Sweet Delight
 Desserts
Oreo Shamrock McFlurry – Copycat Recipe: A Festive Delight for Every Occasion
Delicious Oreo Shamrock McFlurry – Copycat Recipe: A Festive Delight for Every Occasion
 Desserts
Berry Bliss Frozen Raspberry Yogurt Bites
Delicious Berry Bliss Frozen Raspberry Yogurt Bites
 Desserts
Colorful Heart Cake: 7 Steps to Create Joyful Delight
Learn how to make delicious Colorful Heart Cake: 7 Steps to Create Joyful Delight. Easy recipe…
 Desserts
Silky Matcha White Chocolate Fudge: A Delightful Treat
Delicious Silky Matcha White Chocolate Fudge: A Delightful Treat
 Desserts
Delightful Quick Italian Cream Cake: A Slice of Heaven
Delicious Delightful Quick Italian Cream Cake: A Slice of Heaven
 Desserts
No Bake Lemon Cheesecake with Fresh Berries and Glaze
Learn how to make delicious No Bake Lemon Cheesecake with Fresh Berries and Glaze. Easy recipe…
 Desserts
Fudgy Brownies Using Cocoa Powder from Your Pantry
Learn how to make delicious Fudgy Brownies Using Cocoa Powder from Your Pantry. Easy recipe with…

Caroline
I cook these recipes at home before they ever land here — simple ingredients, clear steps.