Crunchy Roasted Garlic Chickpeas: A Flavorful and Healthy Snack
 Save
Save
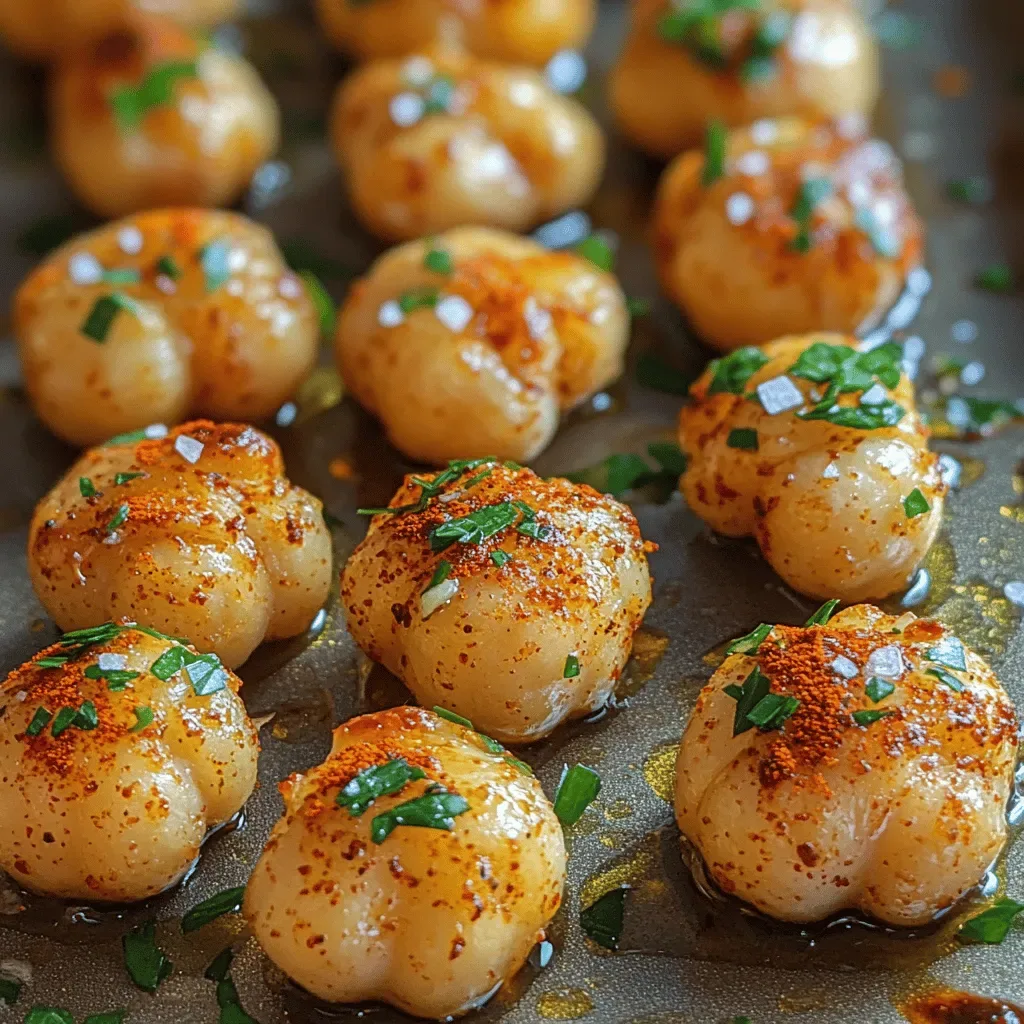
Imagine a snack that crackles with every bite, delivers a deep garlicky aroma, and still feels light enough for a morning pick‑me‑up. Crunchy Roasted Garlic Chickpeas hit that sweet spot, turning a humble pantry staple into a show‑stopping treat.
What makes this snack truly special is the balance of textures: a golden, crisp exterior paired with a tender, creamy interior, all coated in a smoky‑garlic spice blend that awakens the palate.
Busy professionals, health‑conscious parents, and brunch‑loving friends will all adore this dish. Serve it at a weekend brunch spread, as a midday snack, or even as a protein‑rich topping for salads and grain bowls.
The process is straightforward—soak, toss, roast, and finish with a bright splash of lemon. In under forty minutes you’ll have a snack that’s both satisfying and nutritionally smart.
Why You'll Love This Recipe
Bold Garlic Flavor: Roasting intensifies the garlic, giving each chickpea a fragrant, savory punch that’s far more complex than raw or sautéed garlic.
Ultimate Crunch: The high‑heat oven blast creates a crisp shell, delivering that addictive crunch without the need for deep‑frying.
Protein‑Packed Snack: One cup of chickpeas supplies over 15 g of plant‑based protein, making it perfect for energy‑boosting brunches.
Simple & Affordable: All ingredients are pantry staples, so you can whip up this snack without a special trip to the store.
Tips & Tricks
Perfecting the Recipe
Dry Thoroughly. Any residual water on the chickpeas will steam them, preventing the desired crunch.
Single‑Layer Baking. Overcrowding the pan creates hot spots and uneven browning; use two sheets if necessary.
Stir Mid‑Roast. Turning the chickpeas halfway ensures all sides become evenly golden.
Cool on a Rack. Transfer to a wire rack after roasting to keep steam away and preserve crispness.
Flavor Enhancements
Add a pinch of nutritional yeast for a cheesy note, or drizzle a teaspoon of tahini after roasting for added richness. A dash of smoked sea salt can amplify the smoky profile without extra sodium.
Common Mistakes to Avoid
Skipping the drying step leaves moisture that sabotages crispness. Also, avoid using too much oil; a thin coating is enough to help spices adhere and promote browning.
Pro Tips
Use Fresh Garlic. Freshly minced garlic releases more aromatics than pre‑minced jars, giving a brighter flavor.
Season While Hot. Toss the lemon juice and parsley immediately after roasting while the chickpeas are still hot; the heat helps the flavors meld.
Batch Roast. Double the recipe on two sheets and freeze the extra portions; they re‑crisp perfectly in a 350°F oven for 5‑7 minutes.
Season to Taste. Taste a single chickpea after roasting and adjust salt or lemon before serving for a perfectly balanced snack.
Variations
Ingredient Swaps
Swap canned chickpeas for cooked dry chickpeas for a firmer texture. Replace smoked paprika with chipotle powder for a smoky‑spicy twist, or use curry powder for an Indian‑inspired flavor profile. Fresh herbs like cilantro or dill work just as well as parsley.
Dietary Adjustments
The recipe is naturally vegan, gluten‑free, and low‑sugar. For a lower‑fat version, halve the olive oil and add a splash of vegetable broth to keep the coating moist. If you’re on a low‑sodium diet, reduce the added salt and rely on the natural flavor of the garlic and spices.
Serving Suggestions
Serve the crunchy chickpeas alongside a Greek yogurt dip, atop avocado toast, or mixed into a quinoa salad for extra protein. They also make a satisfying topping for soups, adding texture and a burst of flavor.
Storage Info
Leftover Storage
Allow the chickpeas to cool completely, then transfer them to an airtight container. Store in the refrigerator for up to 4 days. For longer preservation, portion into freezer‑safe bags, squeeze out excess air, and freeze for up to 3 months.
Reheating Instructions
Reheat in a preheated 350°F oven for 8‑10 minutes, spreading them on a sheet to regain crispness. If you’re short on time, a quick 2‑minute blast in a microwave‑safe dish (covered) works, but the texture will be softer.
Frequently Asked Questions
Can I make this snack ahead of time?
How do I keep the chickpeas from getting soggy?
What’s the best way to serve these at a brunch gathering?
Can I use other legumes instead of chickpeas?
This crunchy, garlicky chickpea snack delivers bold flavor, satisfying texture, and a nutritious boost—all in under half an hour. The step‑by‑step guide, storage tips, and creative variations give you everything you need to make it a staple in your brunch repertoire. Feel free to tweak spices, add heat, or pair it with your favorite dips—cooking is your canvas. Enjoy the crisp bite and the compliments that follow!
Crunchy Roasted Garlic Chickpeas: A Flavorful and Healthy Snack
Delicious Crunchy Roasted Garlic Chickpeas: A Flavorful and Healthy Snack
Ingredients
Main Ingredients
- 2 (15‑oz) cans chickpeas, drained and rinsed
- 2 tablespoons extra‑virgin olive oil
Spice Blend
- 4 cloves garlic, minced
- 1 teaspoon smoked paprika
- ½ teaspoon ground cumin
- ¼ teaspoon sea salt (or to taste)
- ¼ teaspoon freshly cracked black pepper
Finishing Touches
- 1 tablespoon freshly squeezed lemon juice
- 2 tablespoons chopped fresh parsley
- Optional: ¼ teaspoon red‑pepper flakes for heat
Instructions
Roasting
- Preheat the oven. Set your oven to 425°F (220°C) and let it fully heat for at least 10 minutes. A hot oven creates the initial burst of steam that later evaporates, leaving the chickpeas crisp.
- Arrange & Roast. Transfer the seasoned chickpeas back onto the baking sheet, spreading them evenly. Roast for 20‑25 minutes, stirring halfway through to promote uniform browning. Look for a deep golden‑brown color and a crunchy snap when you bite.
- Check for Doneness. When the chickpeas are crisp on the outside yet still slightly tender inside, they’re ready. If you prefer extra crunch, add an additional 3‑5 minutes, watching closely to avoid burning.
Similar Recipes
 Appetizers
Crispy Golden Homemade Tater Tots: A Culinary Delight
Delicious Crispy Golden Homemade Tater Tots: A Culinary Delight
 Appetizers
Cheesy Fall Chili Mac Cups: The Perfect Comfort Food for Autumn
Delicious Cheesy Fall Chili Mac Cups: The Perfect Comfort Food for Autumn
 Appetizers
Tropical Fiesta Mango Black Bean Salsa: A Fresh and Vibrant Delight
Delicious Tropical Fiesta Mango Black Bean Salsa: A Fresh and Vibrant Delight
 Appetizers
Cozy Comfort Potato Bacon Bliss: A Creamy Soup Recipe
Delicious Cozy Comfort Potato Bacon Bliss: A Creamy Soup Recipe
 Appetizers
Crispy Air Fryer Mozzarella Sticks: A Delectable Snack for Any Occasion
Delicious Crispy Air Fryer Mozzarella Sticks: A Delectable Snack for Any Occasion
 Appetizers
High-Protein Pasta Salad: 22g Protein in 25 Minutes
Learn how to make delicious High-Protein Pasta Salad: 22g Protein in 25 Minutes. Easy recipe with…
 Appetizers
Crunchy Chicken Bliss
Delicious Crunchy Chicken Bliss
 Appetizers
Roasted Carrot and Quinoa Salad Recipe
Delicious Roasted Carrot and Quinoa Salad Recipe

Caroline
I cook these recipes at home before they ever land here — simple ingredients, clear steps.